


This post may contain affiliate links. If you buy through them, we may earn a small commission at no extra cost to you.
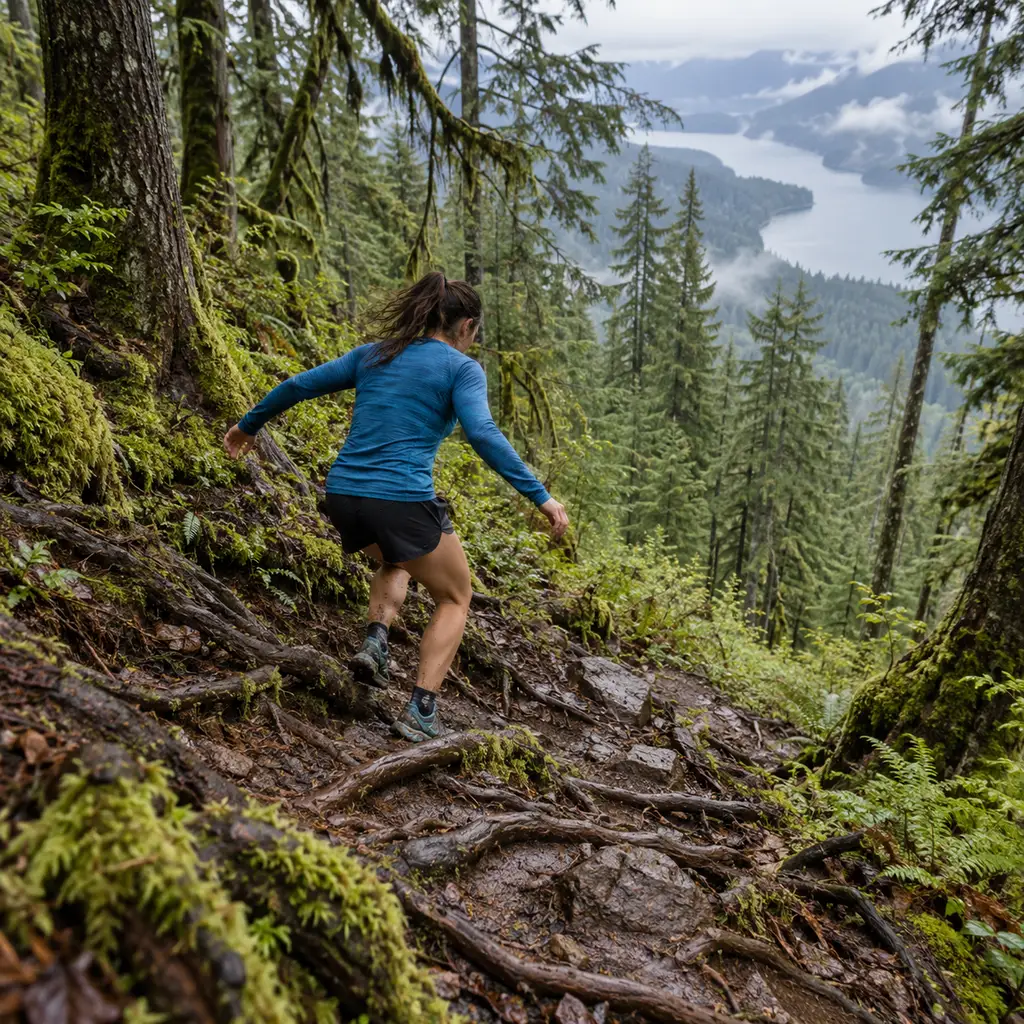
Learning how to run downhill is the fastest way to get quicker on trails without getting any fitter. Most runners lose more time on the descents than on the climbs, and they lose it by braking: heels out in front, torso leaning back, quads fighting gravity on every step. Good trail running descents look almost lazy by comparison, with short quick steps, a relaxed upper body and feet landing under the hips.
This guide covers the technique, the terrain adjustments and the training that make descents faster and a lot kinder to your legs. If you are brand new to dirt, start with our trail running for beginners guide and come back once you have a few runs in.

Table of Contents
Why Downhill Running Feels So Hard
Your Quads Work as Brakes
On a climb your muscles shorten as they push. On a descent they lengthen while they resist, which is called an eccentric contraction. It produces more force with less effort, and it also causes far more muscle damage. That is why a hilly race can leave your quadriceps wrecked for three days even when your lungs felt fine the whole way.
Gravity Multiplies Every Mistake
A clumsy step on the flat costs you a stumble. The same step on a steep descent carries your full body weight plus momentum, so a sloppy landing turns into a rolled ankle or a slide. The steeper the grade, the less room there is for poor form.
Fatigue Shows Up Later
The soreness from downhill running usually peaks one to two days after the run, a pattern known as delayed onset muscle soreness. The good news is that the muscle adapts quickly. A few weeks of regular descending cuts that soreness dramatically, which is the whole case for training downhills on purpose.
How to Run Downhill: 9 Techniques That Work
These nine techniques build on each other. Work on one or two per run rather than all nine at once, and practice them on a moderate grade before taking them onto anything steep or technical.
1. Lean From the Ankles, Not the Waist
The instinct on a steep slope is to sit back. Resist it. Leaning back puts your center of mass behind your feet, so every landing becomes a brake. Instead, keep your body roughly perpendicular to the slope with a slight forward lean from the ankles. It feels fast and a bit scary at first, and it is the single biggest change most runners can make.
2. Shorten Your Stride and Quicken Your Cadence
Long strides mean long airtime and hard landings. Short, quick steps keep your feet close to the ground, so you can adjust in an instant if a rock rolls or a root appears. Think of your feet as ticking over rather than reaching. On a steep descent your cadence should feel noticeably faster than on the flat.
3. Land Under Your Hips
Aim to land with your foot beneath your body, not out in front of it. A midfoot or forefoot landing with a slightly bent knee absorbs impact through the whole leg. A straight leg and a heel strike out in front sends that impact straight into your knees and lower back.
4. Look Three to Five Steps Ahead
Your feet follow your eyes. Staring at the ground directly in front of you leaves no time to react, while looking too far ahead means missing the rock under your next step. Scan three to five steps ahead and trust your proprioception, your body sense of where your feet are, to handle the ground you have already read.
5. Use Your Arms for Balance
On the flat your arms swing close to your body. On a descent, let them come out wider, a little like a tightrope walker. Wide arms make small balance corrections easy and help you stay upright when a foot slips. On very steep ground, runners who look like they are flailing are often simply balancing well.
6. Stay Relaxed and Soft in the Knees
Tension is the enemy of good descending. Tight shoulders, clenched fists and locked knees all make you stiffer and slower to react. Drop your shoulders, loosen your hands and keep a small bend in the knees so your legs work as suspension. A relaxed runner can absorb a bad step that would send a tense one sprawling.
7. Pick a Line Before You Need It
Read the trail like a skier reads a slope. Look for the smoothest path through rocks and roots, and choose it early. Flat tops of rocks, bare packed dirt and the inside of worn ruts are usually the best footholds. Wet rock, loose gravel over hardpack and leaf-covered holes are the worst.
8. Control Speed on Switchbacks
A switchback is where most descending falls happen, because runners carry too much speed into the turn. Scrub speed on the straight before the corner with a few extra short steps, then take the turn on the inside line with quick feet. Never cut the corner: it damages the trail and the loose soil on shortcuts is exactly where feet slide out. Our trail etiquette guide covers why that matters.
9. Walk the Sections You Cannot Run Well
There is no prize for running every step. On a very steep, loose or icy section, a fast hike with good footing is often just as quick and far safer than a run that turns into a slide. Experienced ultrarunners walk descents all the time. Save your legs for the runnable ground below.
Downhill Running Guide by Grade
Grade changes everything about how to run downhill. Use this as a rough guide to what each kind of slope asks of you.
| Grade | What It Feels Like | Technique Focus |
|---|---|---|
| Under 5% | Barely noticeable, free speed | Let it roll, normal stride, relaxed arms |
| 5% to 10% | Comfortably fast | Slight forward lean, quicker cadence |
| 10% to 20% | Steep, quads start working hard | Short steps, land under hips, arms wider |
| 20% to 30% | Very steep, braking is tempting | Tiny quick steps, eyes ahead, zigzag if wide |
| Over 30% | Scrambling territory | Hike it, use poles or hands, three points of contact |
Grade on a trail app is usually averaged over a long stretch, so short pitches can be far steeper than the number suggests. The same planning habits from our guide to reading trail apps and weather apply: check the profile before you go, and expect the steep bits to be steeper than they look.
Adjusting Your Downhill Technique for Terrain
The core technique never changes, but the surface decides how aggressively you can apply it. Knowing how to run downhill on one kind of ground does not automatically transfer to another, so adjust like this.
Loose Gravel and Scree
On loose ground, commit to quick, light steps and do not try to stop suddenly. Your feet will slide a little, so let them, and keep your weight centered over them. On true scree, many runners use a controlled shuffle or even a skiing motion, letting the stones move under them while they stay balanced.
Roots and Rocks
Step on the tops of rocks rather than the edges, and step over roots rather than on them, especially when wet. Roots running across the trail at an angle are the most dangerous, because a foot landing on one slides sideways. Lift your knees slightly higher than normal on rooty ground.
Mud and Wet Leaves
Fall descents bring wet leaves that hide rocks and holes. Slow down, shorten your stride even more and keep your feet flatter to maximize grip. Our fall trail running guide has more on handling mud, leaves and low light. Once ice arrives, the rules change again, and our guide to hiking in snow and ice covers traction devices that work for runners too.
Smooth Fire Roads
Wide, smooth descents are where you can actually open up. Keep the cadence high, lean a little further forward and let gravity do the work. This is the best place to practice good form at speed before taking it onto technical singletrack.
How to Train Your Legs for Descents
Technique only gets you so far if your legs give out halfway down. The runners who know how to run downhill fast for an entire race have almost always trained for it specifically.
Eccentric Strength Work
Slow lowering exercises build the exact strength descents demand. Step-downs off a box, slow single-leg squats and lunges with a three-second lowering phase all load the quads eccentrically. Two short sessions a week make a noticeable difference within a month.
Downhill Repeats
Find a runnable hill of five to eight percent and run down it at a controlled, quick pace, then walk or jog back up. Start with four to six repeats of one to two minutes and build from there. Treat them as a hard workout, because your legs will. Runners training for mountain races can pair these with the climbing tips in our guide to training for elevation for sea level runners.
Balance and Ankle Work
Single-leg balance drills, calf raises and short plyometric hops strengthen the ankles and sharpen the reflexes that save you from a sprained ankle. Do them barefoot on a folded towel to make them harder. Five minutes after a run is enough.

Gear That Helps on the Way Down
Shoes With Real Lugs
Grip is everything on a descent. Deep, widely spaced lugs bite into soft ground and shed mud, while a sticky rubber compound matters more on rock. A secure midfoot and heel hold stops your foot sliding forward inside the shoe and bruising your toes. Our picks for the best trail running shoes are all chosen with descending in mind.
Poles for Long, Steep Descents
On long mountain descents, poles take load off the quads and knees and give you two extra points of balance. Folding models like the Black Diamond Distance Carbon Z or the budget AONIJIE trail running poles stow on a vest when you do not need them, and race-focused options like the LEKI Ultratrail FX.One are built for exactly this. See our full guide to the best trail running poles, and our tips on how to use trekking poles for technique.
A Vest That Does Not Bounce
A bouncing pack throws off your balance exactly when you need it most. A snug running vest keeps weight high and close to your body. Our round-up of the best trail running vests has options for short runs and full mountain days, and our hydration guide will help you decide how much water to carry.
Common Downhill Running Mistakes
- Leaning back and braking on every step, which hammers the quads and knees.
- Overstriding with the heel landing out in front of the body.
- Staring at your feet instead of scanning a few steps ahead.
- Carrying too much speed into switchbacks and turns.
- Running stiff, with tight shoulders and locked knees.
- Racing a technical descent you have never practiced on.
- Skipping strength work, then wondering why the next two days hurt.
Most of these come from nerves rather than a lack of fitness. The fix is time on moderate descents until good form feels normal, then gradually steeper ground. The layering rules in our guide on how to layer for hiking help too, because a runner who is cold at the top of a long descent will tense up the whole way down.
Frequently Asked Questions
Is it better to run or walk downhill?
Run the descents you can control and walk the ones you cannot. On moderate grades, running with good form is faster and not much harder on the body. On very steep, loose or wet ground, a quick hike is often just as fast and much safer.