Master your water management with our bikepacking hydration guide. Learn how to carry, store, and filter water safely in the wilder
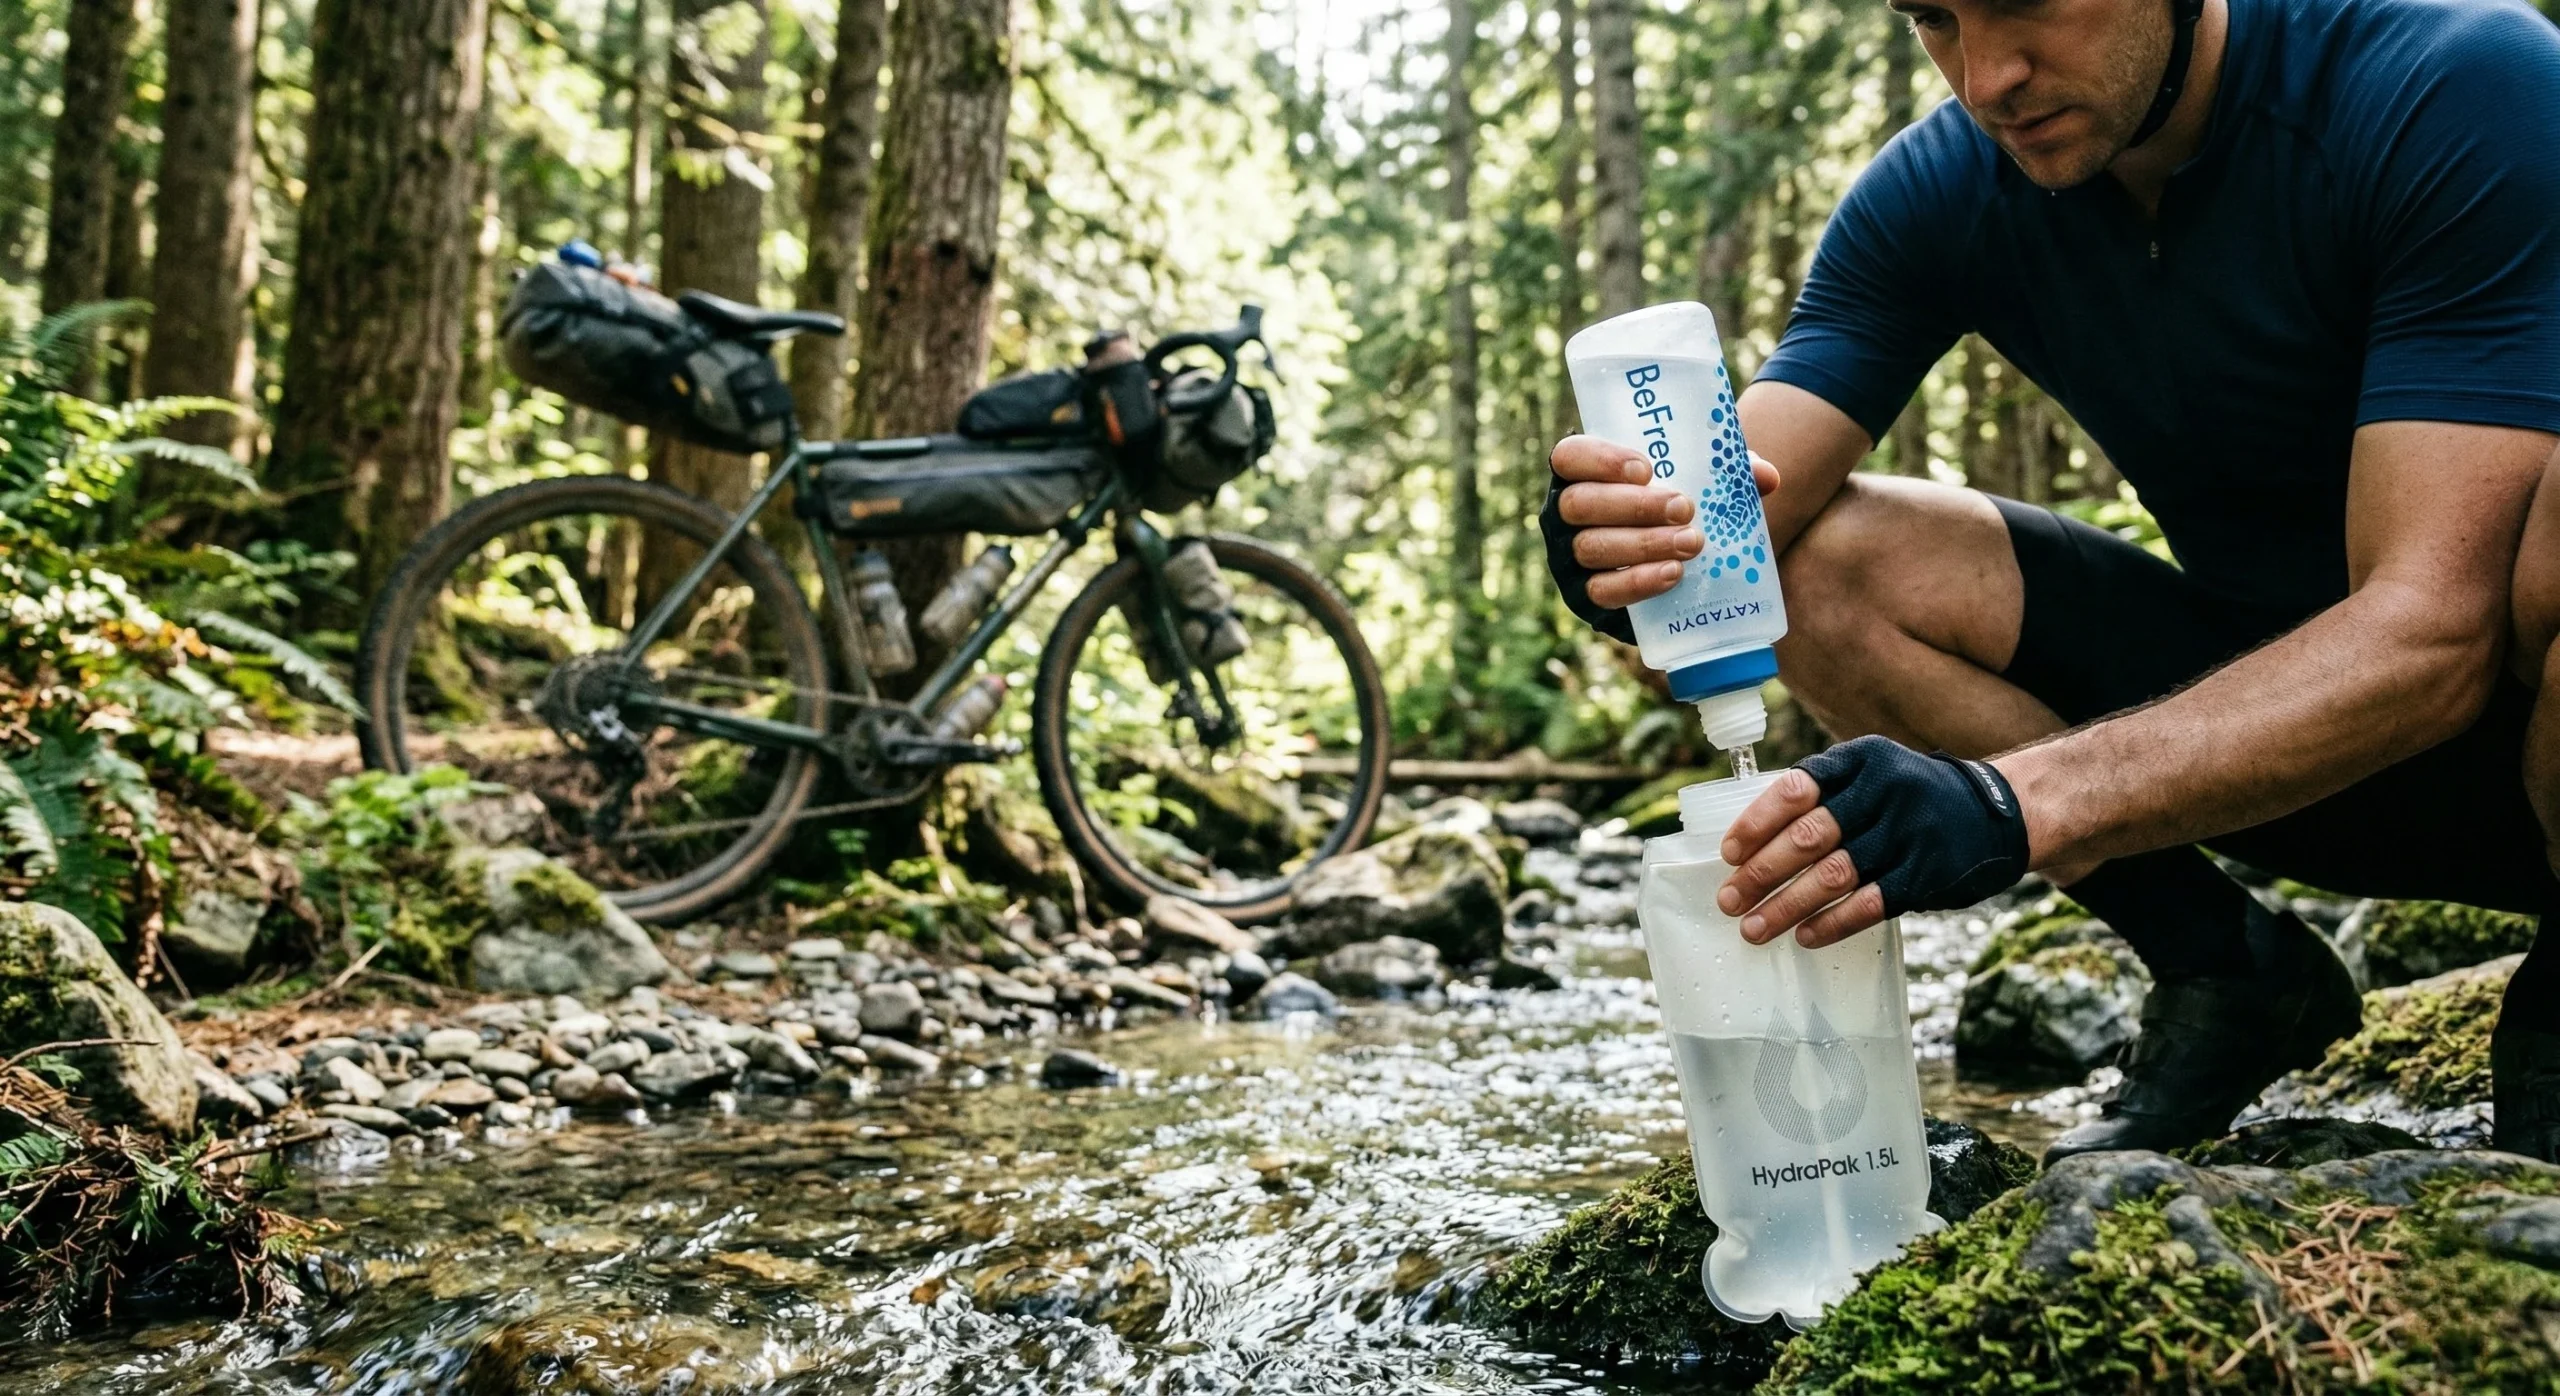
Table of Contents
Introduction: The Critical Importance of Fluid Management
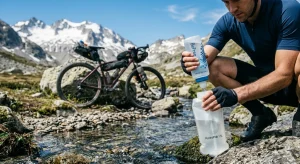
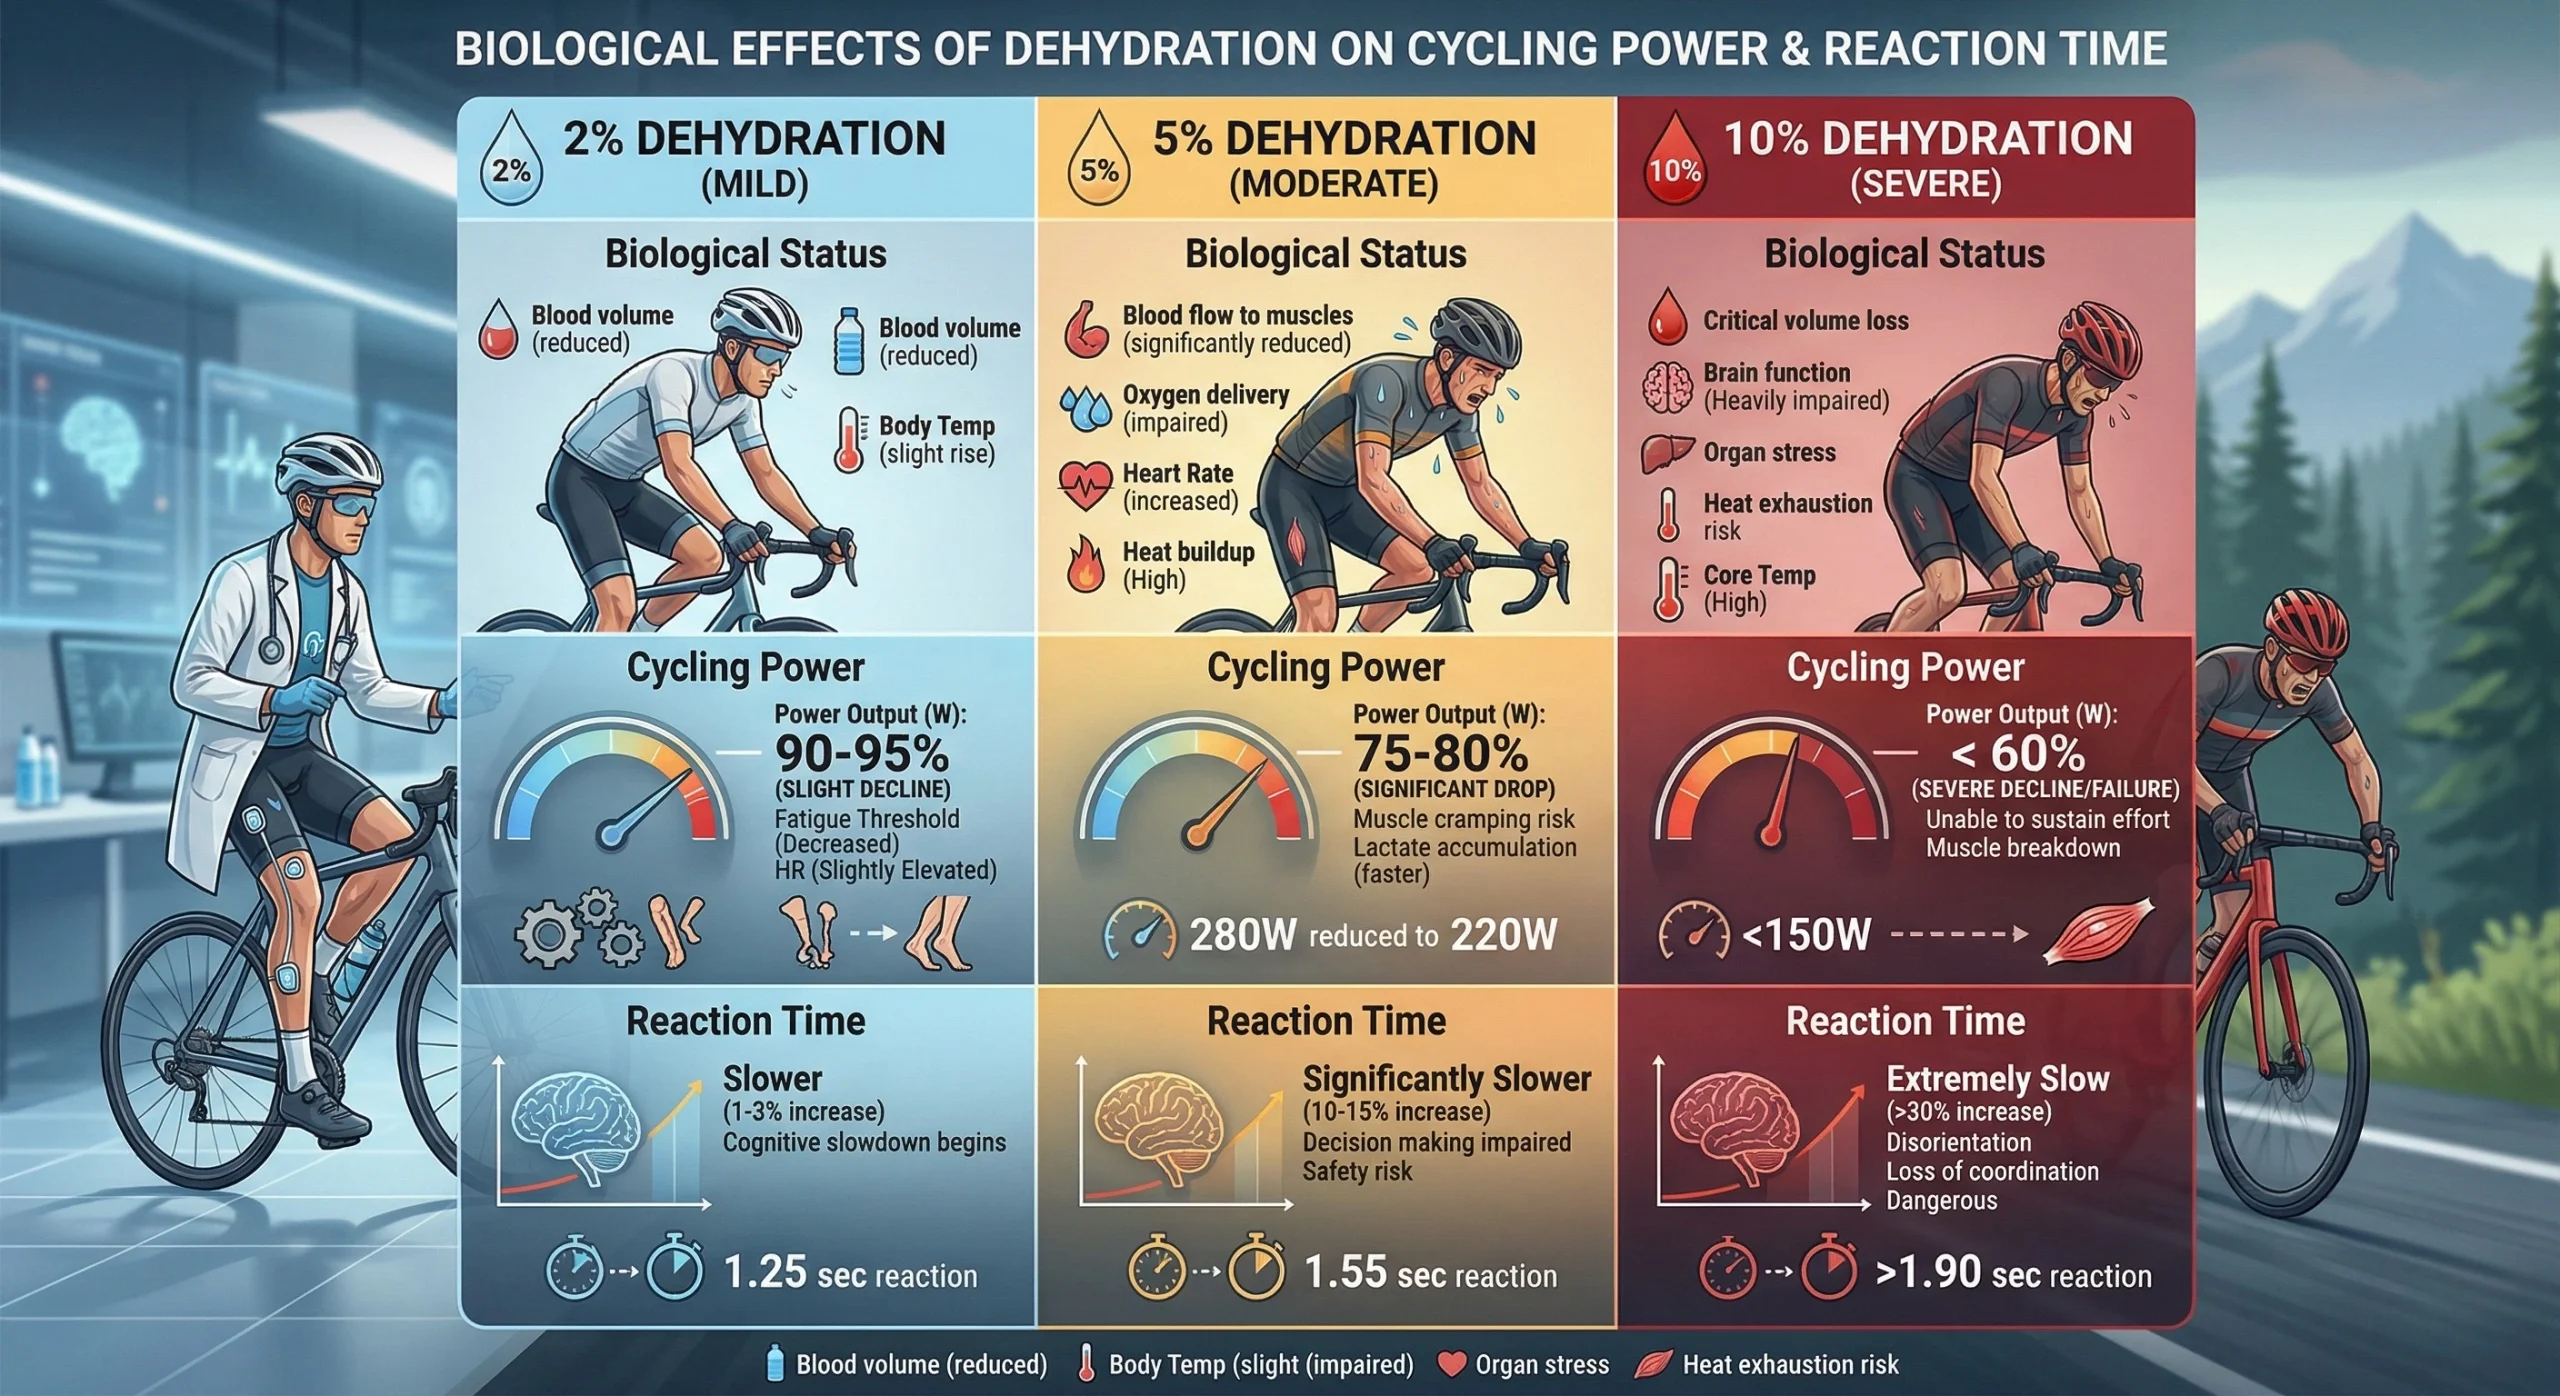
Establishing a technical bikepacking hydration guide is a mandatory safety protocol for any self-contained expedition. In remote environments, water is often the heaviest component of the gear system, weighing 2.2 pounds per liter. Effective management involves balancing carrying capacity with filtration speed. For those following the 7 Proven Steps for Bikepacking for Beginners, mastering fluid intake prevents the cognitive decline and physical fatigue that lead to errors on Bikepacking Routes.
Primary Water Carry Systems: Bladders vs. Bottles
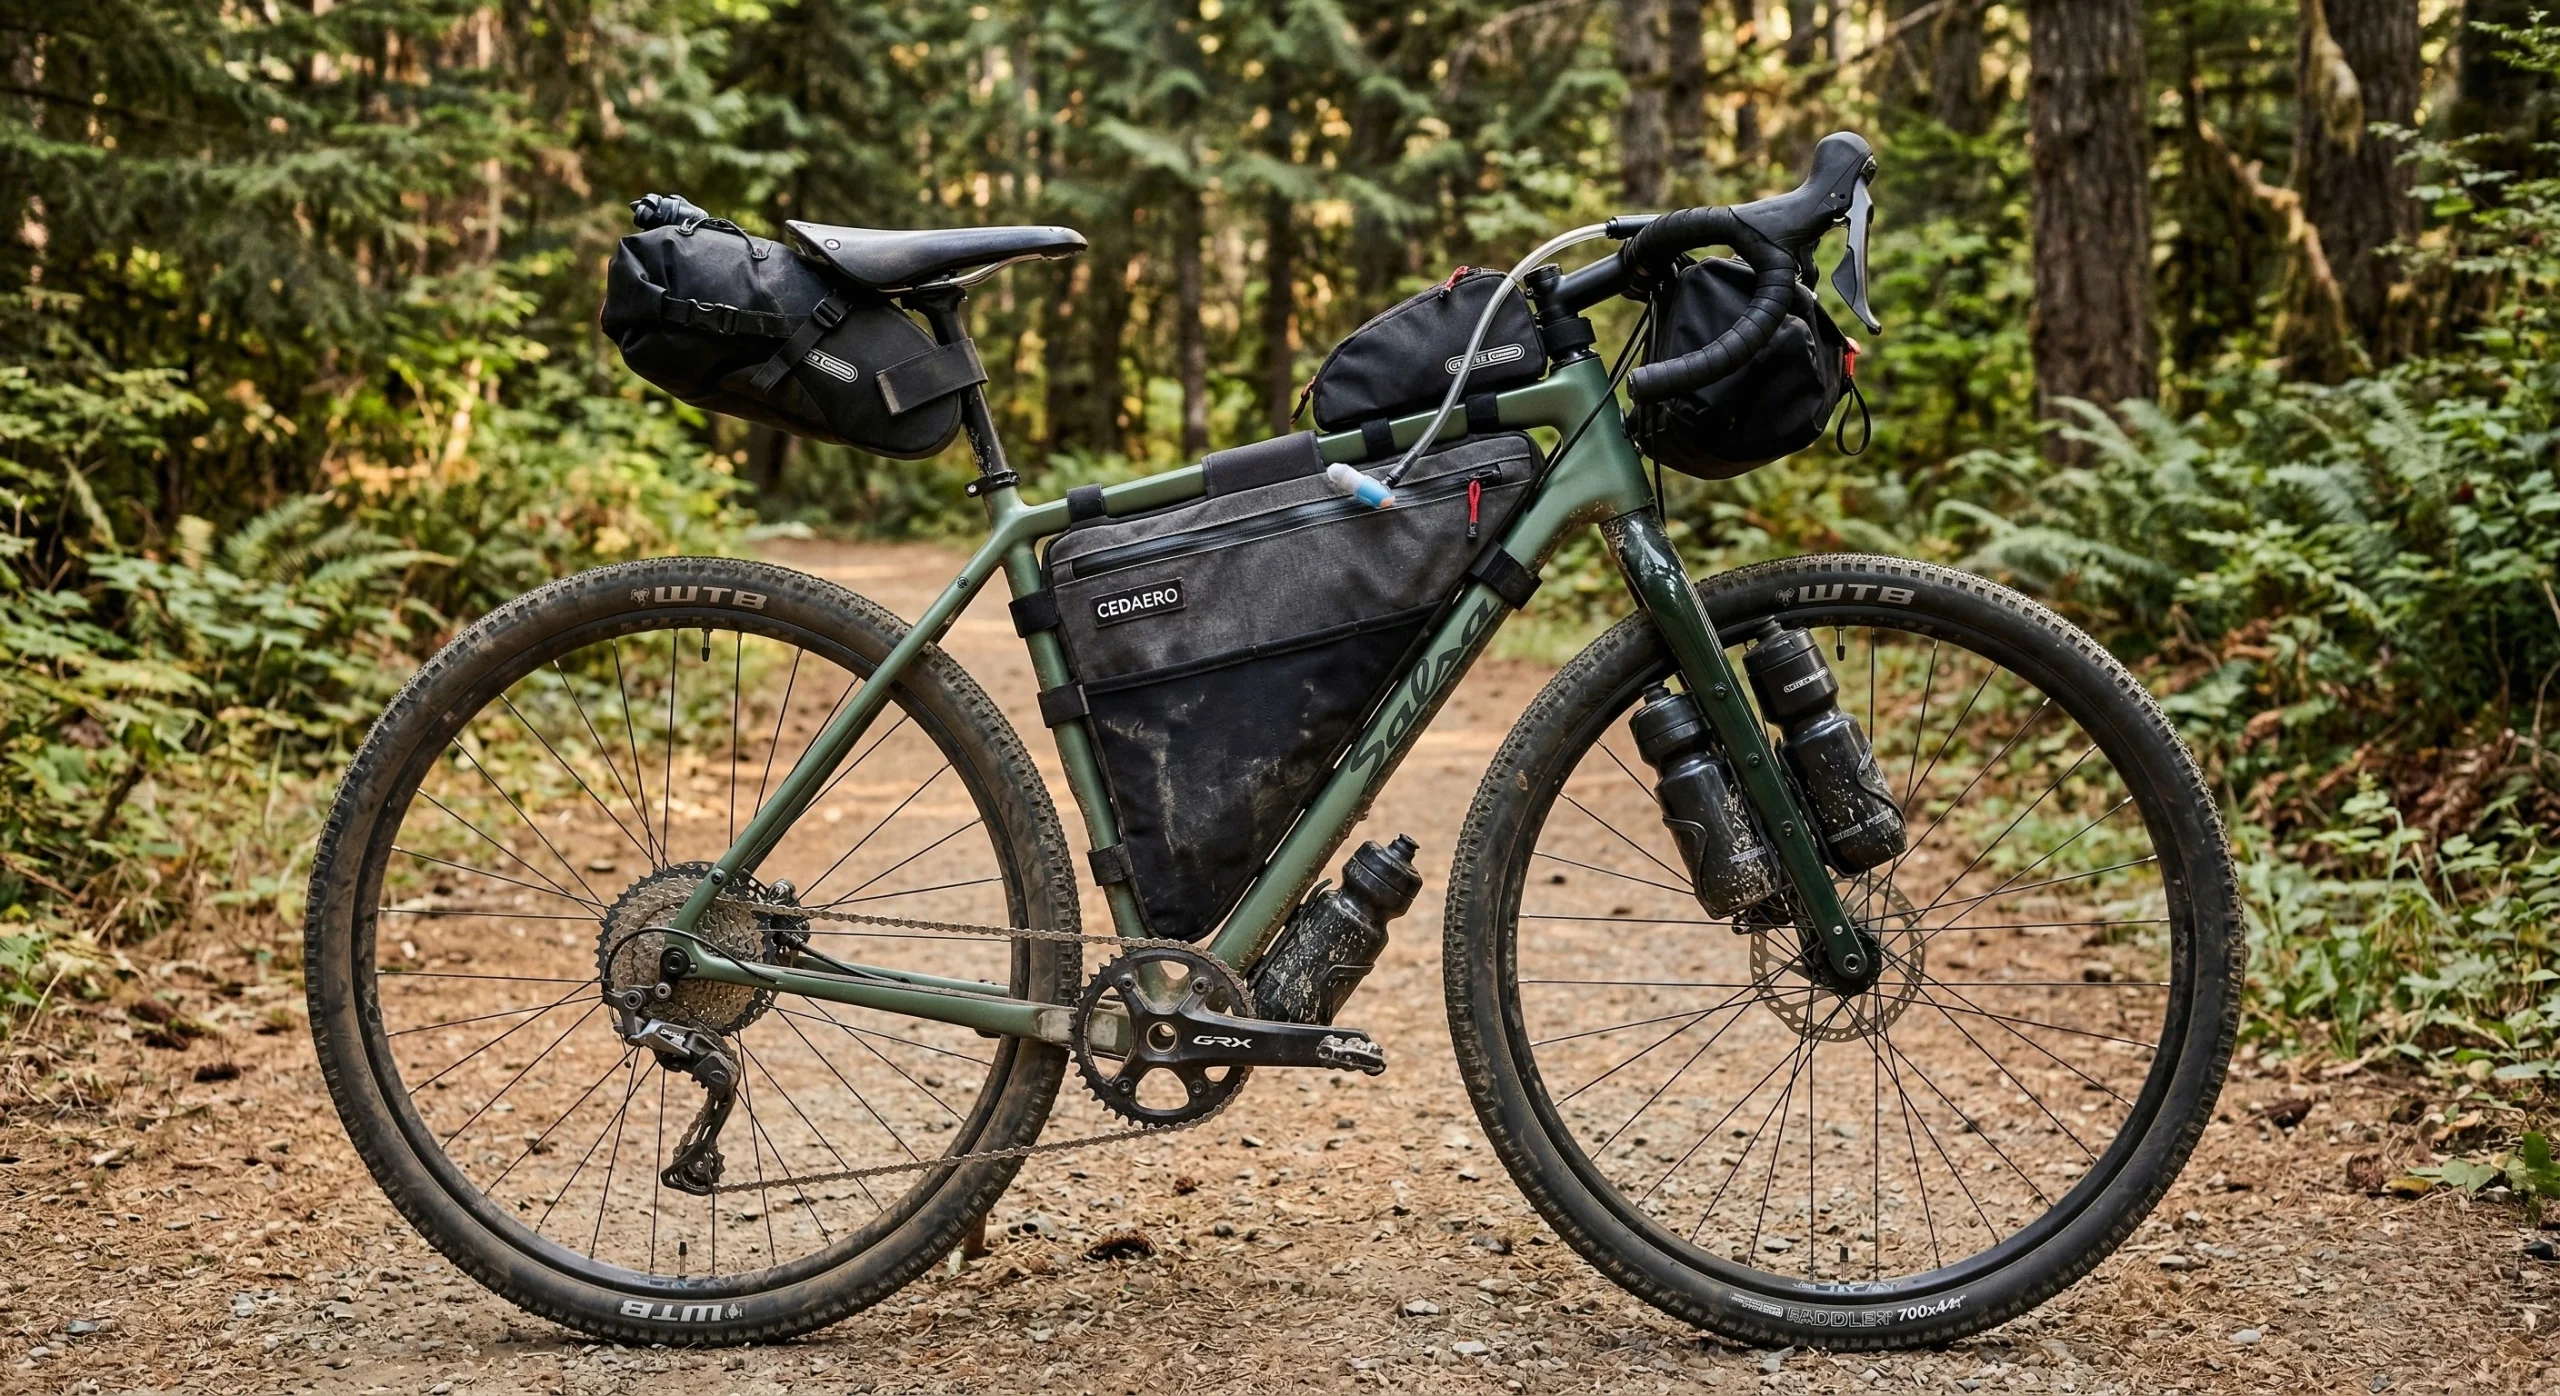
The method of carrying water dictates the Bikepacking Packing Guide strategy. Modern frames allow for a combination of centralized bladders and frame-mounted bottles to optimize weight distribution.
- Hydration Bladders: Best for large volumes (2–4 liters). Storing a bladder in a frame bag keeps the weight low and centered.
- Standard Bottles: Provide rapid access and are easier to clean. They are ideal for mixing electrolyte powders.
- Fork Cages: Allow for auxiliary storage when the main frame triangle is occupied by a Bikepacking Sleeping System.
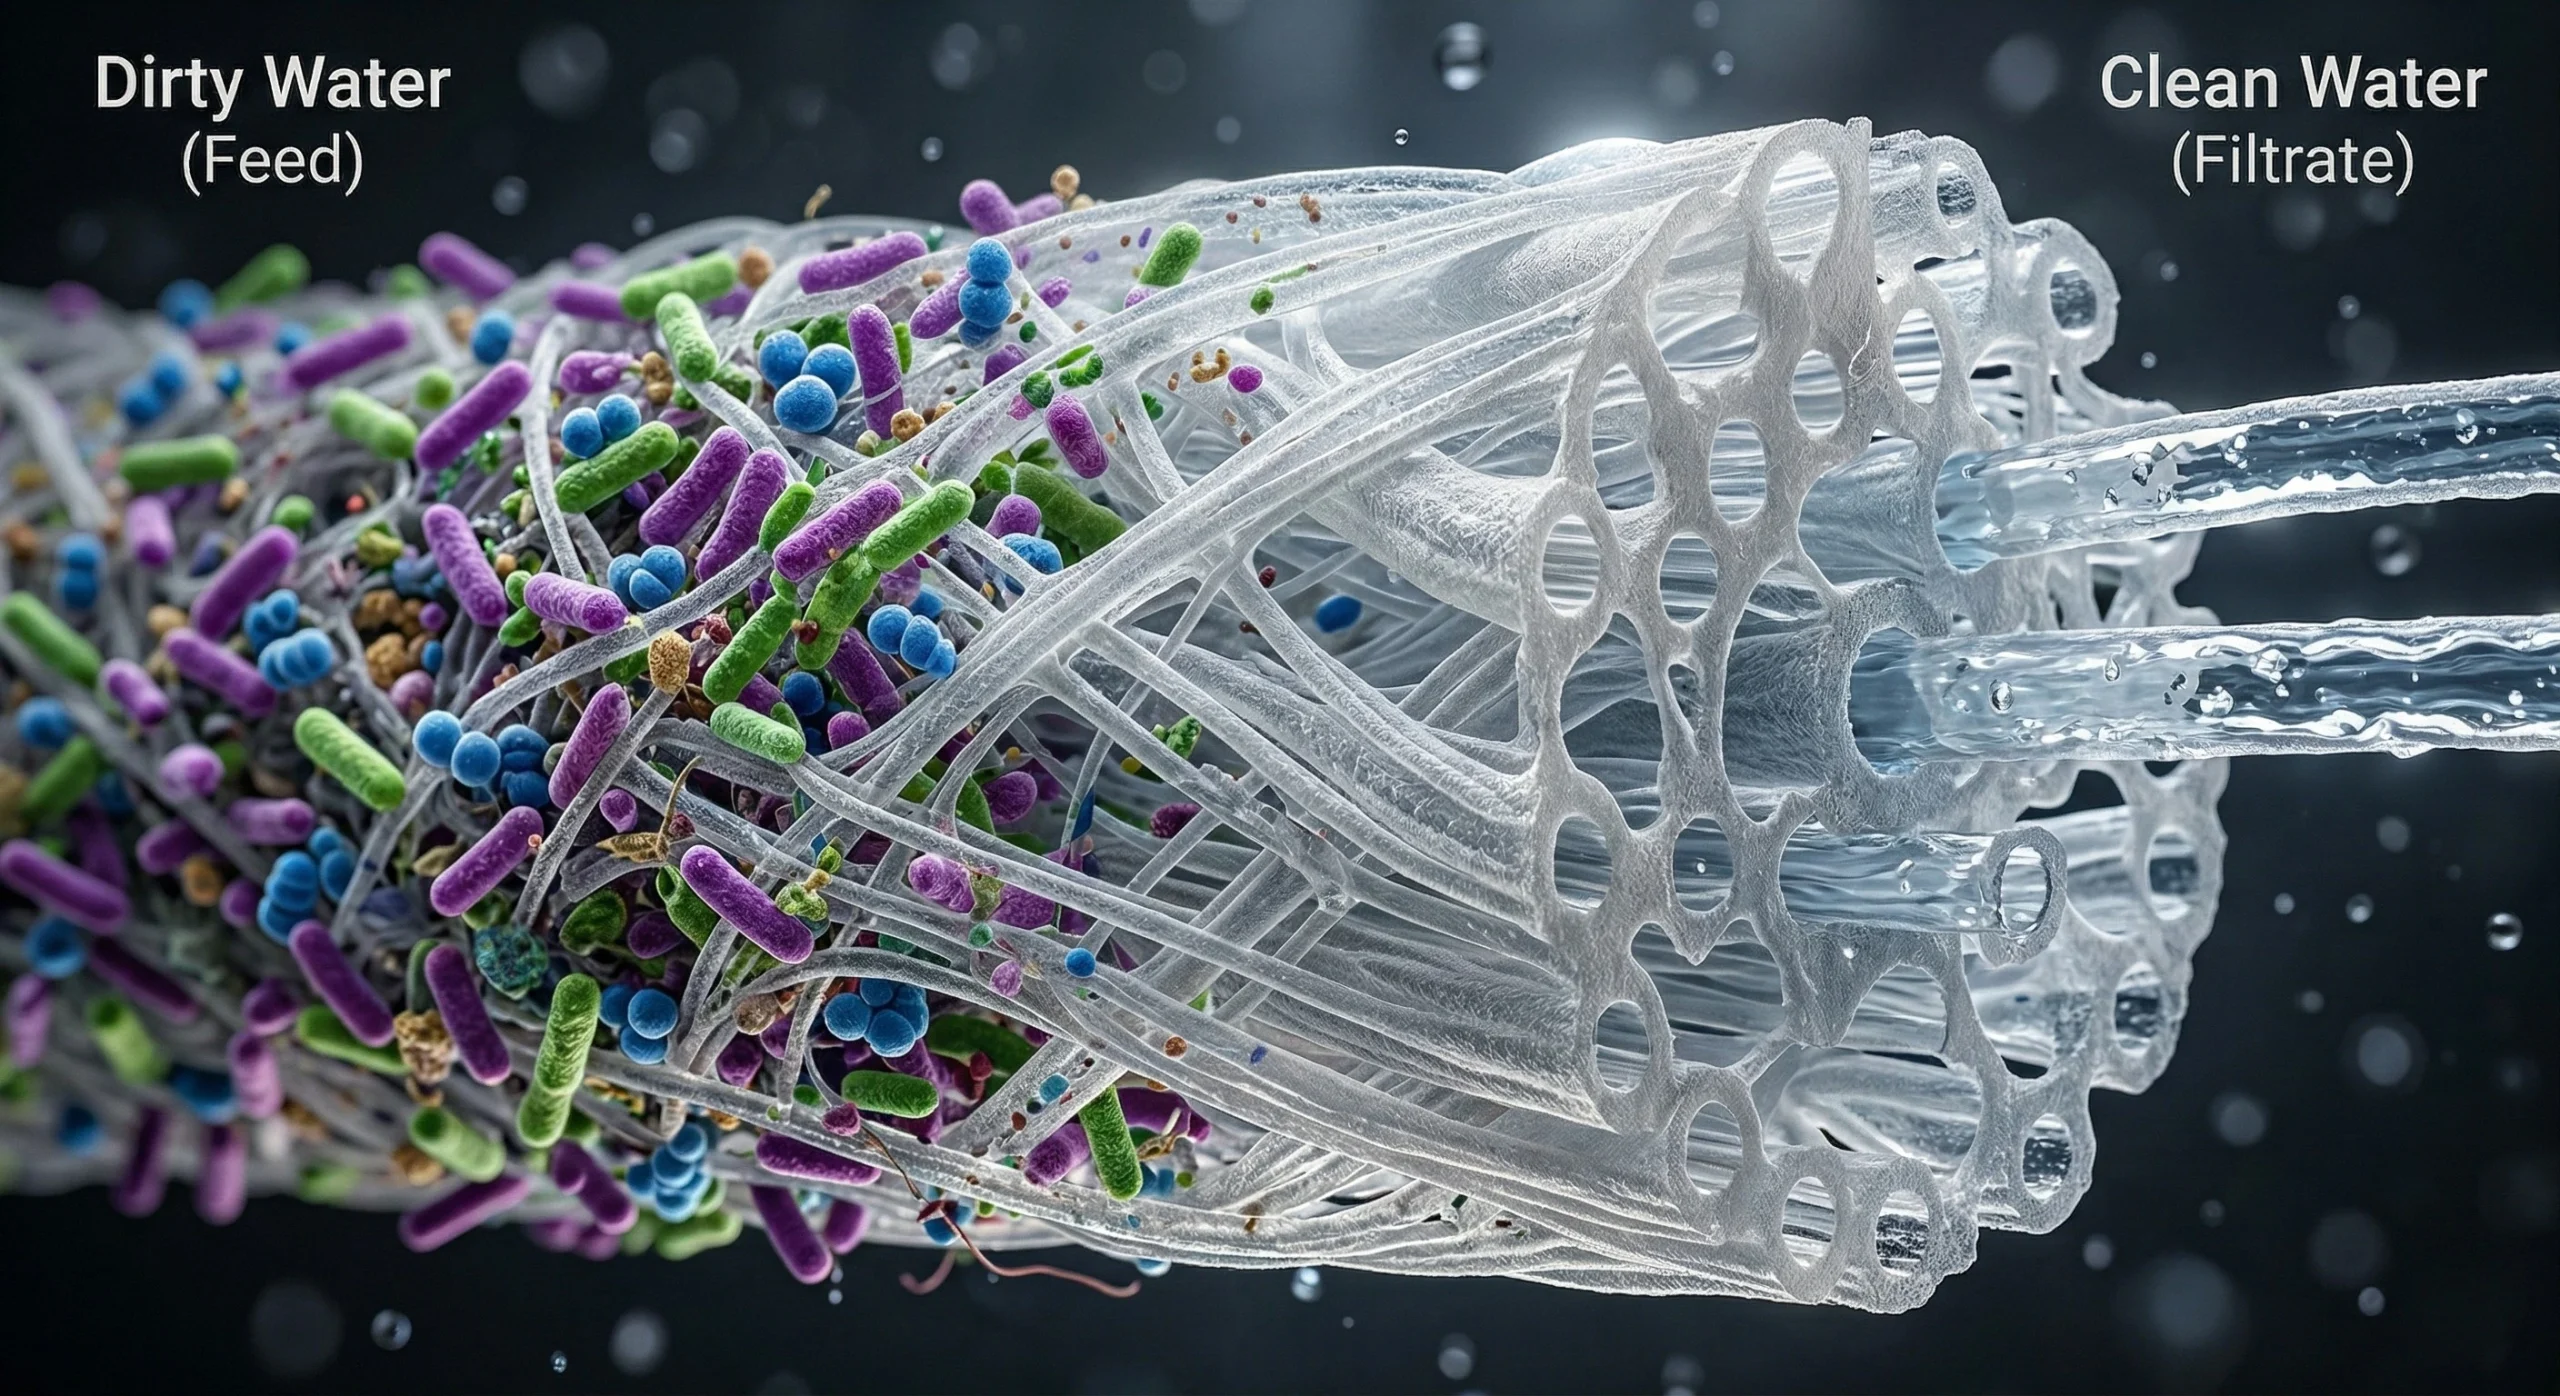
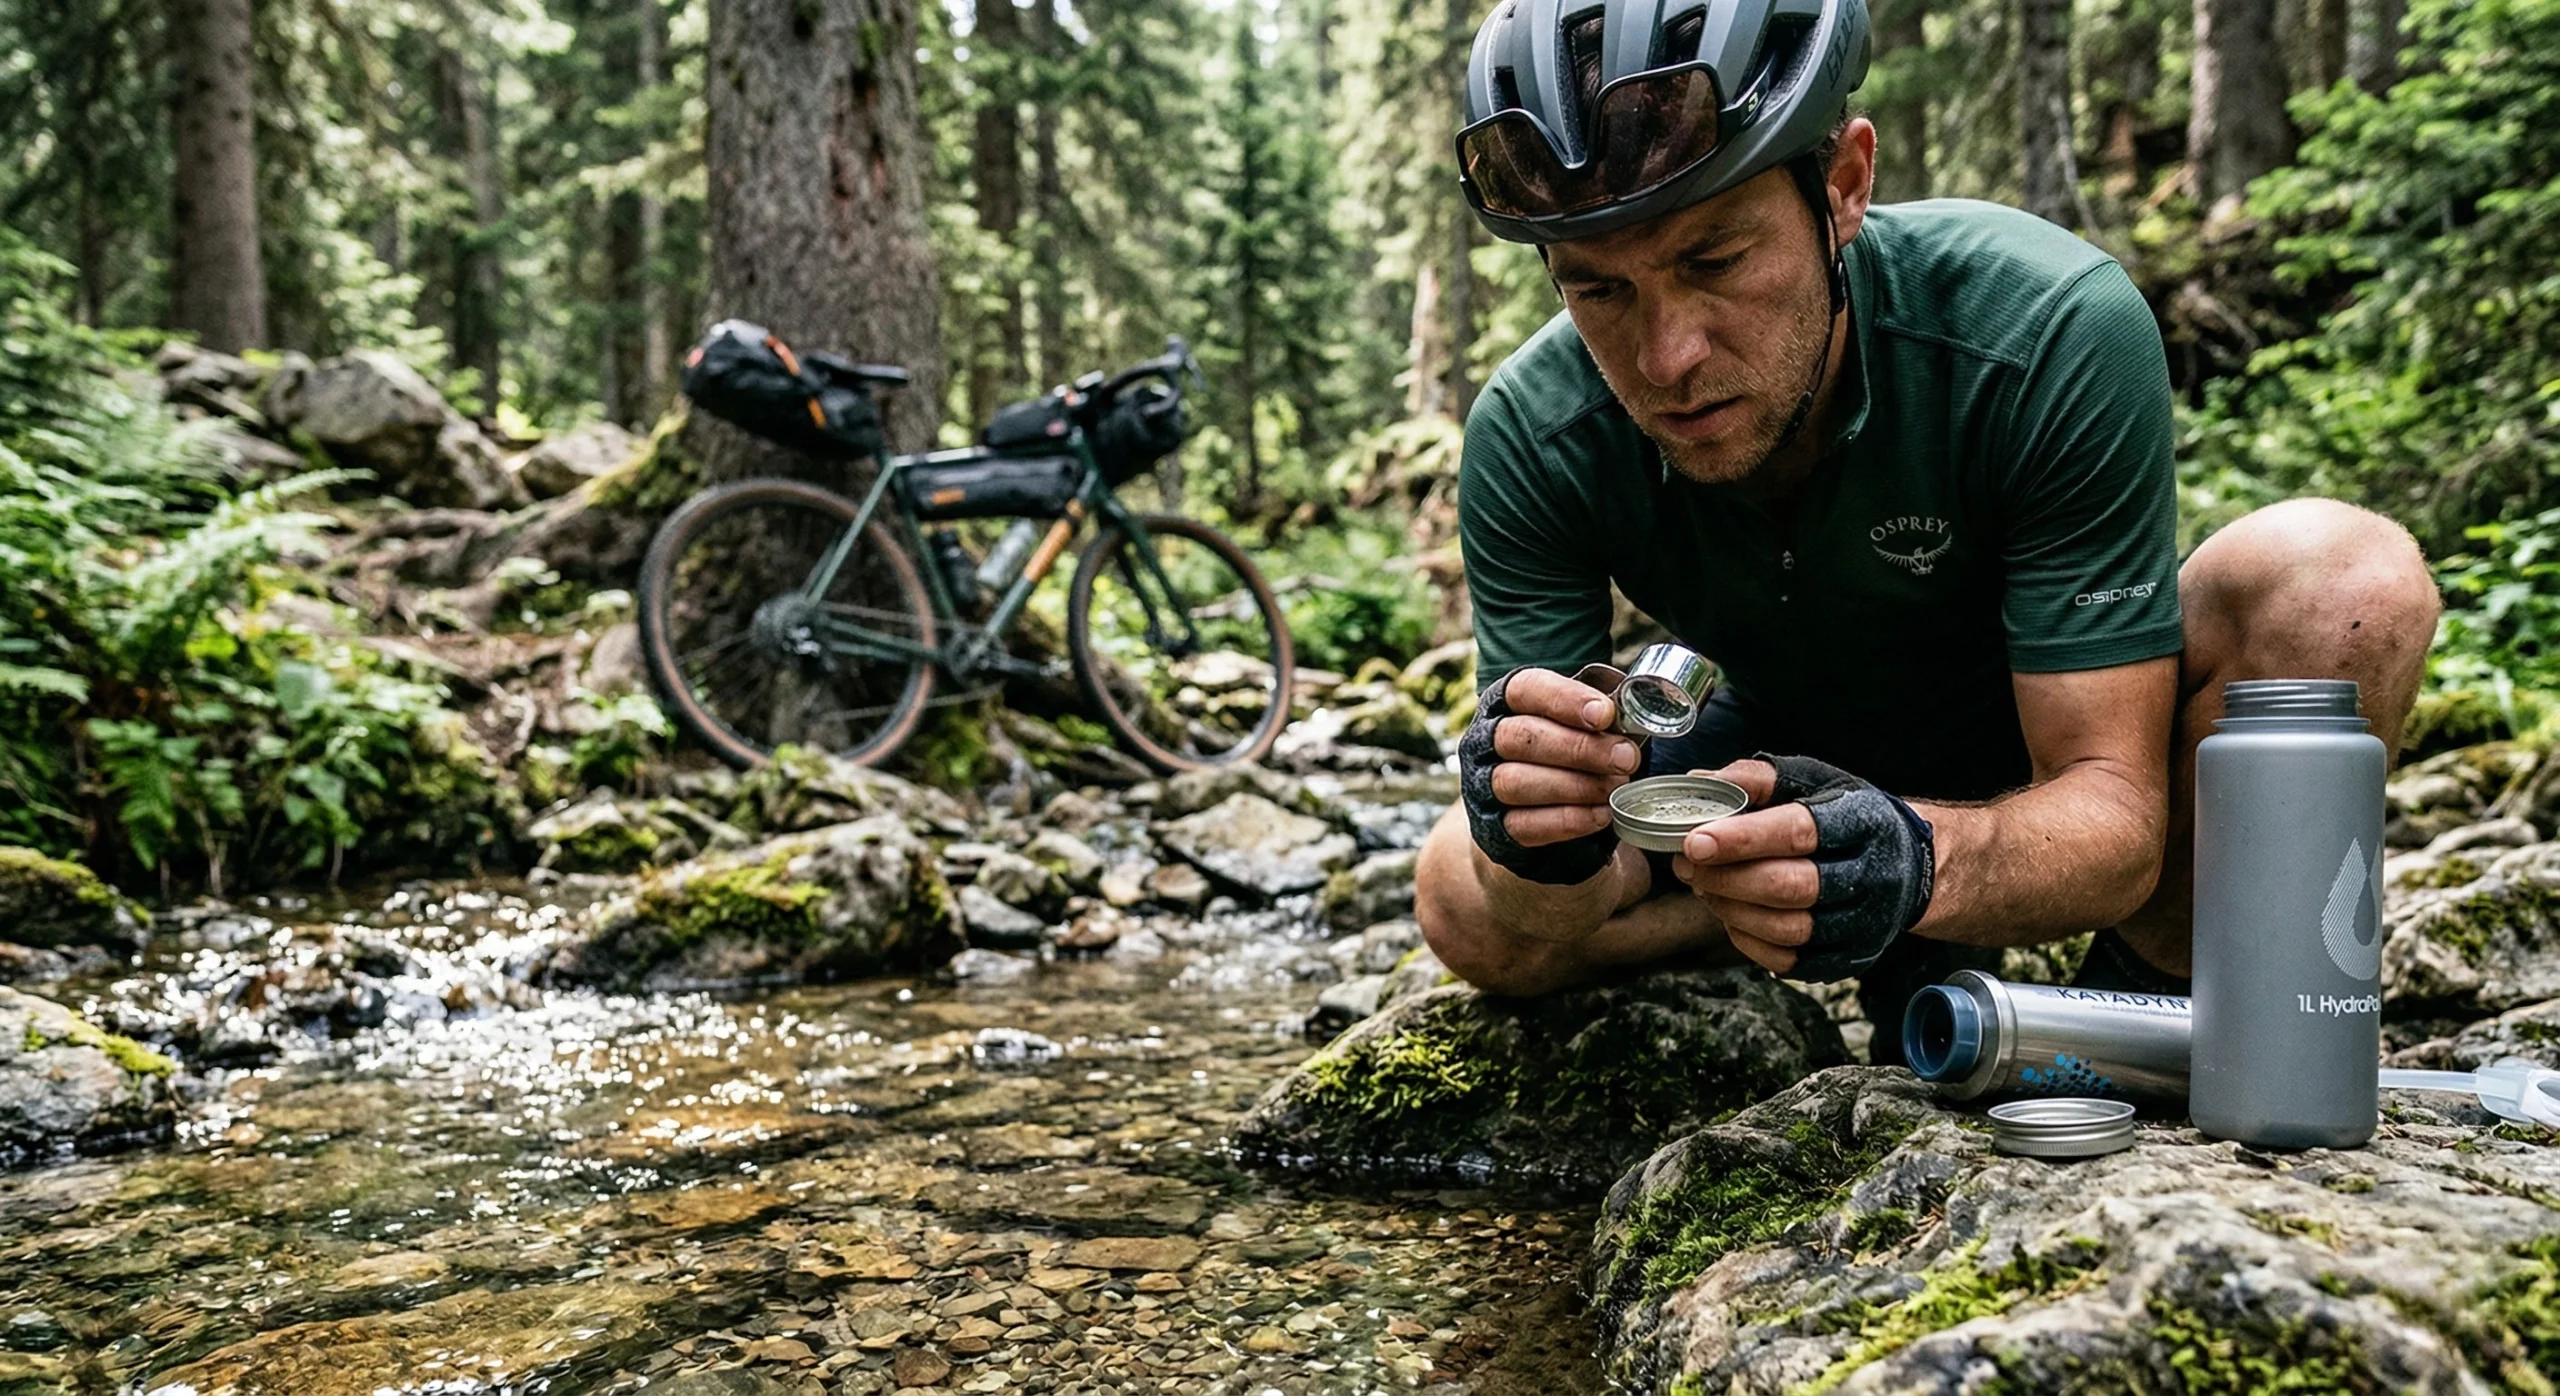
Technical Filtration Methods for Remote Routes
Reliable filtration is the mechanical foundation of wilderness survival. The choice of method depends on the water source quality and required flow rate.
- Hollow Fiber Filters: Use microscopic tubes to block pathogens. These are fast and lightweight.
- UV Purification: Effective against viruses but requires battery power and clear water.
- Chemical Tablets: Best as a redundant backup in your Ultimate Gear List.
4 Best Hydration Tools for 2026 (Affiliate Picks)
Selecting vetted hardware ensures reliability when miles from assistance. The following items are standard-issue for professional wilderness travel.
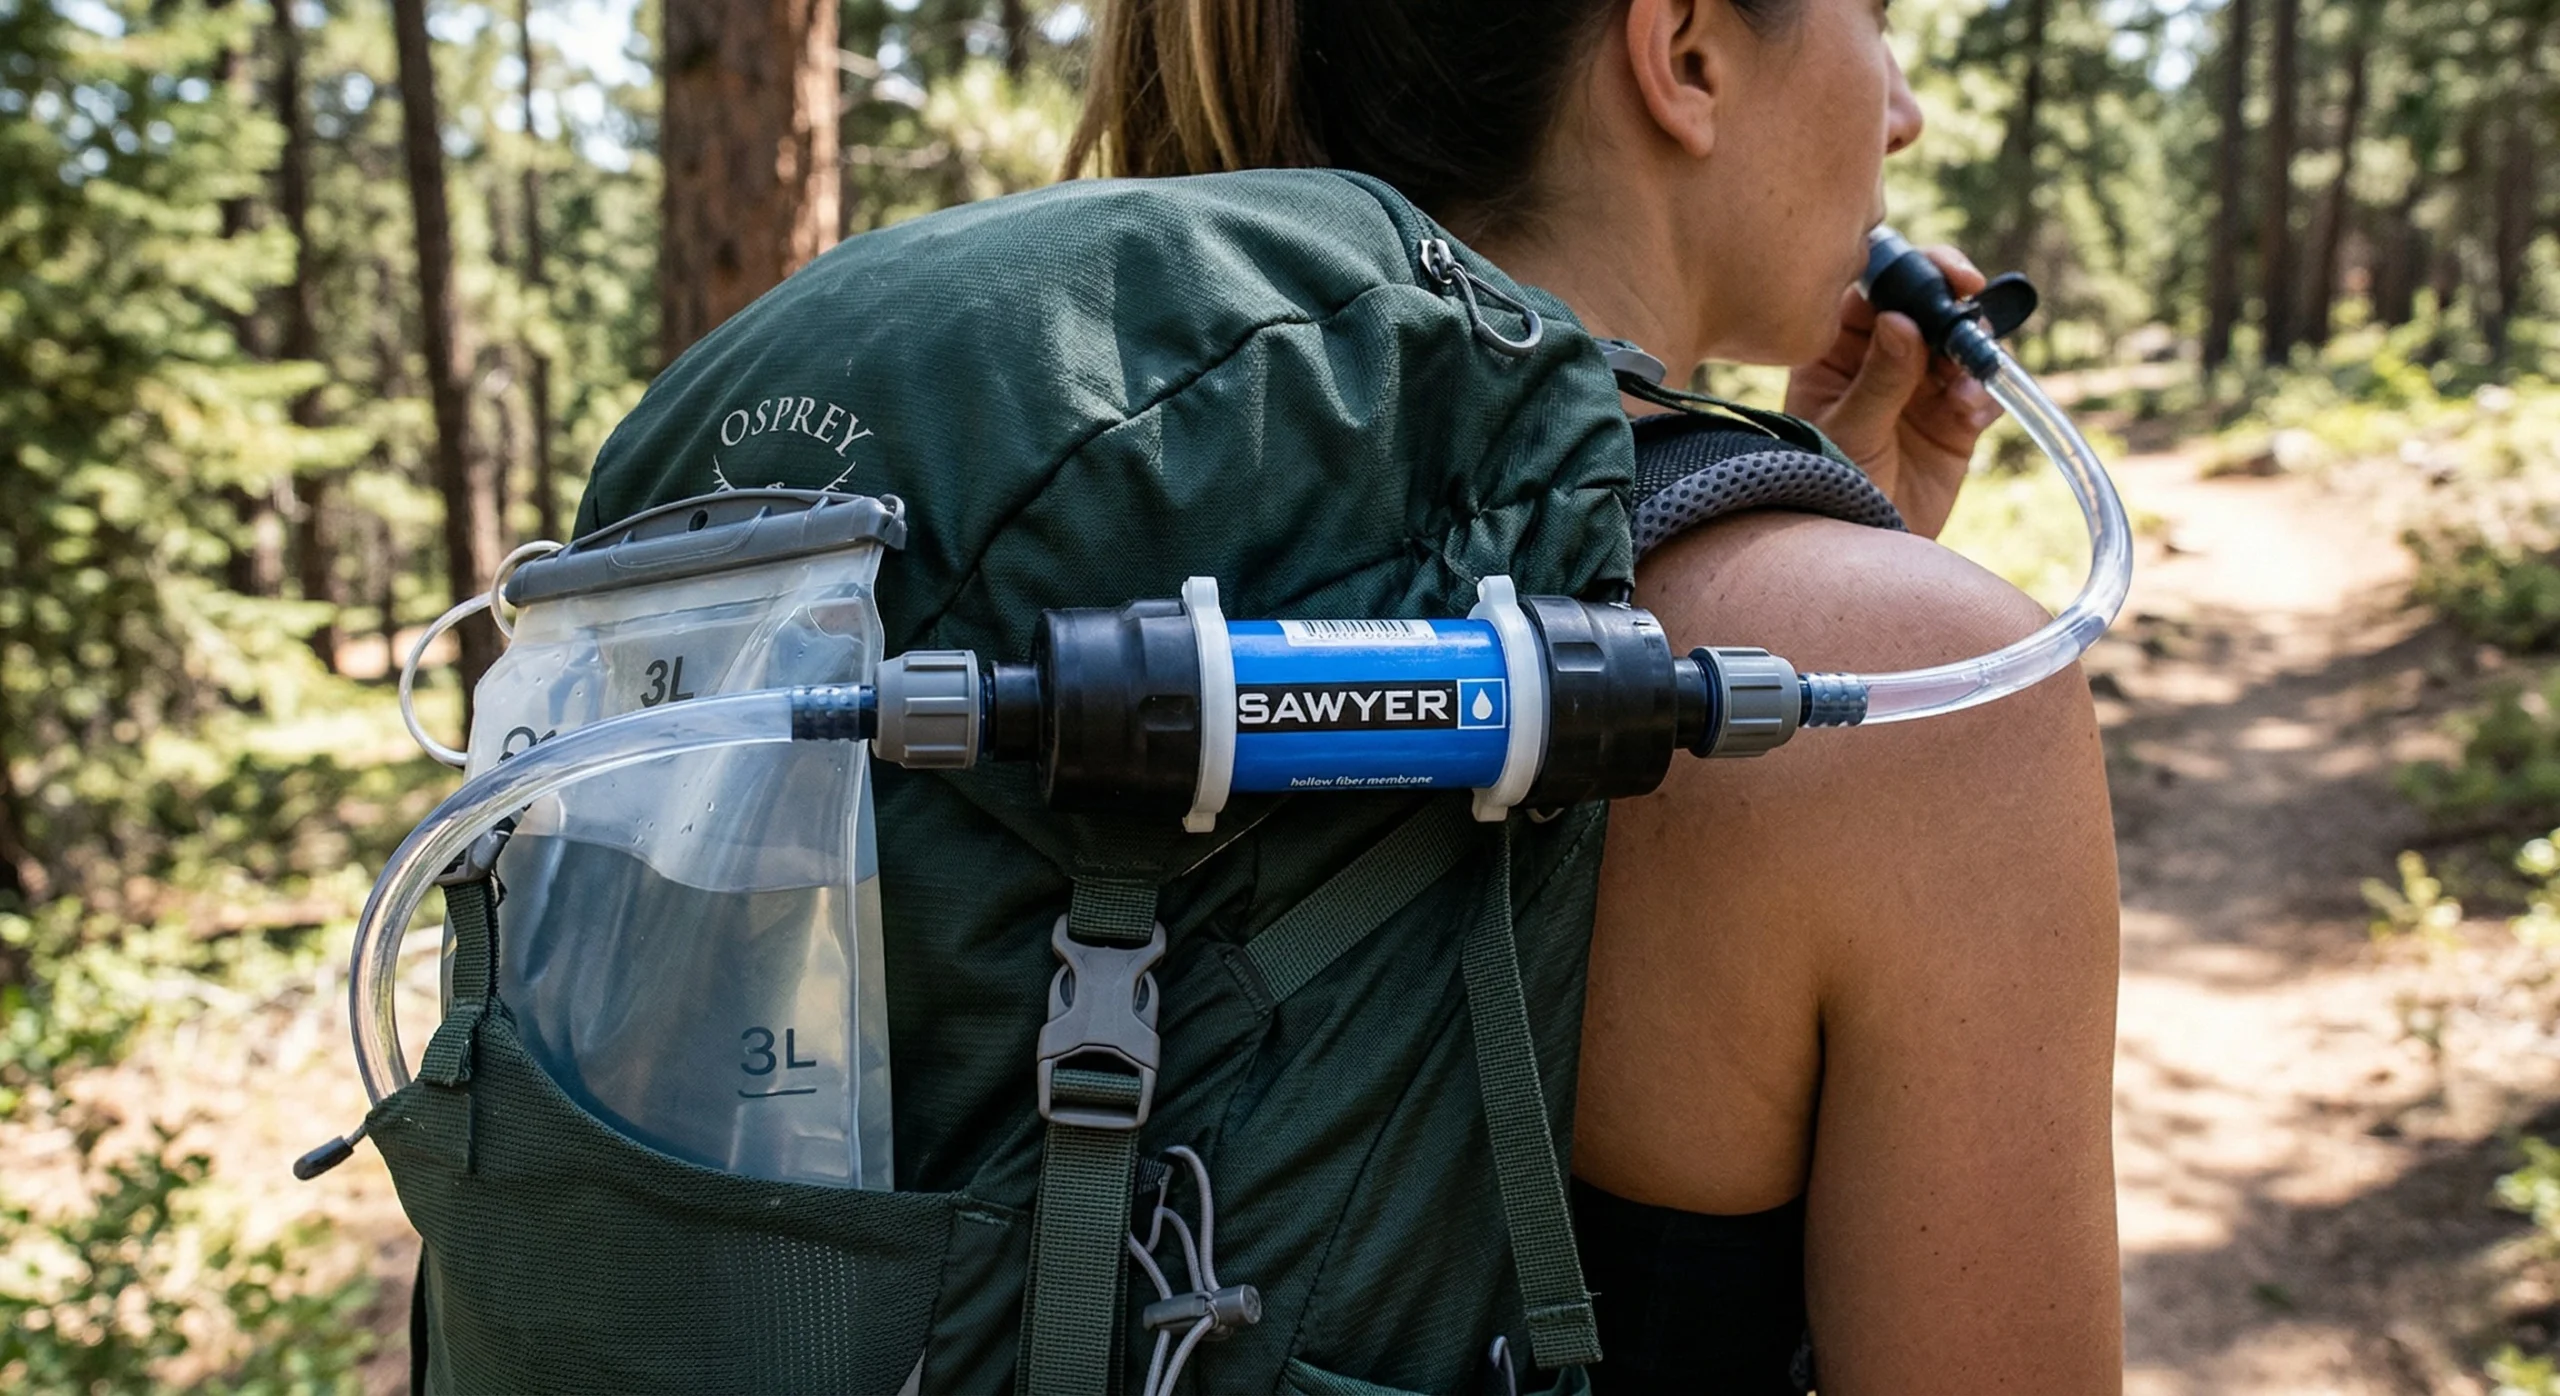
1. Sawyer Squeeze Filtration System
- Key Features: 0.1-micron absolute filter, field-cleanable, lifetime warranty.
- Pros: Exceptional flow rate; versatile attachment options.
- Cons: Must be protected from freezing.
- Check Price: Sawyer Squeeze Filter
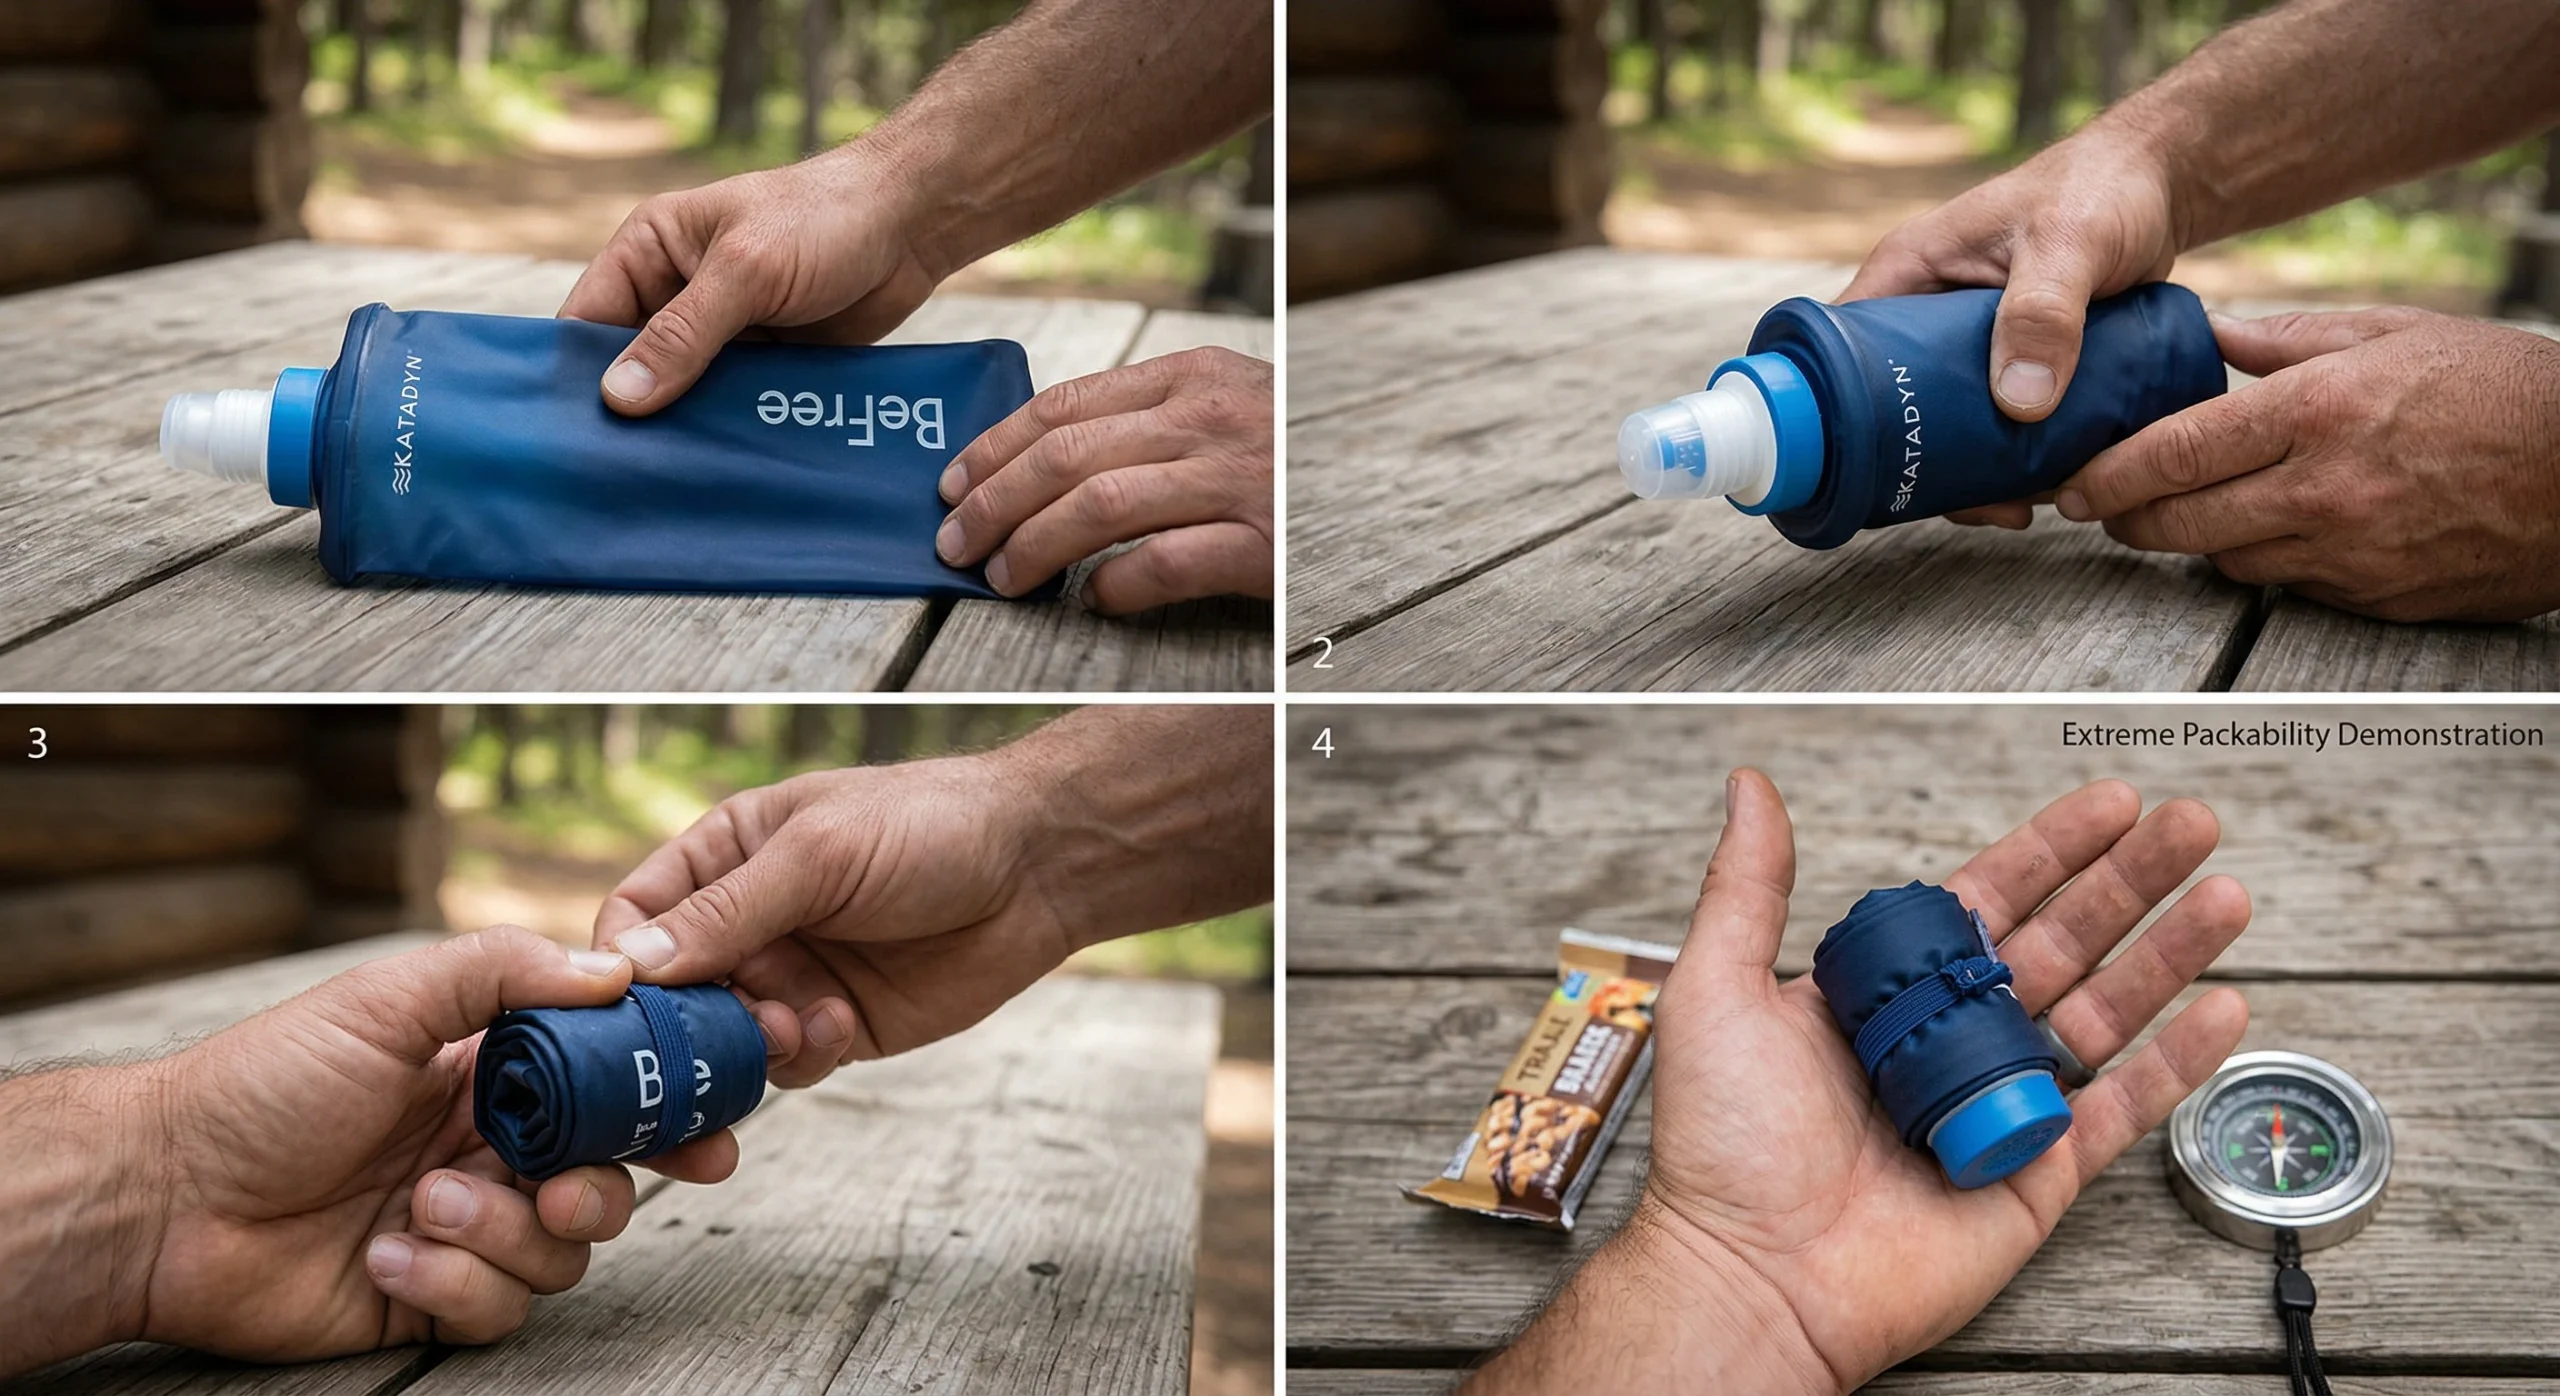
2. Katadyn BeFree 1.0L
- Key Features: Soft-sided flask, fast-flow nozzle, collapsible design.
- Pros: Easiest cleaning method (shake to clean); very lightweight.
- Cons: Flask material is less durable than rigid bottles.
- Check Price: Katadyn BeFree Filter
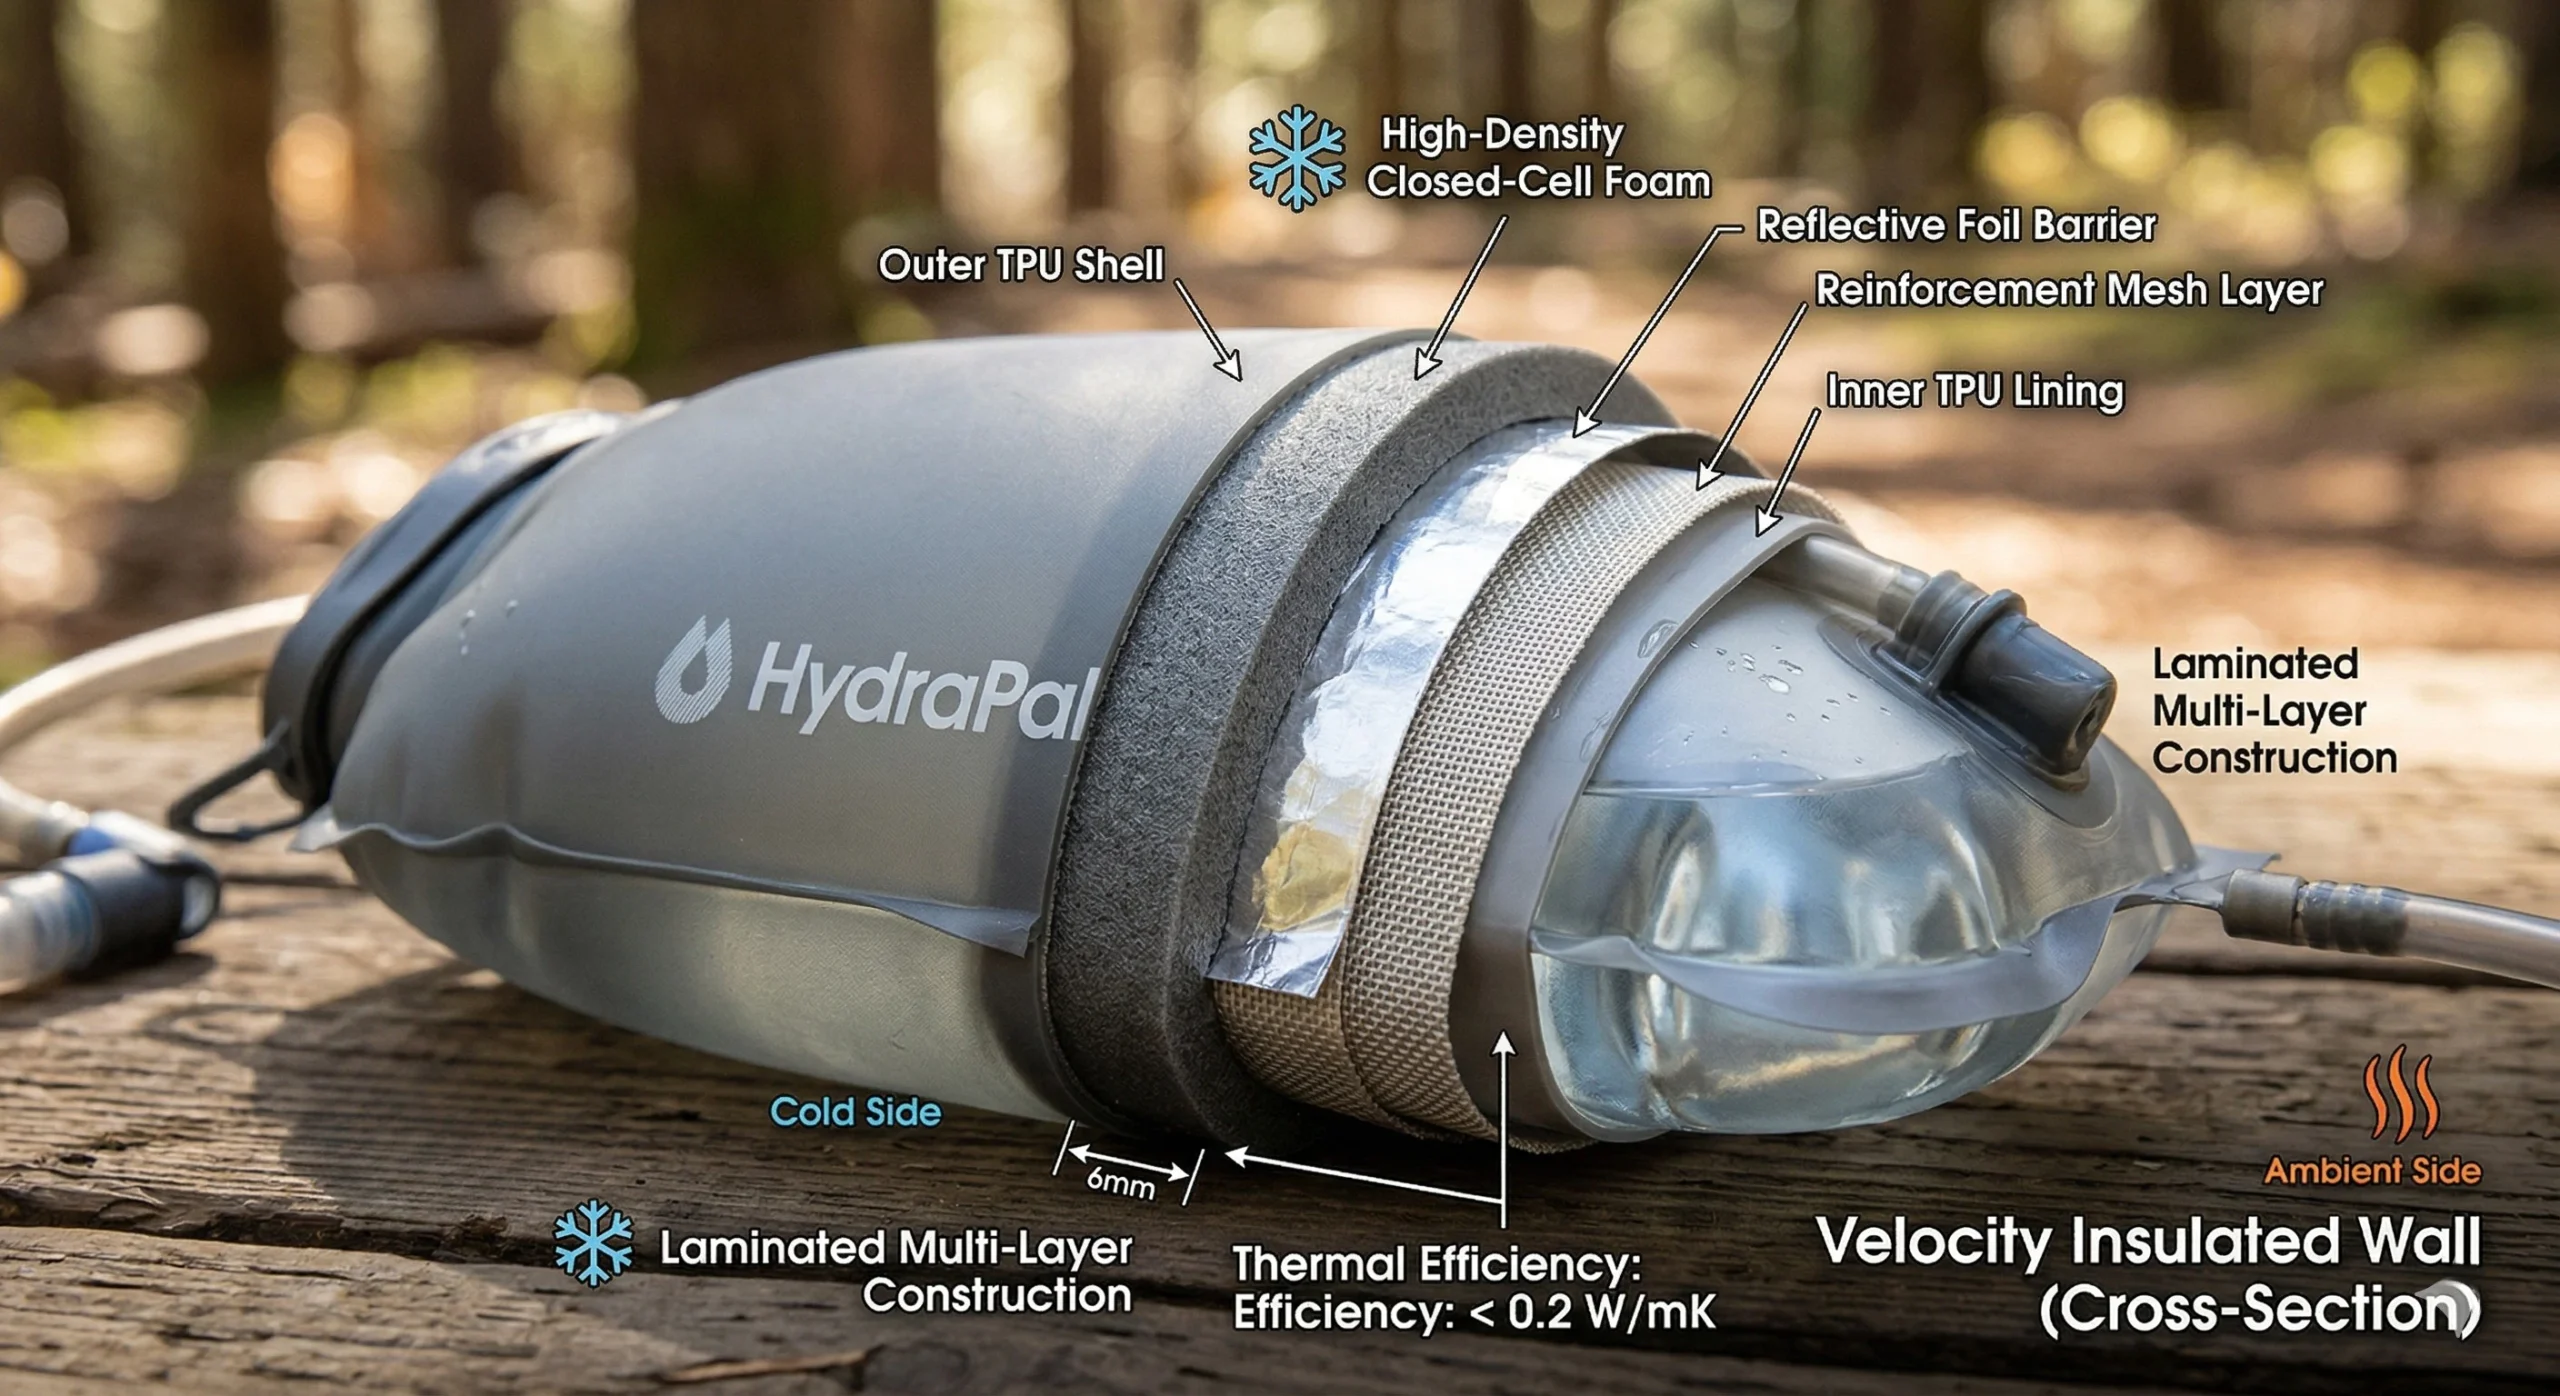
3. Hydrapak Velocity IT 1.5L
- Key Features: IsoBound insulation, Slide-Seal top, flexible TPU.
- Pros: Prevents water from heating up; easy to fill.
- Cons: Smaller volume than standard bladders.
- Check Price: Hydrapak Velocity Reservoir
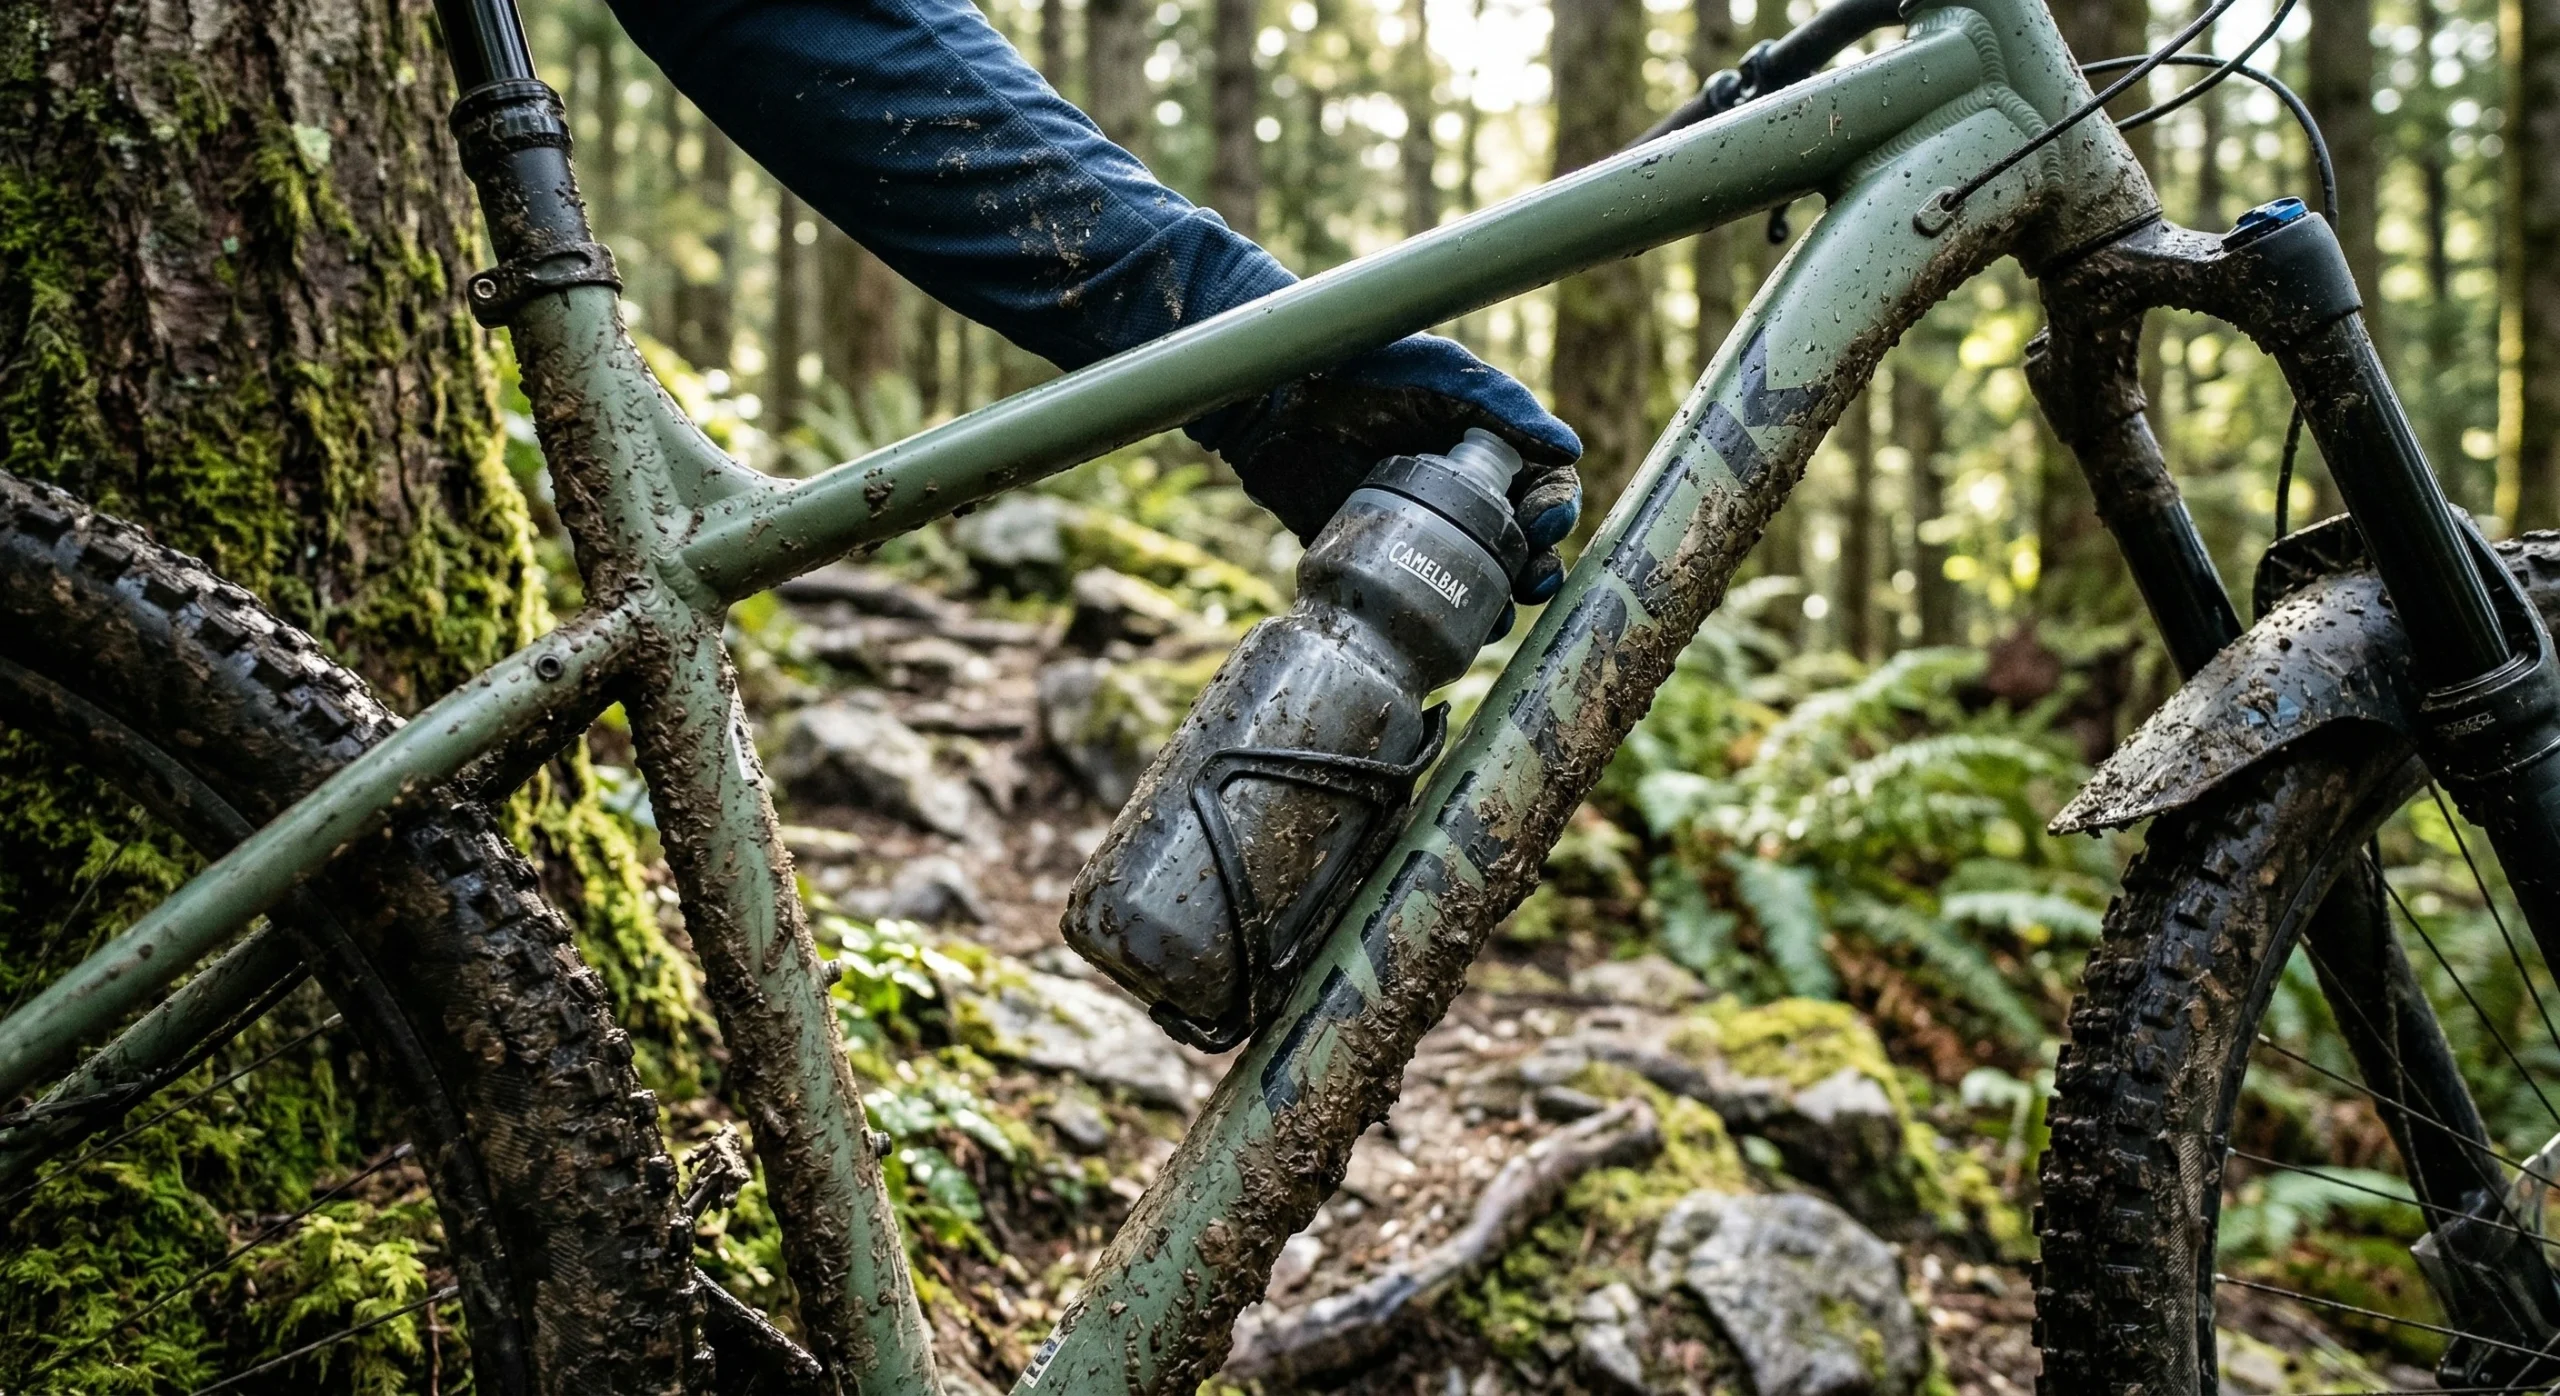
4. CamelBak Podium Dirt Series
- Key Features: Integrated mud cap, high-flow self-sealing cap, BPA-free.
- Pros: Keeps the nozzle clean on muddy trails.
- Cons: Lower capacity than specialized cargo bottles.
- Check Price: CamelBak Podium Dirt Bottle
Hydration Safety and Biological Risk Mitigation
Pathogen avoidance is a critical safety pillar. According to the CDC Wilderness Health Guidelines, untreated water can harbor Giardia and Cryptosporidium. Riders must adhere to Leave No Trace principles by gathering water at least 200 feet away from campsites. For high-risk areas, consult EPA Water Quality Standards to understand regional contaminants. Mechanical reliability is emphasized by the IMBA Safety Standards for off-road travel.
Conclusion: Refining Your Hydration Strategy
Mastering the technical aspects of a bikepacking hydration guide transforms the wilderness experience from one of survival to one of performance. By integrating centralized carry systems and high-speed filtration, any cyclist can maintain their pace across arid or mountainous landscapes. Success depends on the preparation established in your Ultimate Gear List.
Discover more from Maive Verse
Subscribe to get the latest posts sent to your email.