
Master wet weather bikepacking with our 11 technical rules. Learn to manage moisture, protect your electronics, and maintain gear integrity in the rain.
Introduction: The Psychological and Mechanical Challenge of Rain
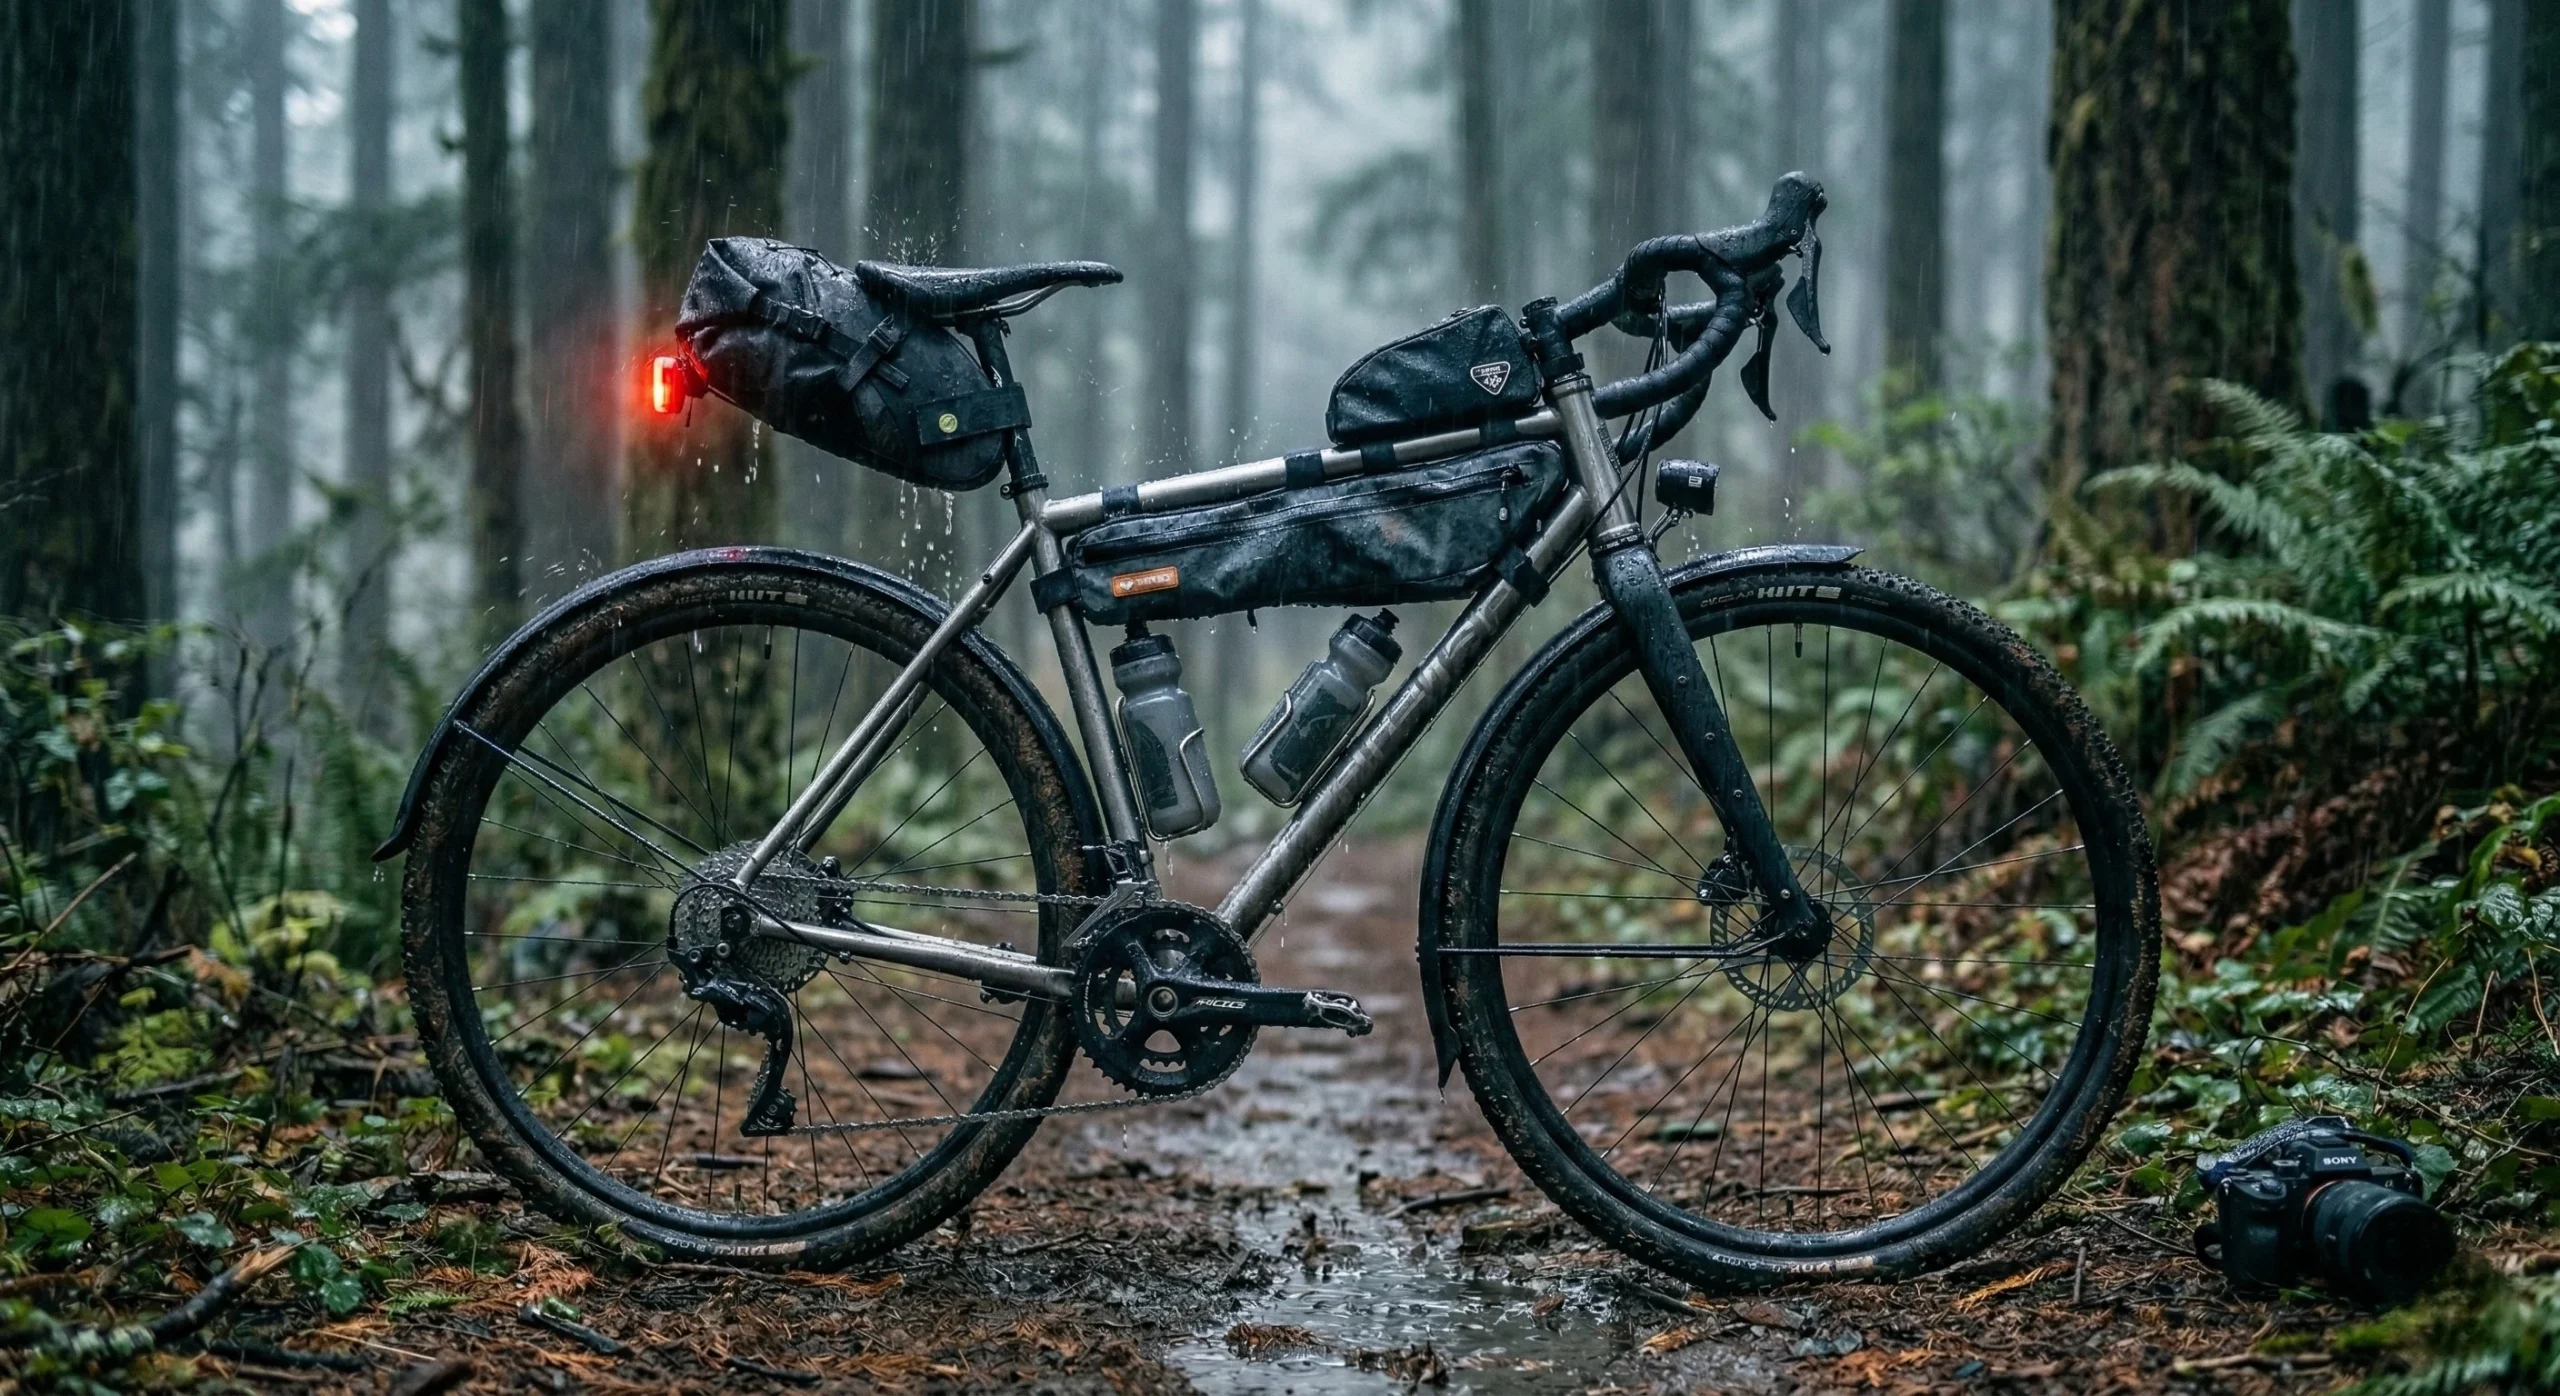
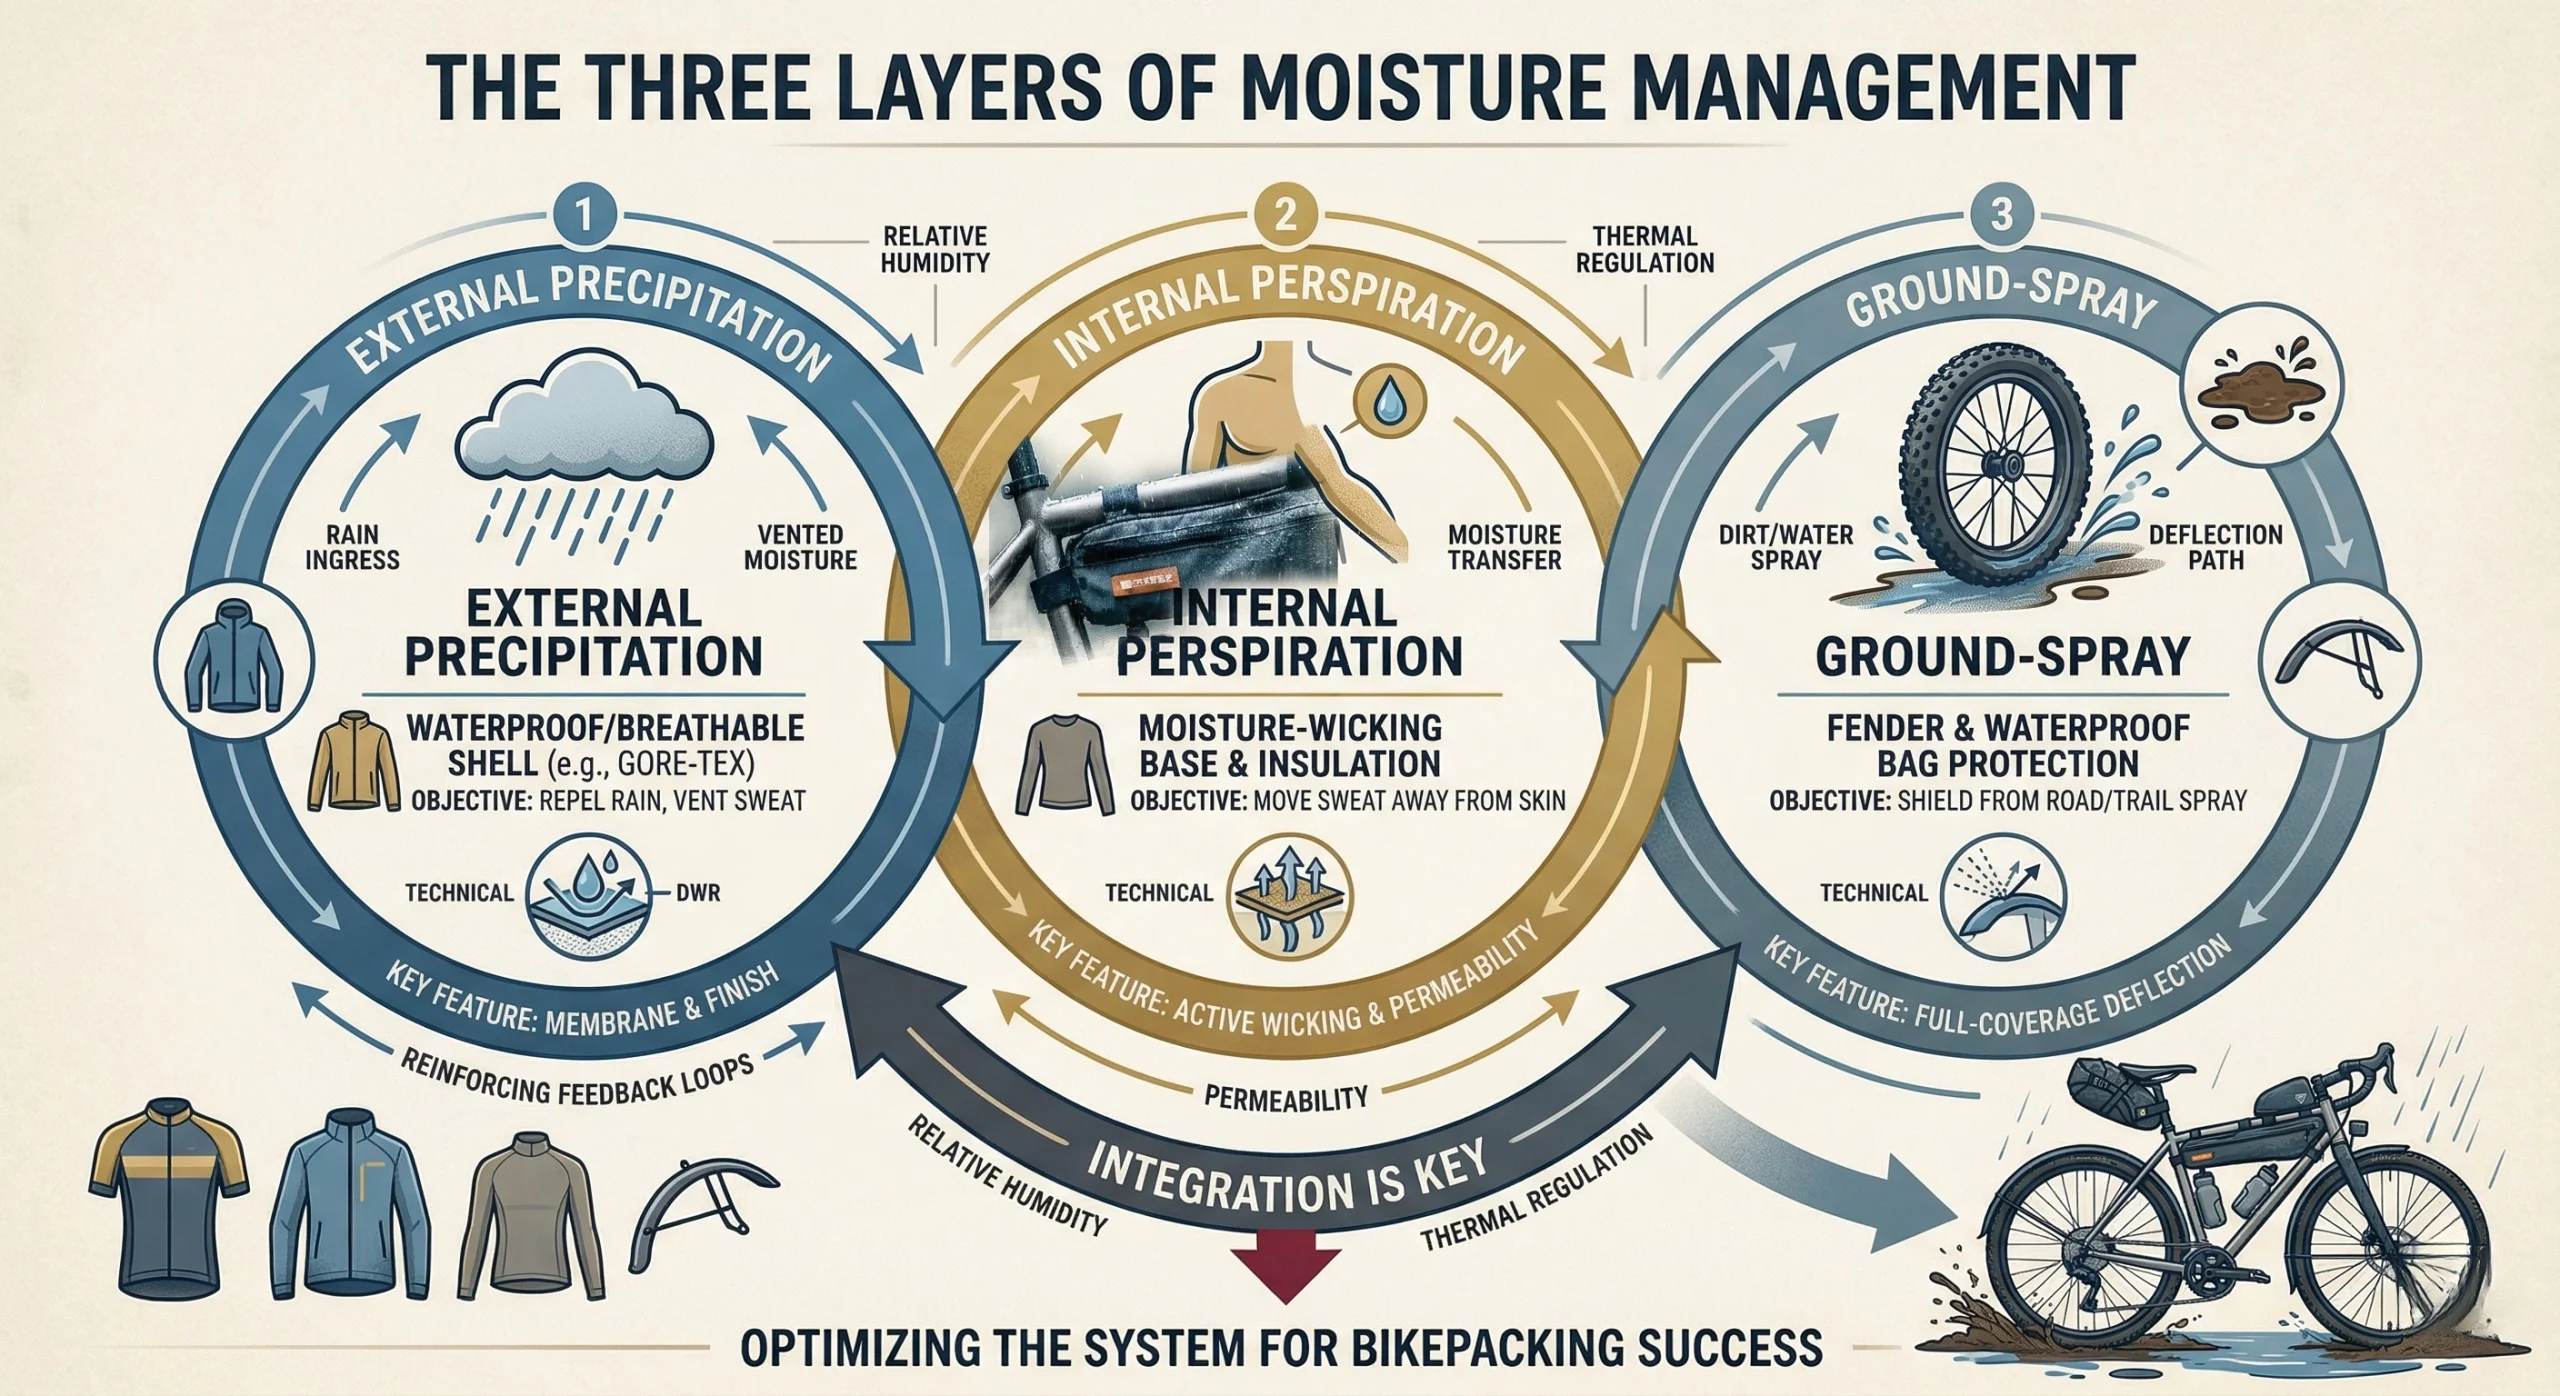
Mastering wet weather bikepacking is a critical skill for any rider venturing into temperate or mountainous regions where precipitation is an inevitability. Rain is not merely a comfort issue; it is a mechanical and physiological threat that can lead to hypothermia and equipment failure if not managed with technical precision. For those who have already established their Ultimate Bikepacking Gear List, rain protocols represent the operational layer of wilderness survival. Success depends on a proactive “moisture management” strategy rather than a reactive one.
The primary objective is to maintain a dry “core” while ensuring that sensitive equipment—specifically sleep systems and electronics—remains isolated from external moisture. In 2026, advances in textile technology and bag sealing have made it possible to remain functional in multi-day storms, provided the rider follows a disciplined routine. This guide analyzes 11 rules for navigating the unpaved world when the environment turns hostile. Understanding these dynamics is as vital as the Bikepacking for Beginners fundamentals.
1. Implement the “Moving vs. Static” Layering Protocol
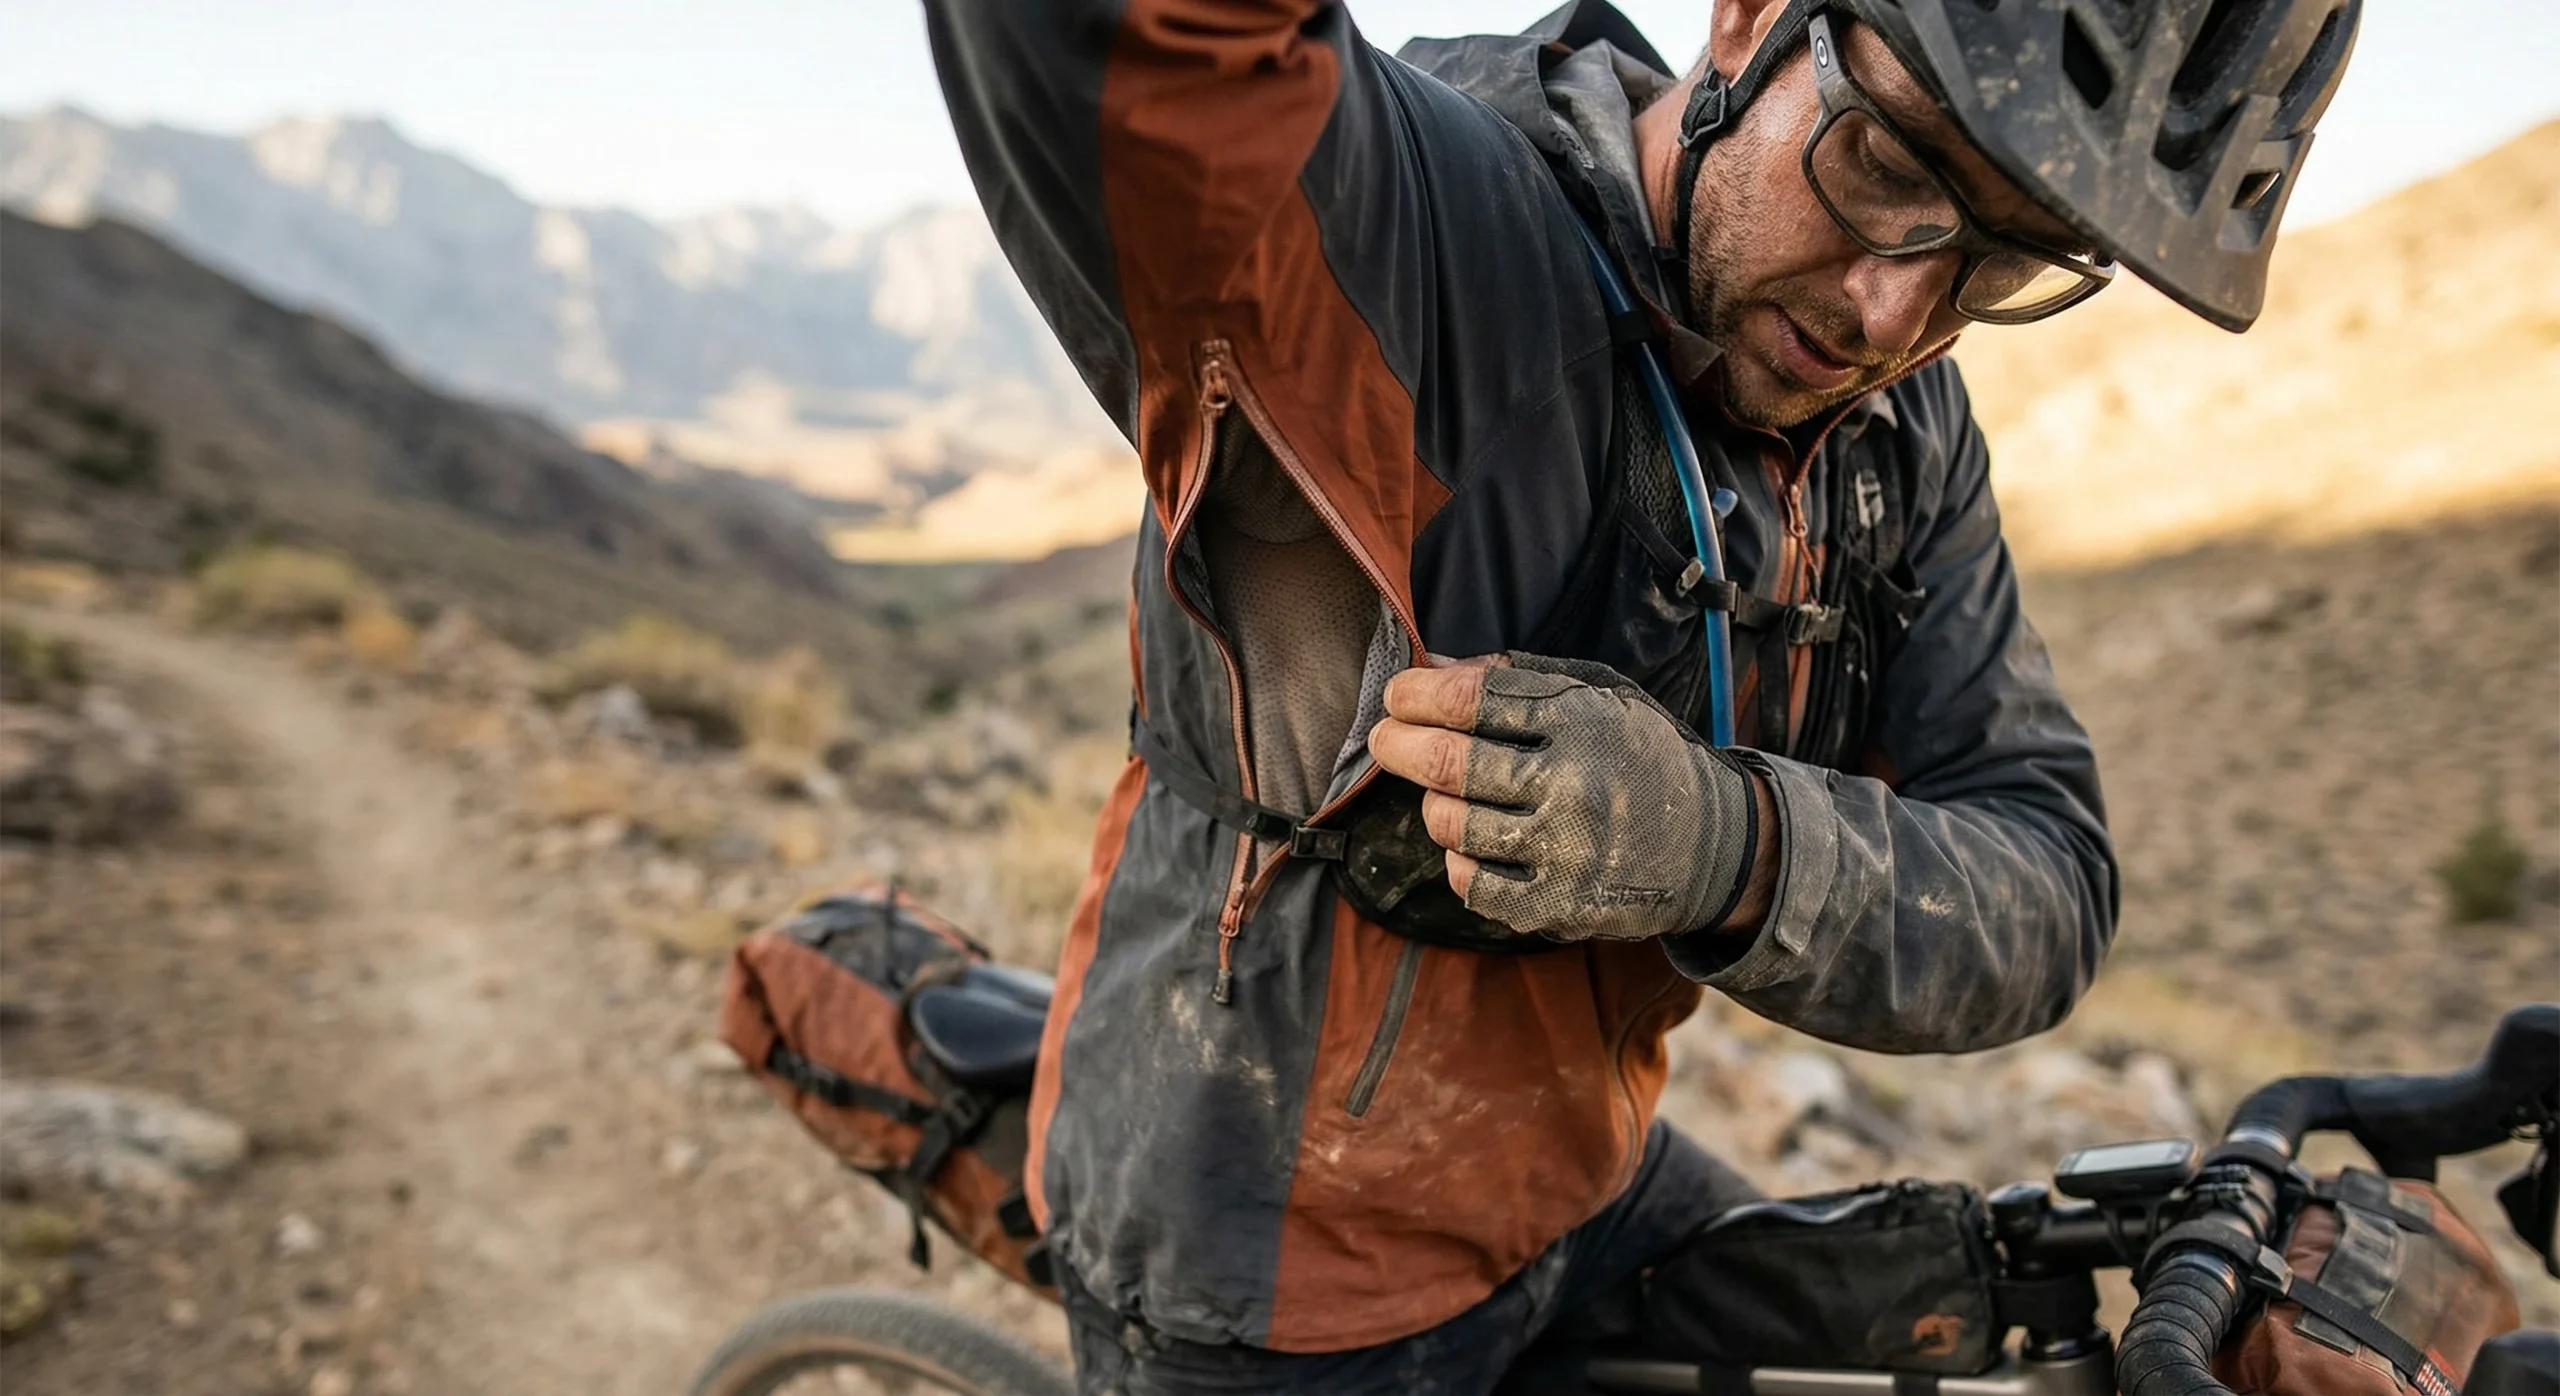
The most common error in wet weather bikepacking is over-layering while riding. High-intensity cycling generates significant body heat; if that heat is trapped by a non-breathable rain shell, the rider will become soaked from the inside out via perspiration. This phenomenon is known as “wetting out” from within.
- The Moving Layer: When riding, use a high-breathability shell with mechanical vents (pit zips). The goal is to remain “comfortably cool” rather than warm.
- The Static Layer: Immediately upon stopping for camp or a mechanical repair, add a high-loft synthetic mid-layer. This prevents the rapid cooling that leads to hypothermia.
- Fabric Choice: Never use cotton base layers. Only merino wool or synthetic polyesters should be used, as they maintain some insulation value even when damp. For more on fabric selection, refer to our 3-Day Adventure Gear List.
2. Recommendation: Outdoor Research Helium Rain Jacket
A reliable rain shell is the cornerstone of any wet weather bikepacking setup. The jacket must be lightweight enough to stow in a Bikepacking Packing Guide system while providing a total barrier against wind and water.
Key Features
- Fabric: Pertex Shield Diamond Fuse 2.5L.
- Weight: 6.3 oz (Men’s Large).
- Design: Fully seam-taped, adjustable hood, chest pocket doubles as a stuff sack.
Pros
- Incredibly packable; occupies minimal space in a frame bag.
- Exceptional wind-blocking capabilities for high-alpine descents.
- Durable face fabric resists abrasion from trail brush.
Cons
- Lacks pit zips for maximum breathability during steep climbs.
- Minimalist fit can make layering over a puffy jacket difficult.
Check Price on Amazon: Outdoor Research Helium Rain Jacket

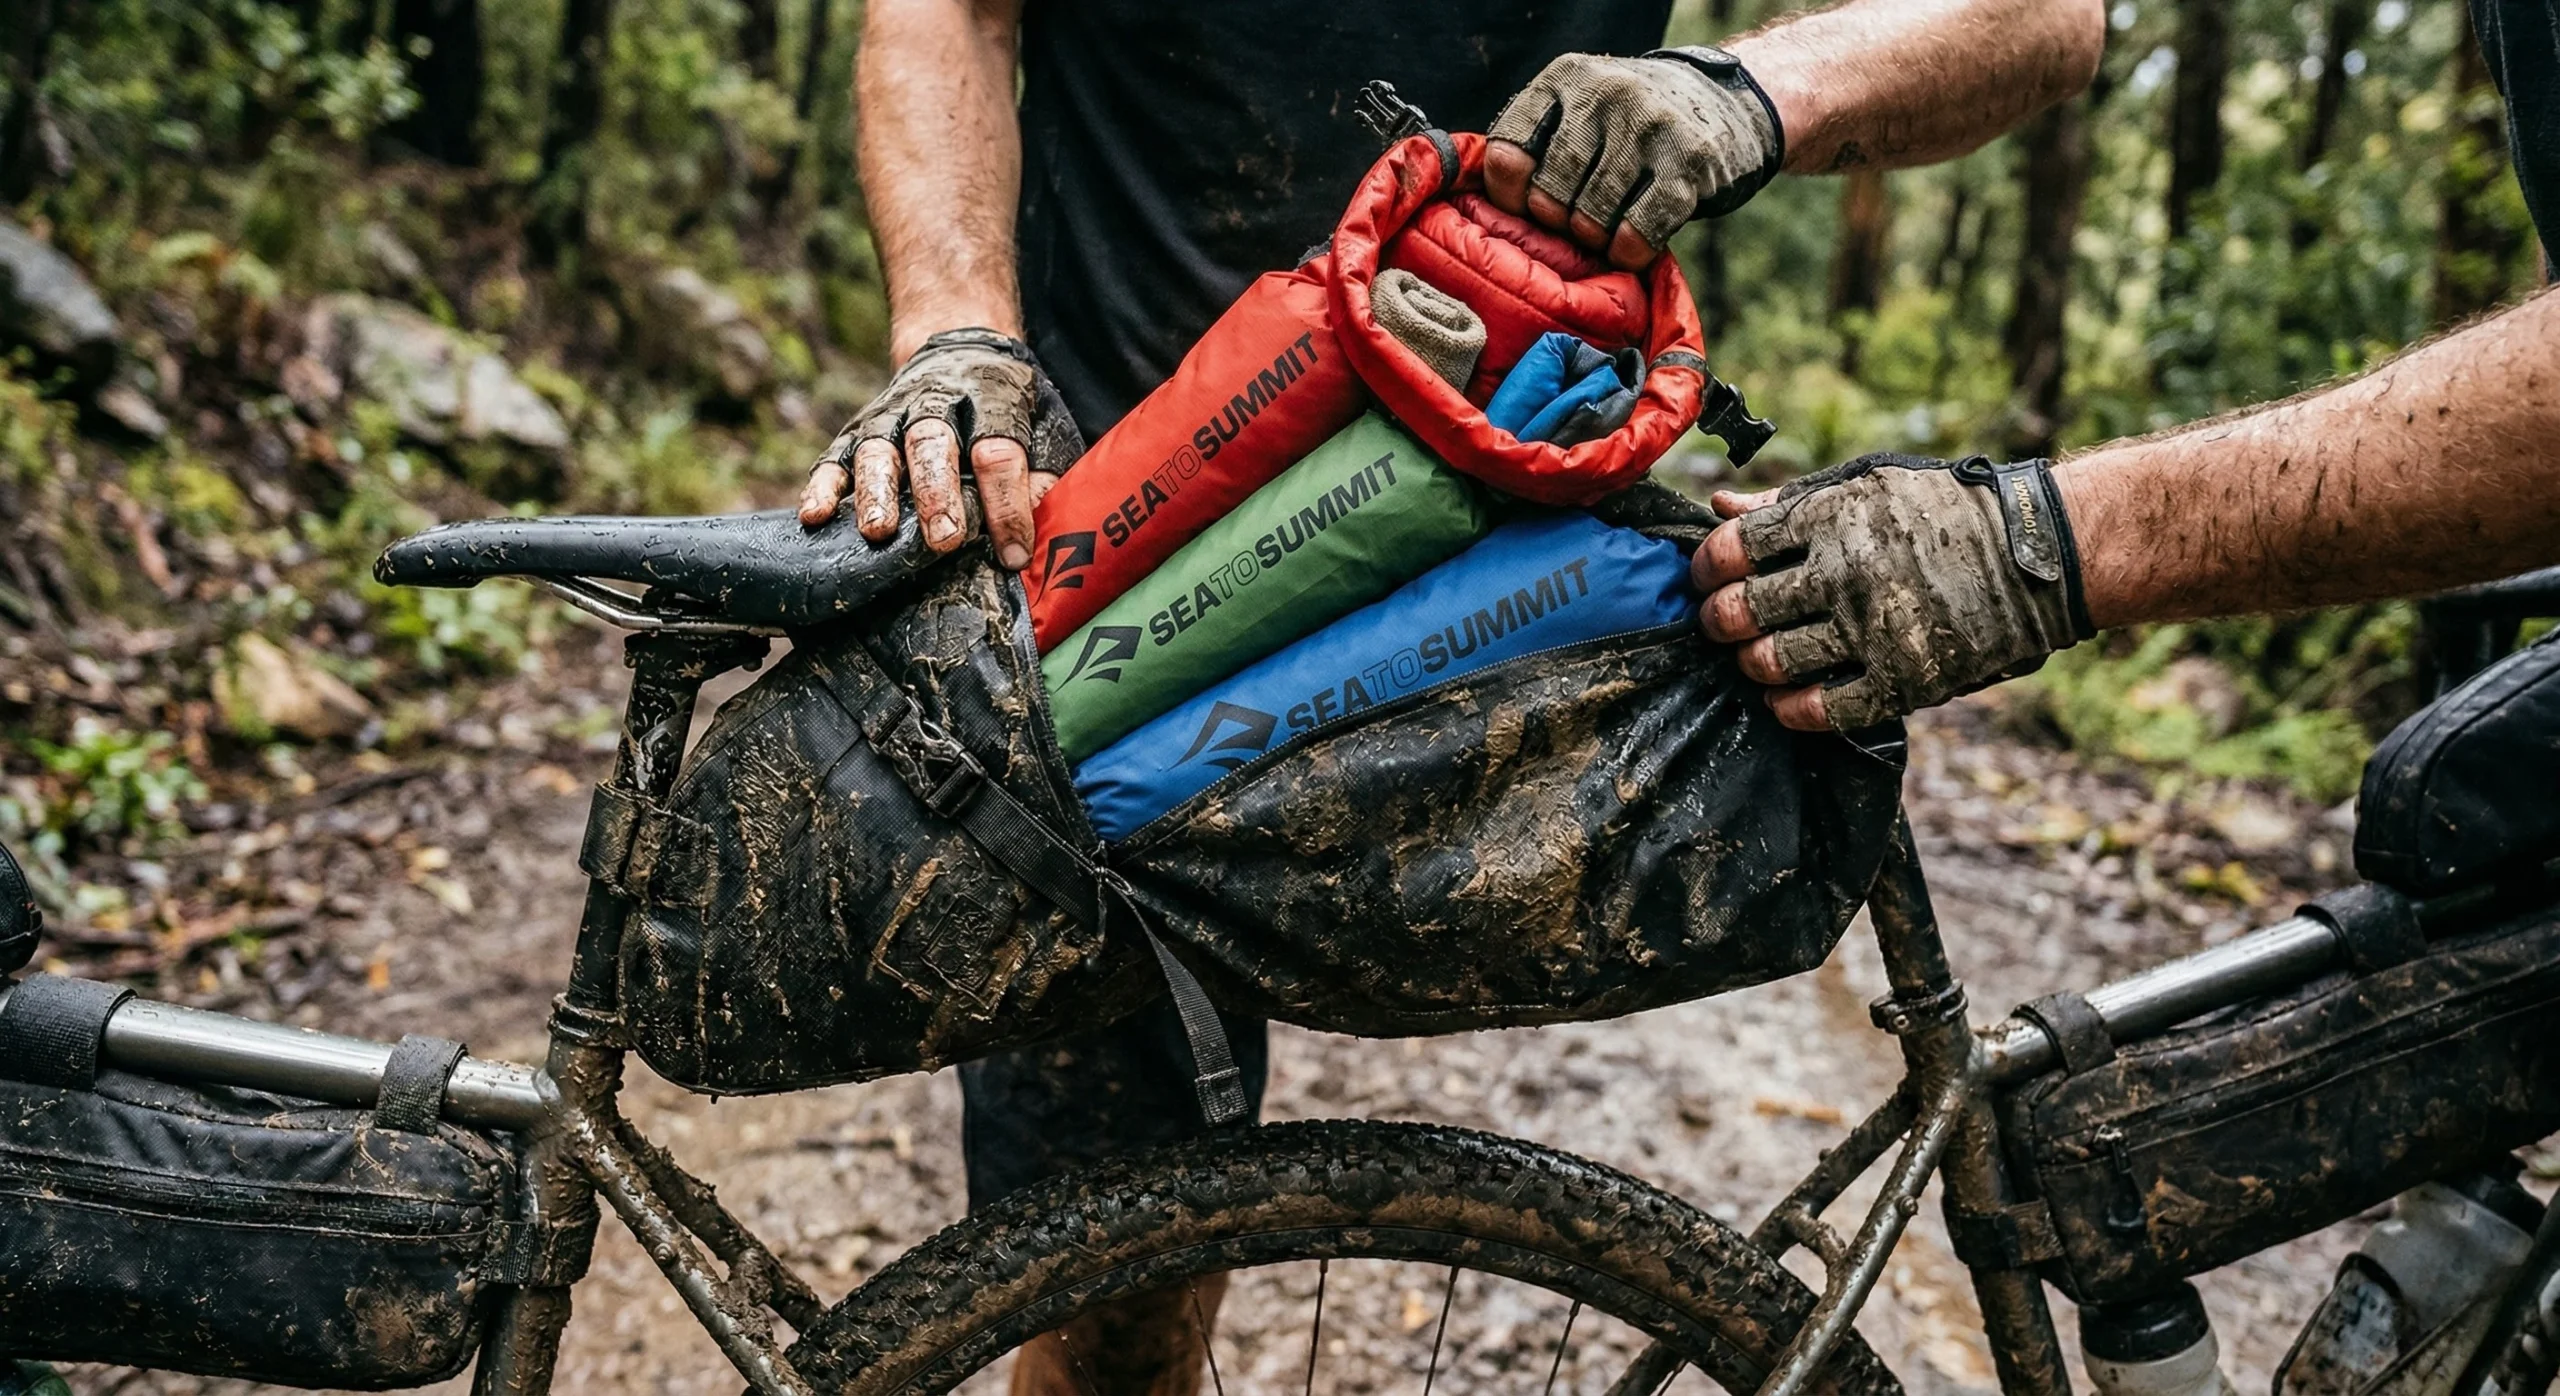
3. Redundant Gear Protection: The “Double-Bag” Rule
Relying solely on the “waterproof” rating of your bikepacking bags is a high-risk strategy. High-frequency vibrations and seam stress can cause even premium bags to develop micro-leaks during a prolonged storm. Wet weather bikepacking requires a redundant system.
- Primary Barrier: The outer bikepacking bag (Seat Pack or Handlebar Roll).
- Secondary Barrier: A lightweight, roll-top dry bag or a heavy-duty trash compactor bag used as an internal liner.
- The Golden Rule: If it must stay dry (sleeping bag, electronics, dry socks), it must be double-bagged. This redundancy is a core pillar of our Solo Safety Tips.
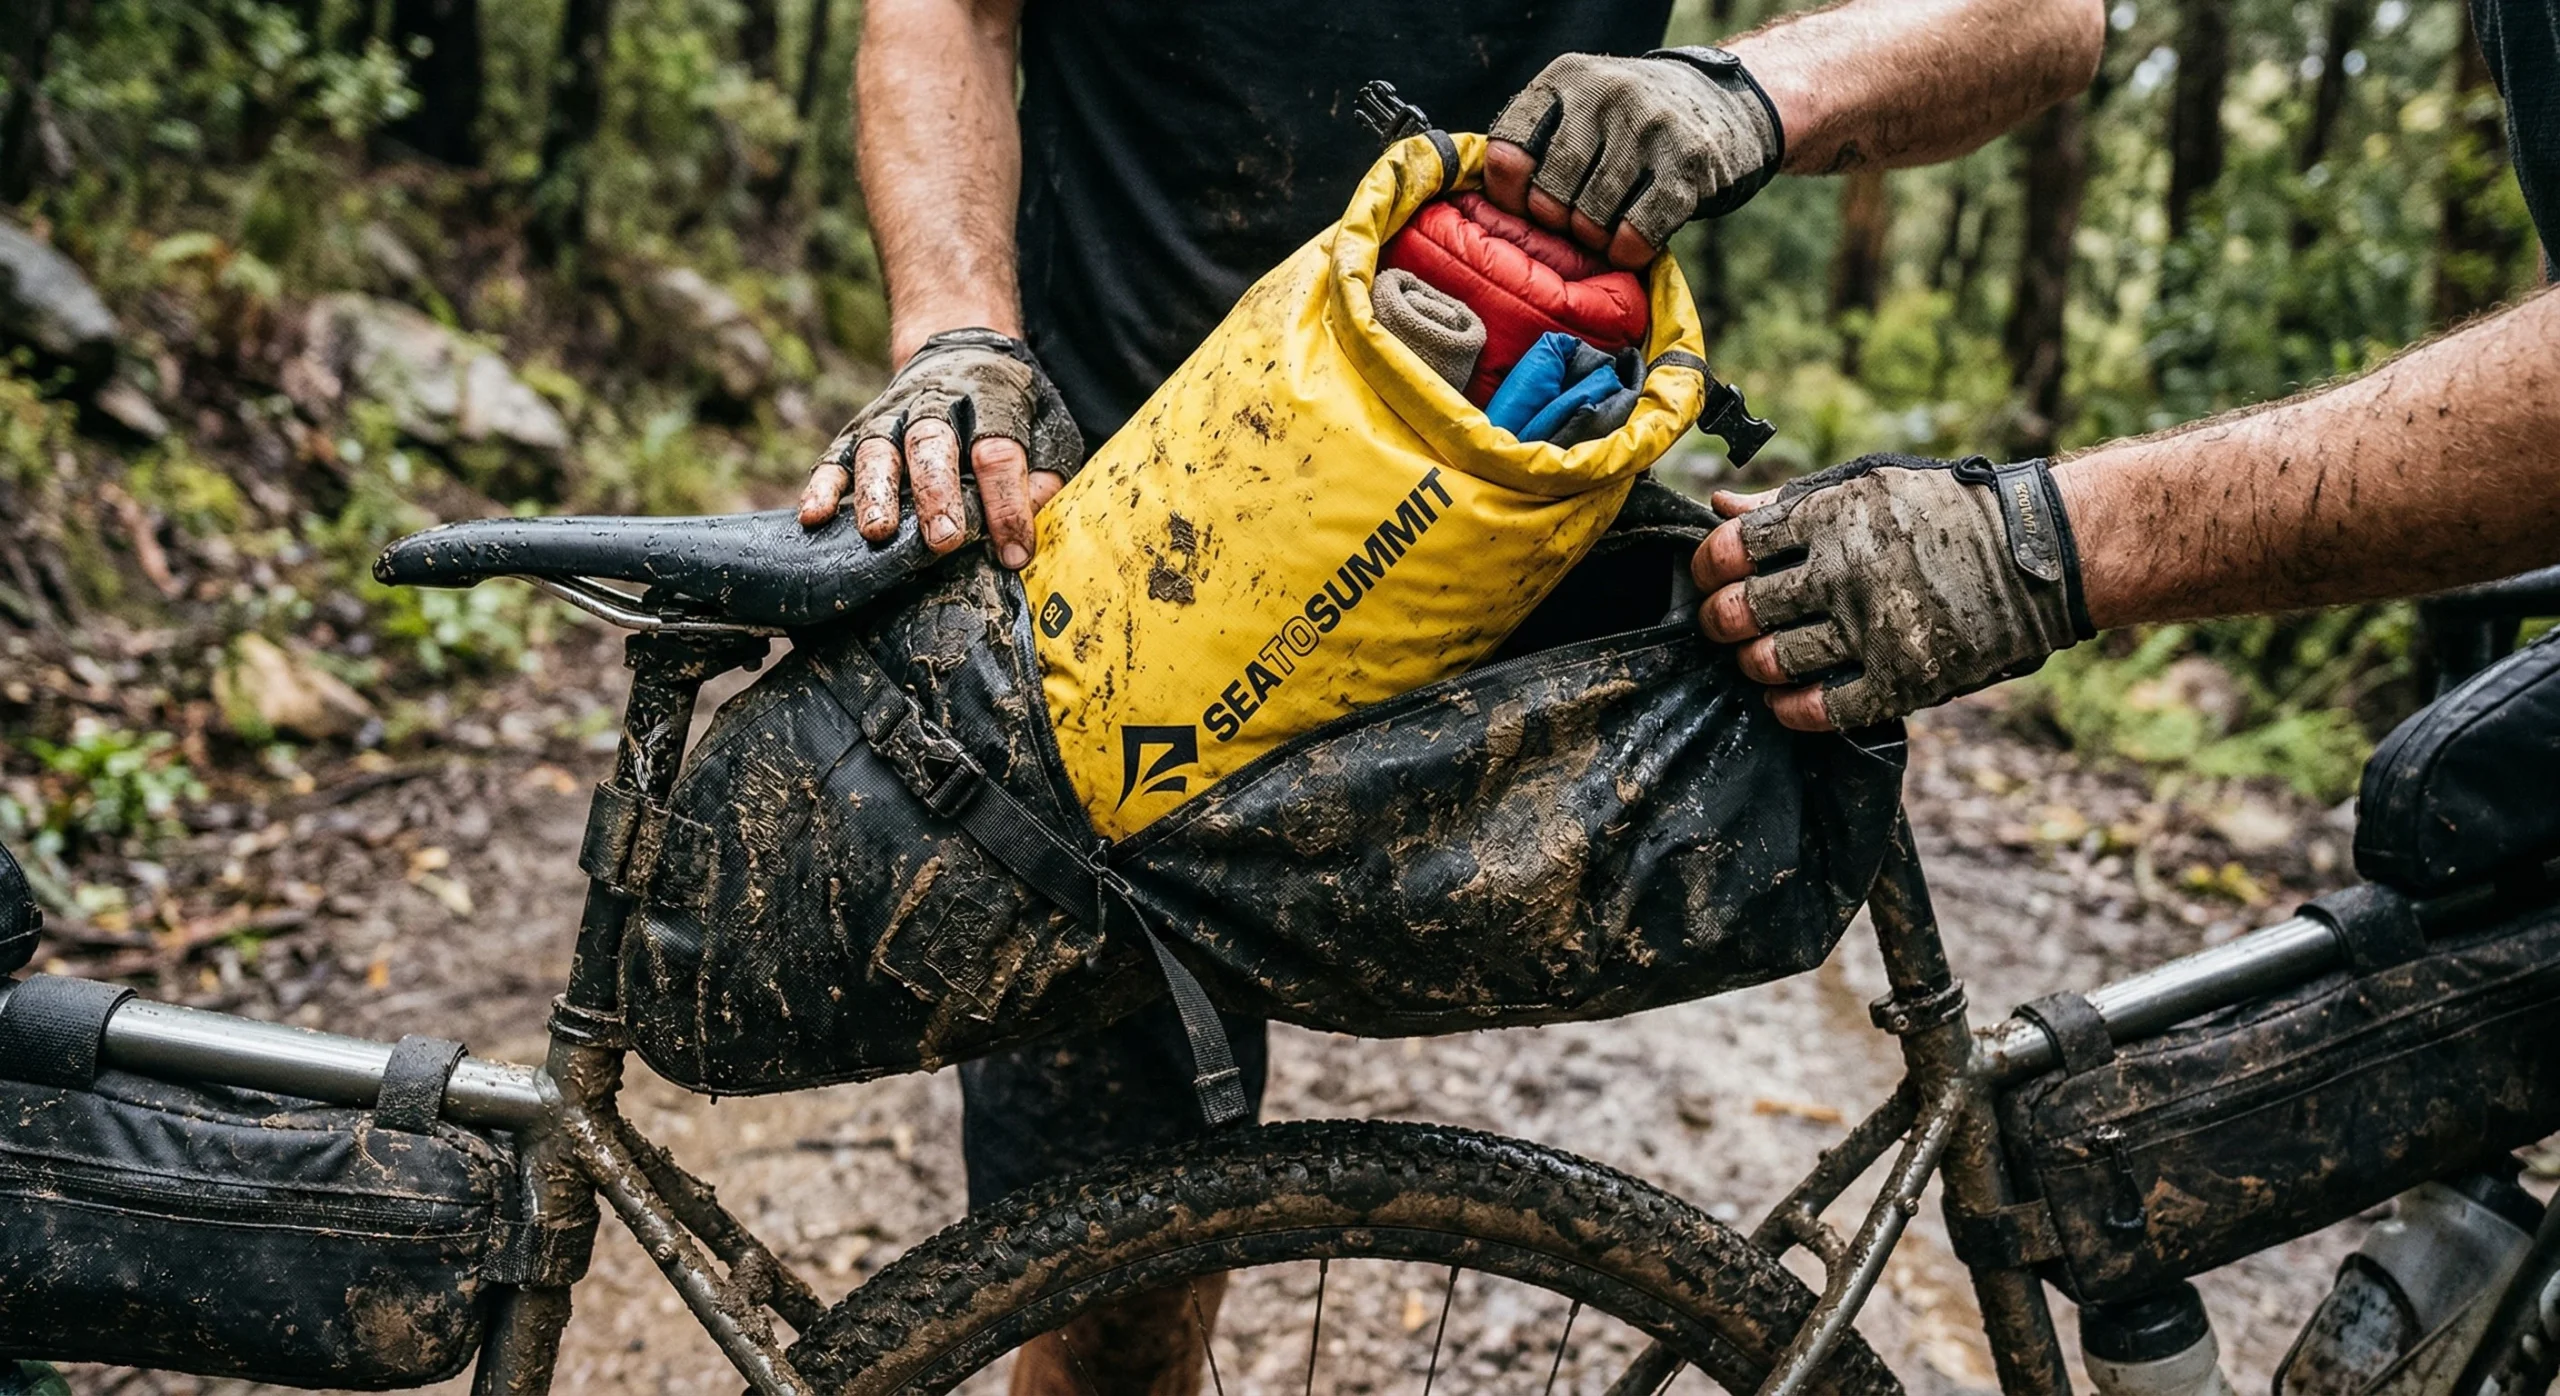
4. Recommendation: Sea to Summit Ultra-Sil Dry Sacks
For internal organization and moisture isolation, these dry sacks are the industry standard for 2026 adventures. They provide the necessary second layer of protection without adding significant weight to the Bikepacking Bag.
Key Features
- Material: 30D Siliconized Cordura nylon.
- Closure: Hypalon roll-top with a non-wicking strip.
- Variety: Available in sizes from 1L to 35L.
Pros
- Translucent fabric allows the rider to see contents without opening.
- Extremely low weight (less than 1oz for smaller sizes).
- Slippery surface makes them easy to slide into tight frame bags.
Cons
- Not intended for submersion (river crossings require a heavier PVC bag).
- Thin fabric can be punctured by sharp tools or stove edges.
Check Price on Amazon: Sea to Summit Ultra-Sil Dry Sacks
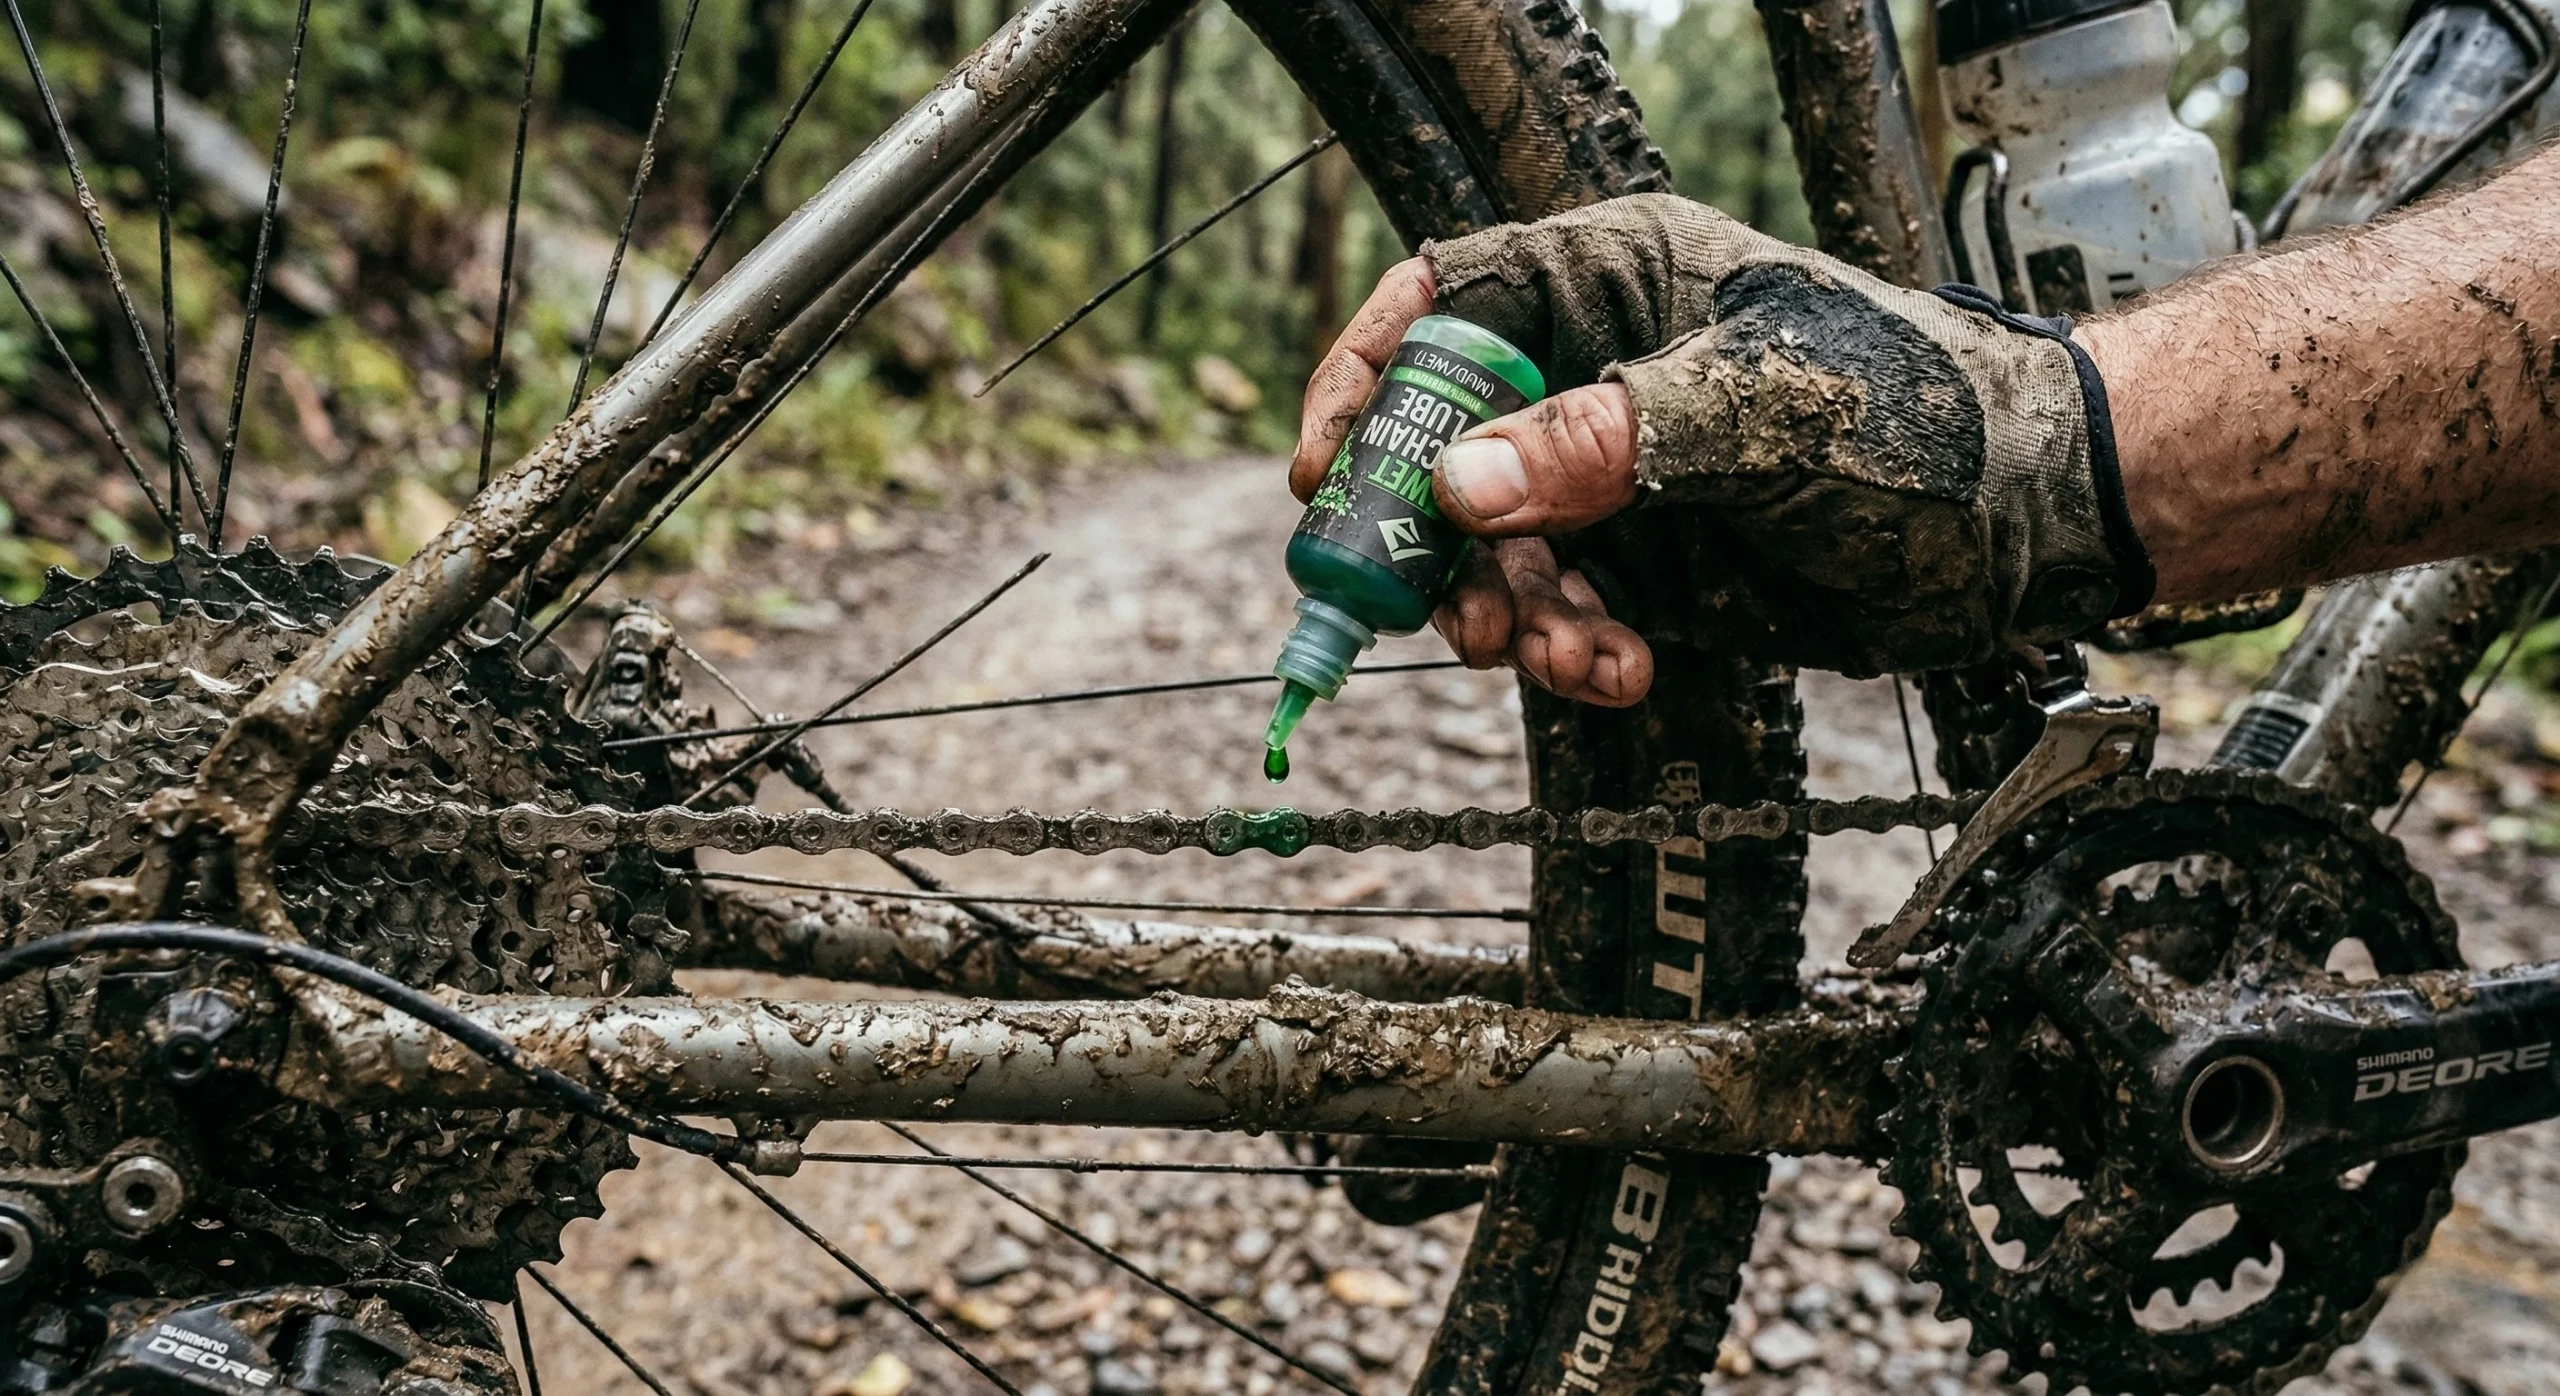
5. Drivetrain Maintenance in Wet and Gritty Conditions
Rain accelerates the wear of your bicycle’s moving parts. Wet roads and trails kick up a “grinding paste” of sand, silt, and water that can destroy a chain in a single 50-mile ride. Maintaining mechanical integrity is a primary safety protocol.
- Wet-Weather Lube: Use a dedicated “Wet Lube” (heavy oil-based) rather than a “Dry Lube” (wax-based). Wet lubes are resistant to being washed away by puddles.
- Daily Cleaning: At the end of every rainy day, wipe the chain down with a rag and re-apply lubricant. This prevents the “creaking” that signals metal-on-metal wear.
- Pro Tip: Carry a small 1oz bottle of lube in your tool roll, as discussed in our Mechanical Repair Guide. A well-lubricated bike is essential for managing Difficult Routes.
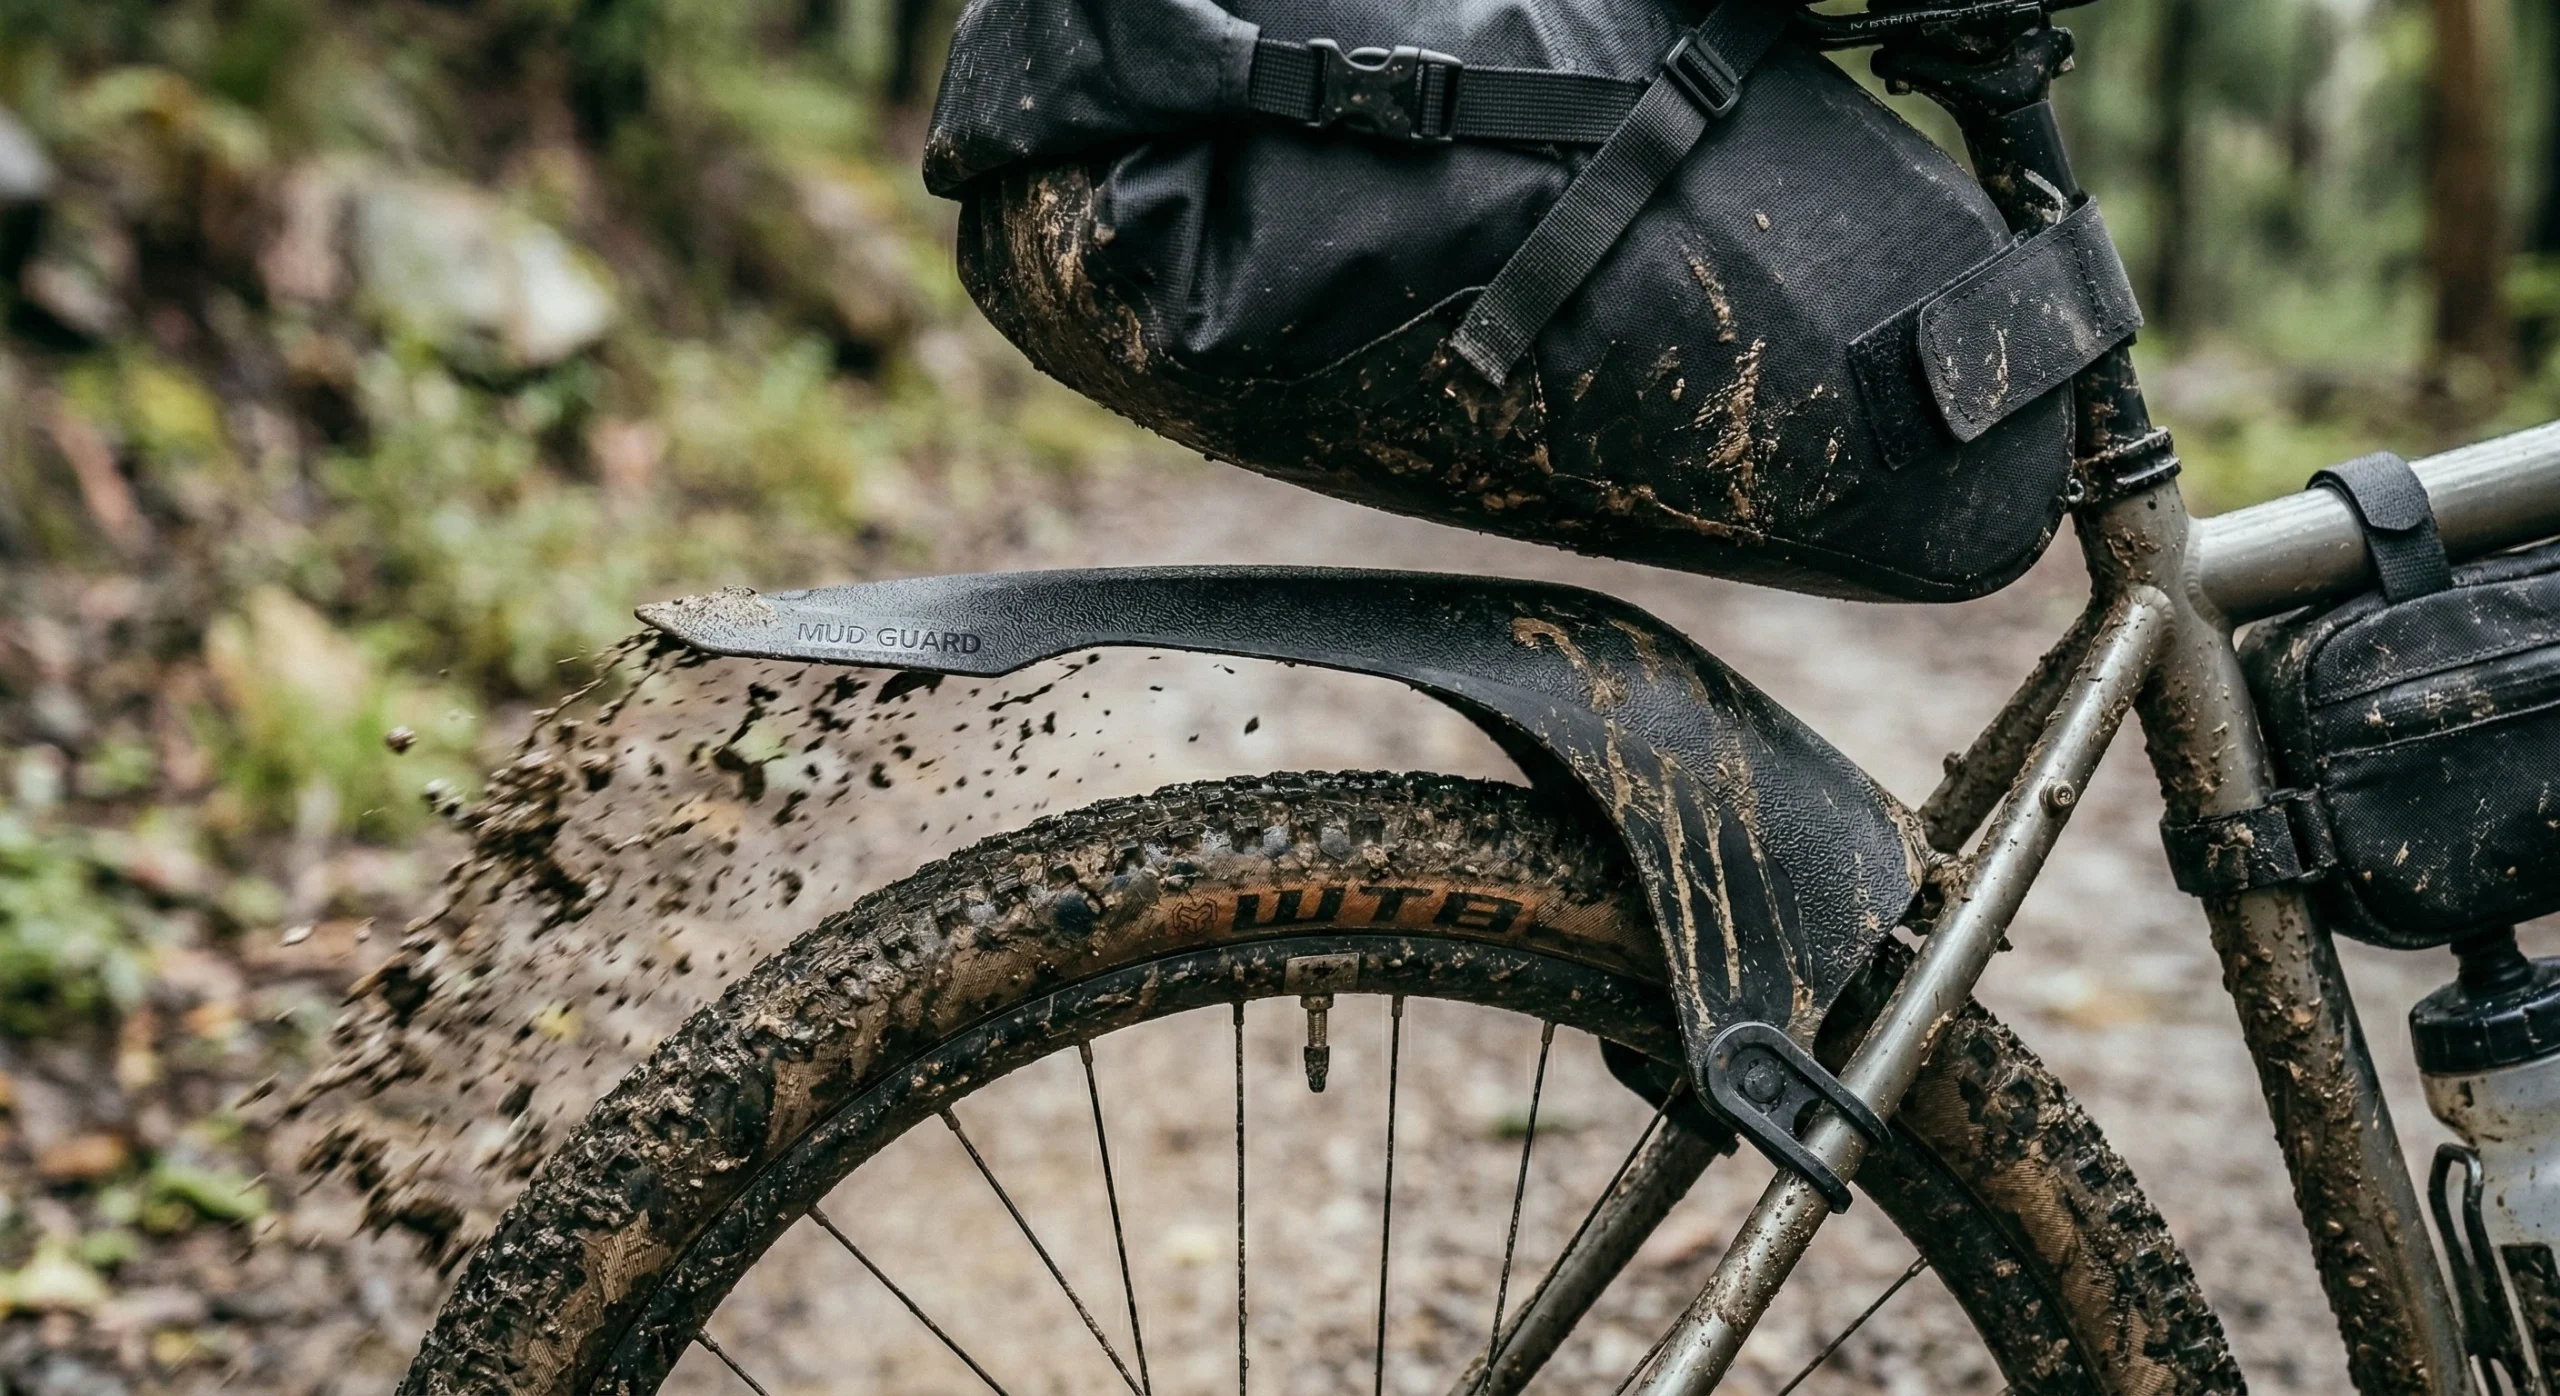
6. Managing the “Ground-Spray” with Technical Fenders
While a rain jacket protects you from the sky, fenders protect you from the ground. Ground-spray from the tires is often more saturated with grit and chemicals than pure rain. Wet weather bikepacking setups benefit significantly from minimalist, lightweight fenders.
- Rear Fender: Prevents the “skunk stripe” of mud on your back and protects the seat pack from becoming saturated.
- Front Fender: Protects your face and eyes from mud, which is a critical safety factor when navigating Technical Singletrack (Internal Link).
- Recommendation: The Ass Savers Win Wing is a 2026 favorite for gravel bikes because it is clip-on and weighs less than 70 grams.
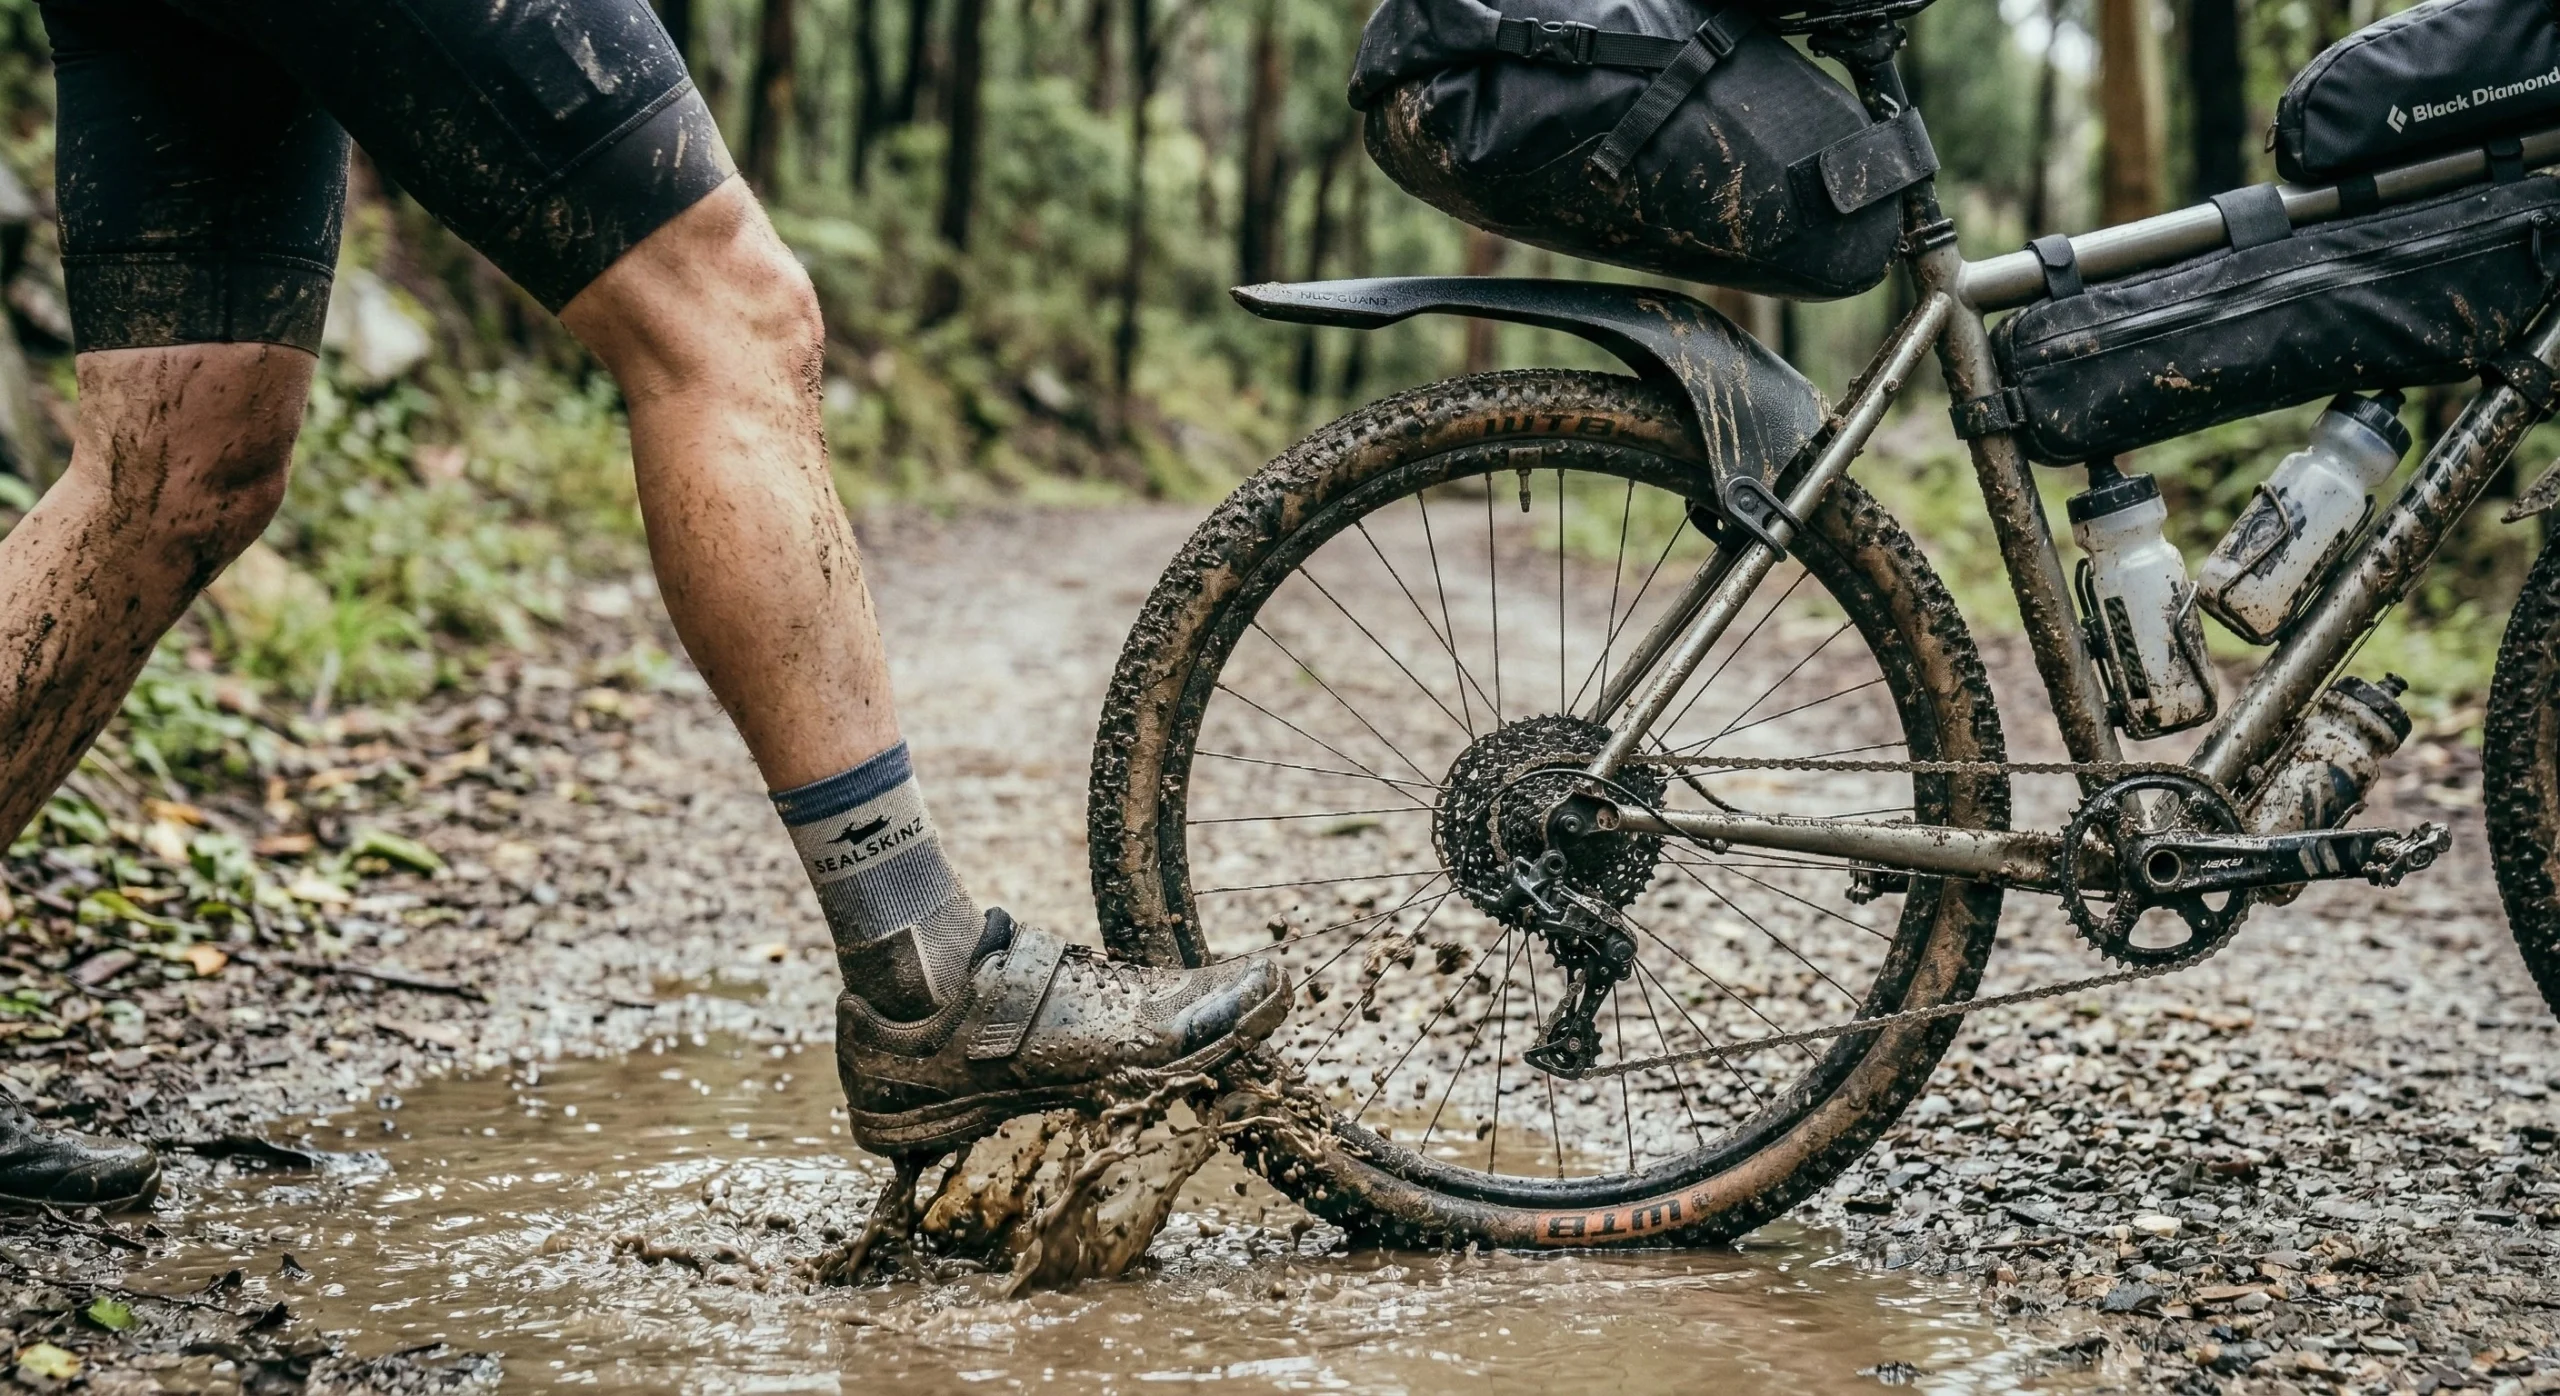
7. Hand and Foot Thermal Isolation
In wet weather bikepacking, extremities lose heat faster than the core. Once hands become numb, the rider loses the ability to shift gears or operate brakes safely. This loss of control is a major hazard on Rugged Terrain.
- Waterproof Socks: Using a membrane-based sock (e.g., SealSkinz) keeps the feet dry even if the shoes become saturated. This prevents the skin maceration and blisters common in multi-day rain.
- Latex Glove Liner: In an emergency, wearing a pair of nitrile or latex gloves inside your cycling gloves provides a 100% waterproof barrier that traps heat.
- Handlebar Pogies: For extreme cold and rain, pogies (insulated bar covers) allow the rider to use thinner gloves, maintaining better tactile feedback on the levers.
8. Electronics and Navigational Security
Water is the primary enemy of digital navigation. Even “waterproof” smartphones can suffer from “phantom touches” on the screen when wet, making it impossible to follow Bikepacking Routes.
- Dedicated GPS: Use a dedicated GPS unit (Garmin/Wahoo) which uses physical buttons or optimized touchscreens for wet use.
- Charging Safety: Never charge your phone or GPS from a power bank while it is raining. Moisture in the charging port can cause a short circuit, permanently damaging your Navigation Gear.
- Screen Protection: Use a plastic bag or a dedicated “dry case” if you must use a smartphone for primary navigation in a storm.

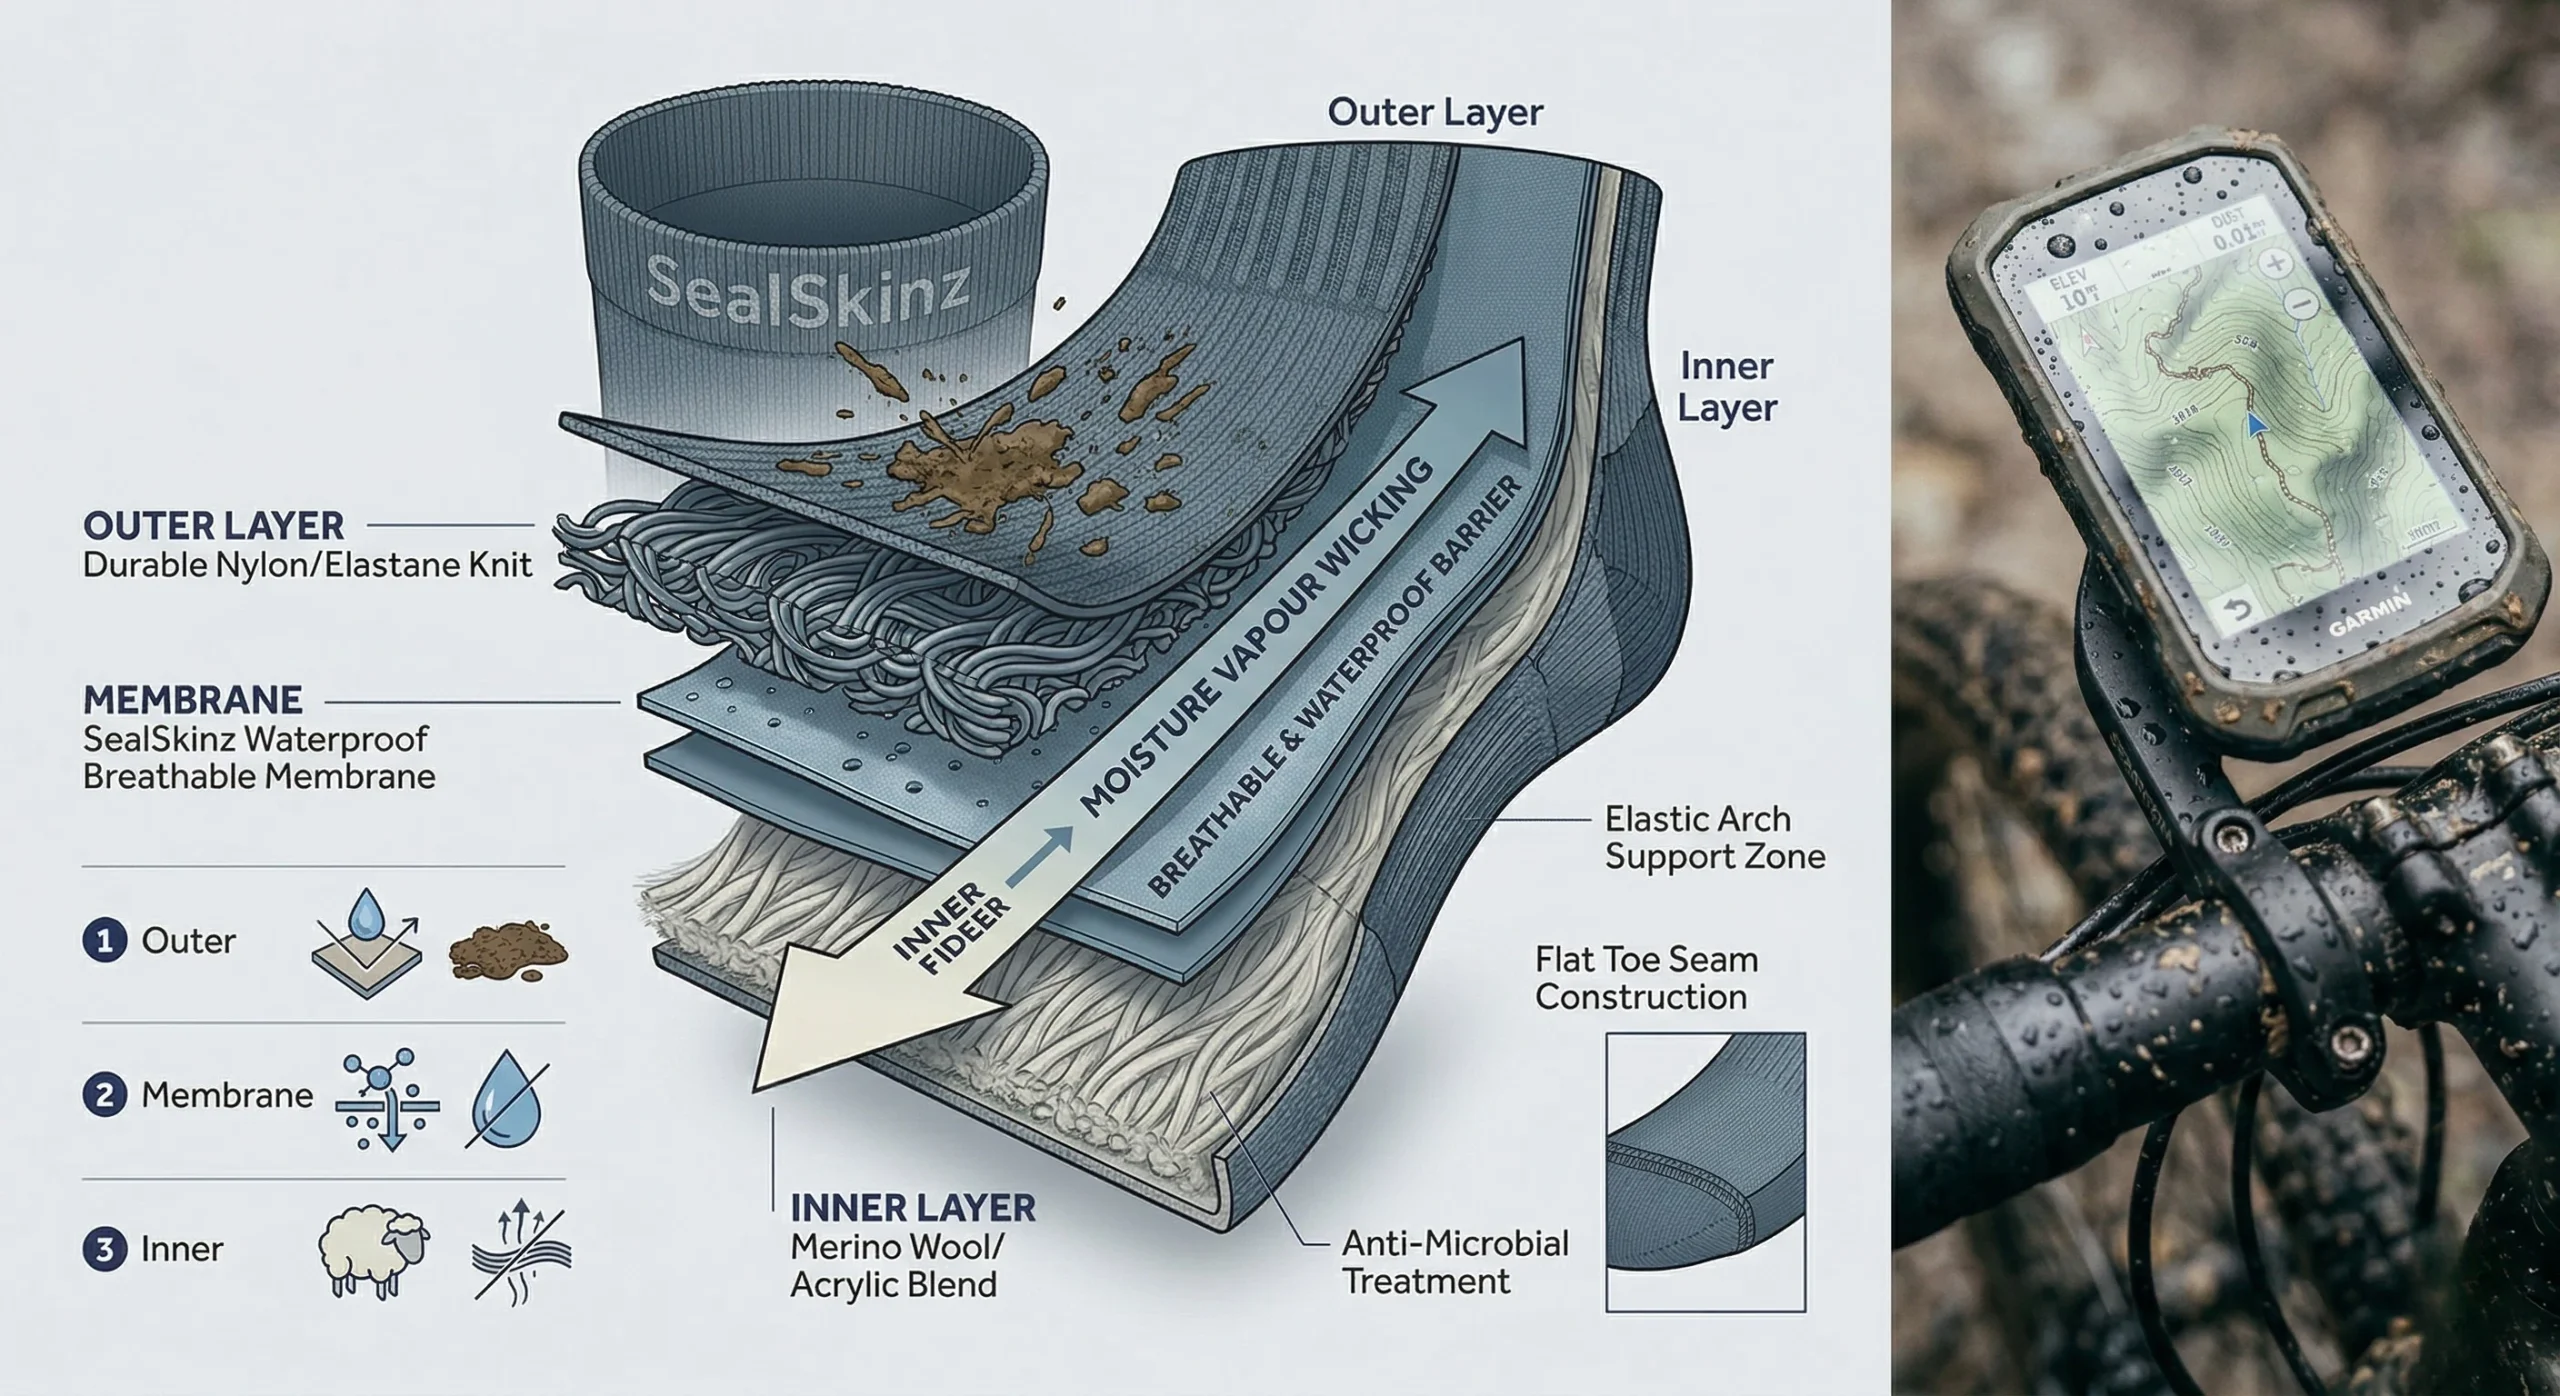
9. Recommendation: SealSkinz Waterproof All-Weather Socks
Keeping feet dry is the difference between a successful expedition and a medical withdrawal. These socks are a technical requirement for any serious wet weather bikepacking mission.
Key Features
- Construction: Three-layer design with a waterproof hydrophilic membrane.
- Interior: Merino wool lining for moisture control and warmth.
- Stretch: Four-way stretch for a close, non-bunching fit.
Pros
- Truly 100% waterproof and breathable.
- Maintains warmth even if the outer shoe is soaked through.
- Prevents “trench foot” and severe chafing over long durations.
Cons
- Can feel “thick” in tight-fitting performance shoes.
- Takes a long time to dry if the interior becomes wet (e.g., sweat or wading).
Check Price on Amazon: SealSkinz Waterproof Socks
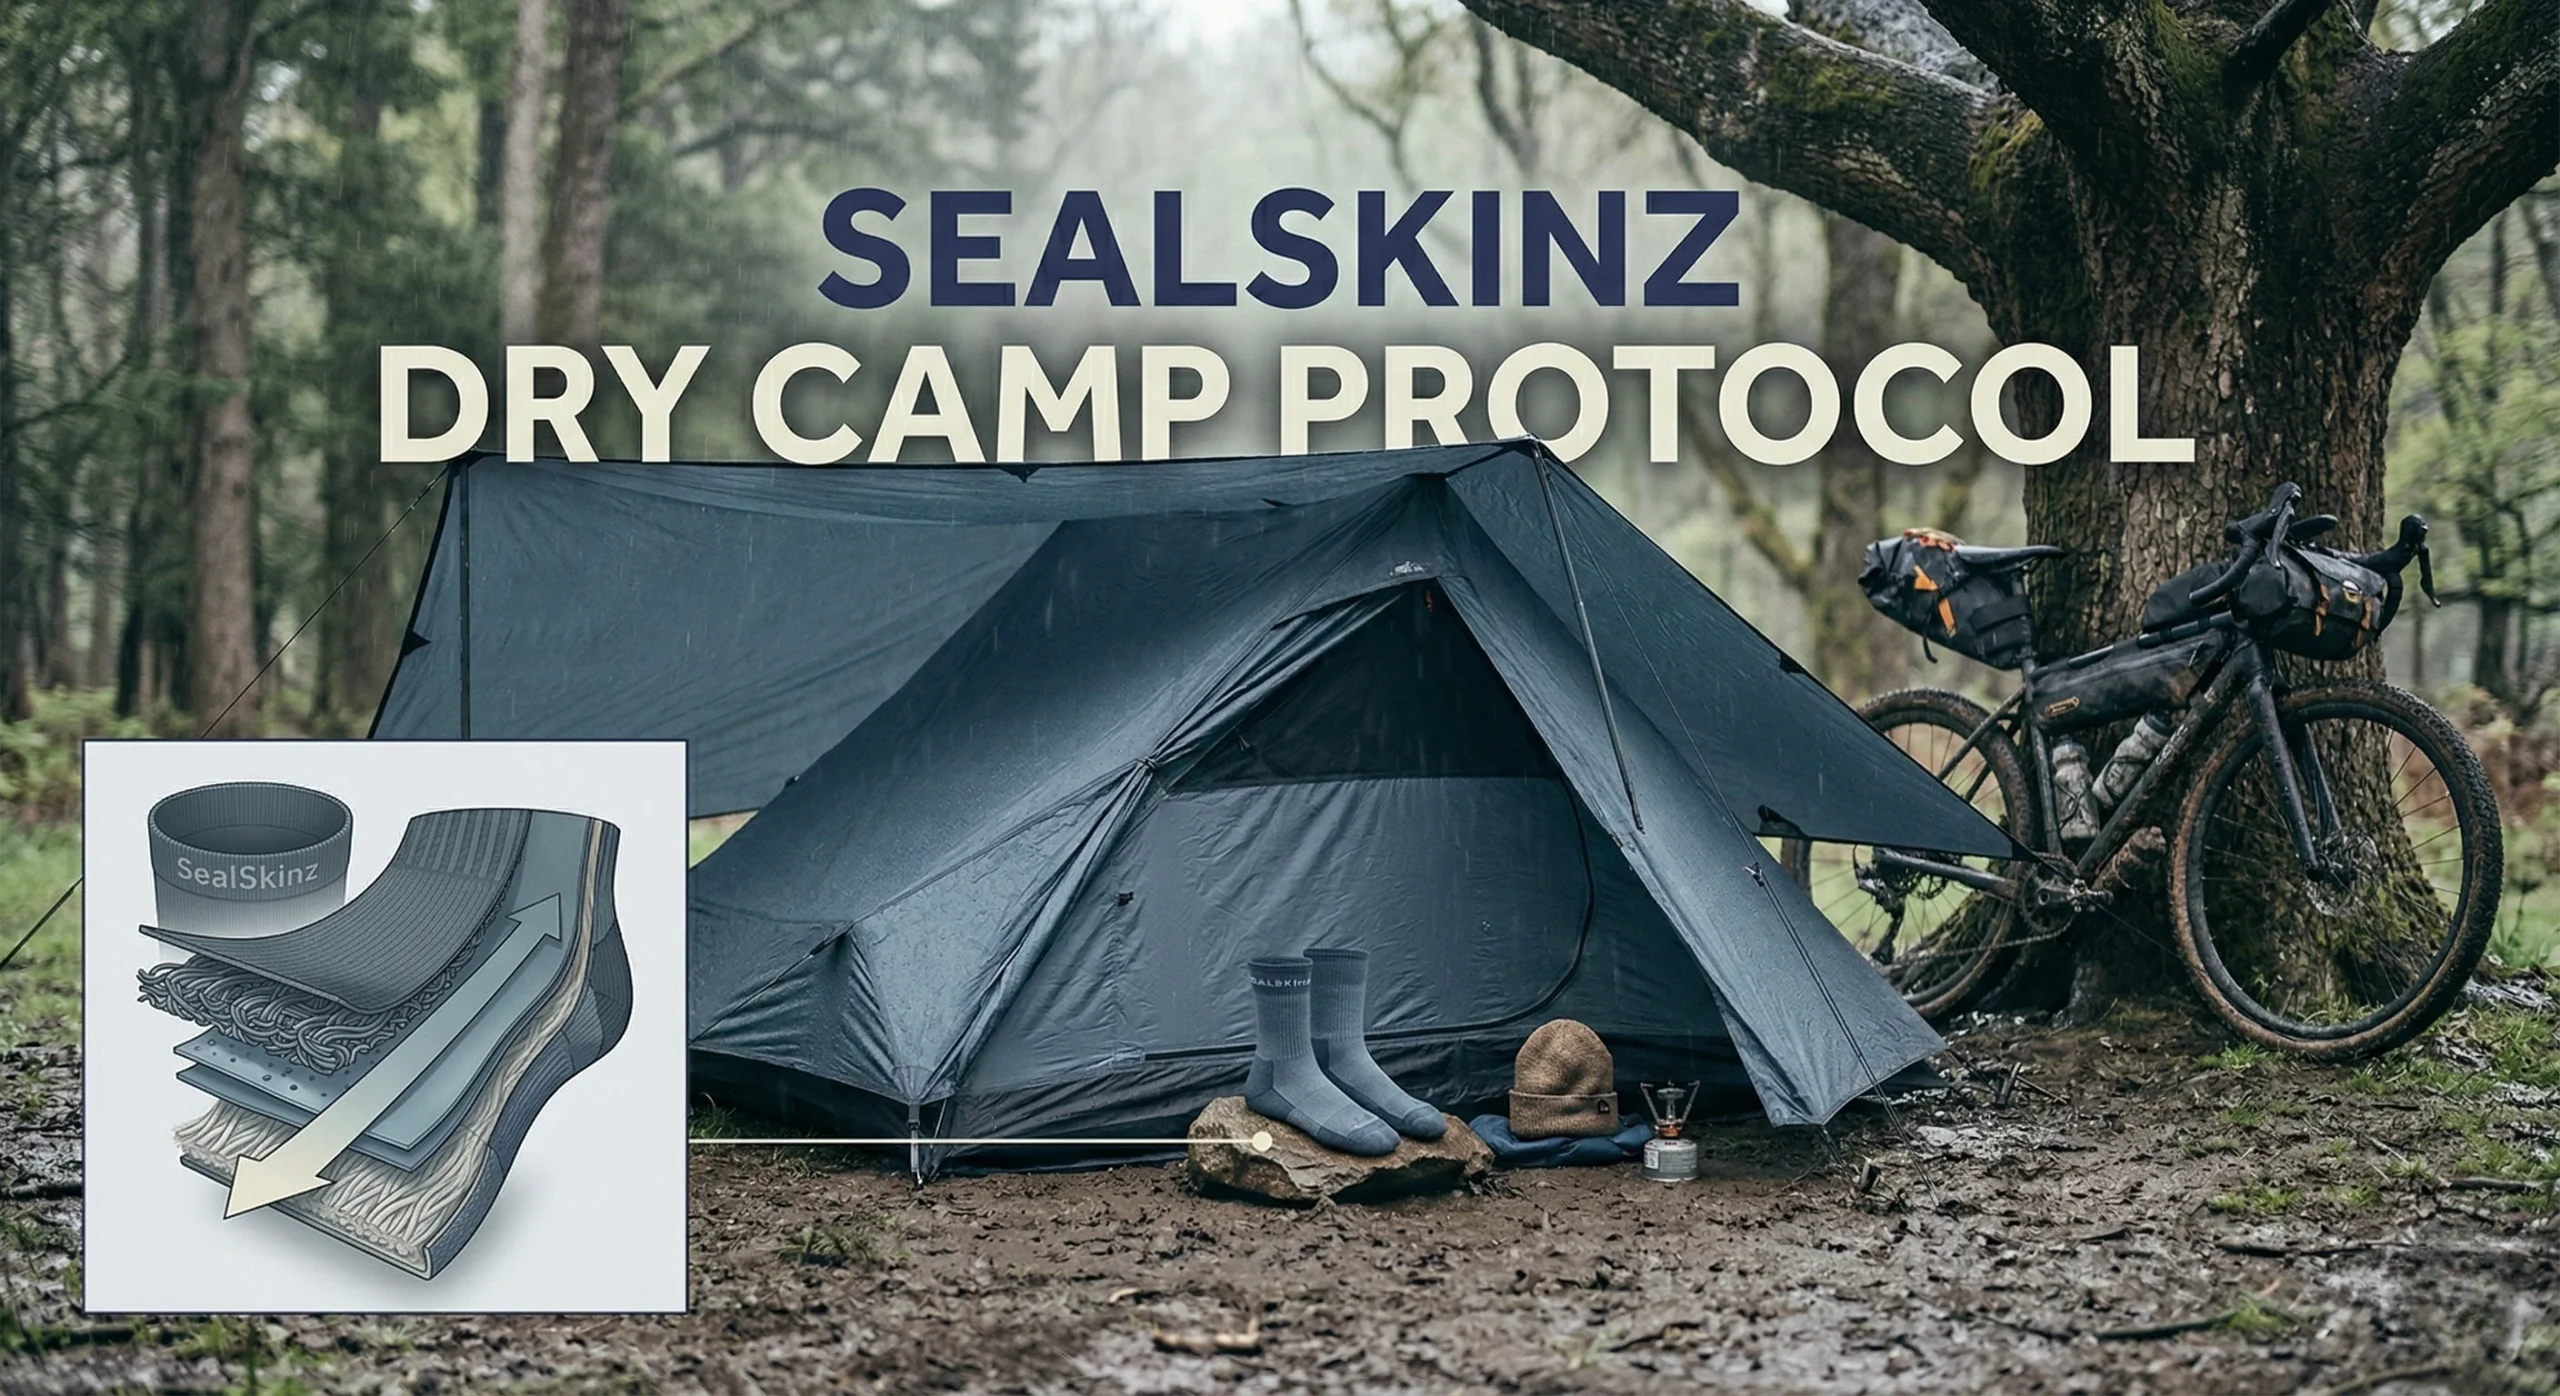
10. Campsite Management: The “Dry Zone” Protocol
The most difficult aspect of wet weather bikepacking is the transition from riding to camping. Once the tent is open, the risk of introducing moisture to the “dry zone” increases exponentially.
- Tarp Integration: If possible, carry a lightweight tarp to create a “porch” area outside your tent. This allows you to remove wet clothing and cook without bringing moisture inside the Bikepacking Sleeping System.
- The Towel Rule: Carry a small, high-absorbency microfiber towel to wipe down the inside of your tent or your body before getting into your sleeping bag.
- Moisture Separation: Store wet items in the “vestibule” of the tent (the area under the fly but outside the mesh body). Never bring a wet rain jacket into the main sleeping area. This discipline is essential for the Leave No Trace ethos of keeping gear contained.
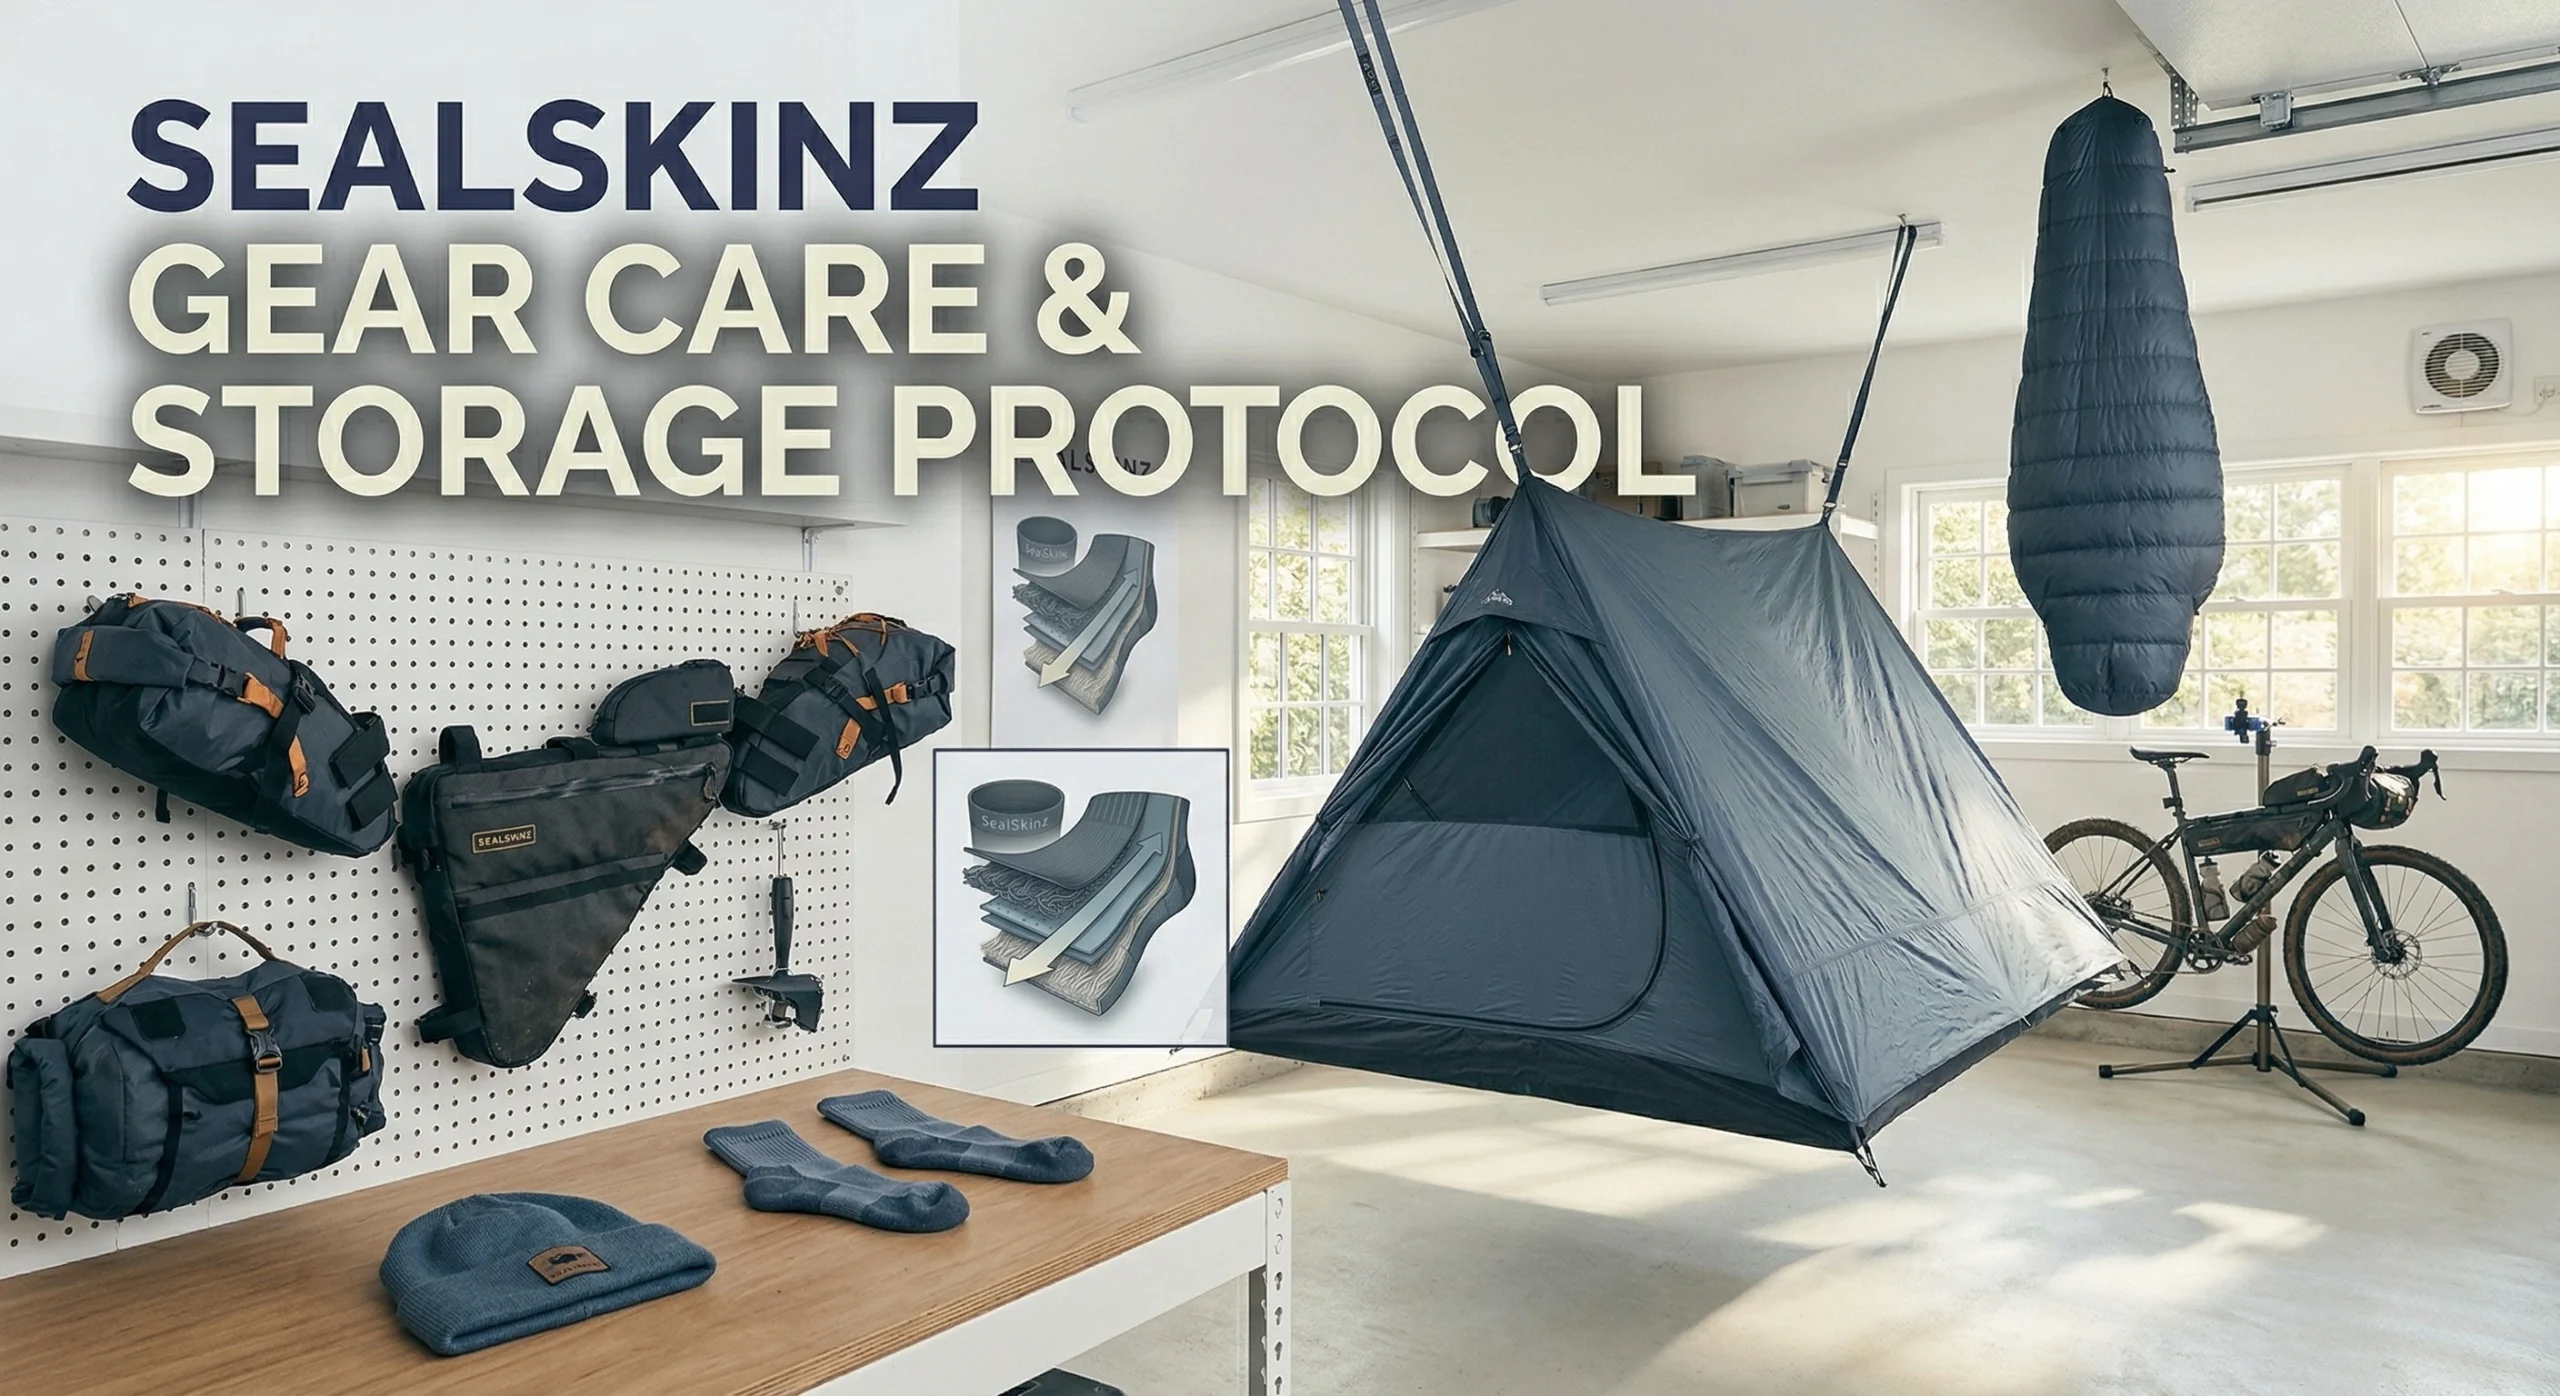
11. Post-Trip Gear Decontamination and Drying
Your mission is not over when you reach the trailhead. Wet weather bikepacking gear will degrade rapidly if stored while damp. Mold can destroy a $500 sleeping quilt in less than a week.
- Total Unpacking: Immediately upon returning home, unpack every single bag. Even if an item feels dry, it has likely absorbed ambient humidity.
- DWR Reactivation: After washing your rain jacket with a technical wash, a short stint in a medium-heat dryer often “reactivates” the Durable Water Repellent (DWR) coating.
- Bag Maintenance: Wipe down the interior of your bikepacking bags with a mild soap to remove the grit and salt that can corrode zippers over time. This is a vital part of Off-Season Maintenance.
Conclusion: Embracing the Storm with Technical Confidence
Mastering wet weather bikepacking transforms the rain from a trip-ending catastrophe into a manageable part of the adventure. By implementing a strict layering protocol (Section 1), utilizing redundant gear protection (Section 3), and maintaining hand and foot warmth (Section 7), any rider can maintain their pace through a multi-day storm. The success of a wet expedition is not measured by staying 100% dry—which is often impossible—but by maintaining the integrity of your core warmth and survival gear.
Remember that gear is only as effective as the Packing Strategy used to organize it. Keep your Mechanical Readiness high and your mental resilience even higher. As you progress from local rail-trails to remote mountain loops, your ability to thrive in the rain will become a source of profound confidence.
The wilderness is waiting, and with the right technical foundation, you are ready to conquer it regardless of the forecast. Treat the environment with respect, pack with purpose, and embrace the unique rhythm of life on two wheels. The transition from a fair-weather rider to a backcountry expert is a path paved with preparation. Step out with a plan, respect your machine’s limits, and enjoy the unparalleled liberation of the unpaved world.
[Image Prompt 14: A close-up of a hand clicking a waterproof camera into a mount, ready to document the rainy journey.] [Image Prompt 15: A 3D render of a bicycle frame with “Wet Weather Zones” highlighted in blue (fenders, bags, drivetrain).] [Image Prompt 16: A macro shot of a roll-top closure being cinched tight, showing the airtight seal.] [Image Prompt 17: A photo of a rider’s mud-splattered face, looking focused and determined through a pair of clear cycling glasses.] [Image Prompt 18: A hand using a microfiber towel to wipe condensation from the inside of a tent roof.] [Image Prompt 19: A sunset shot of a bike leaned against a rock in a damp, emerald-green valley.] [Image Prompt 20: A close-up of a “Wet Lube” bottle sitting next to a multi-tool on a damp rock.