Master portable power for bikepacking with our technical guide. Compare the 11 best solar chargers and power banks for self-sufficient wilderness travel.
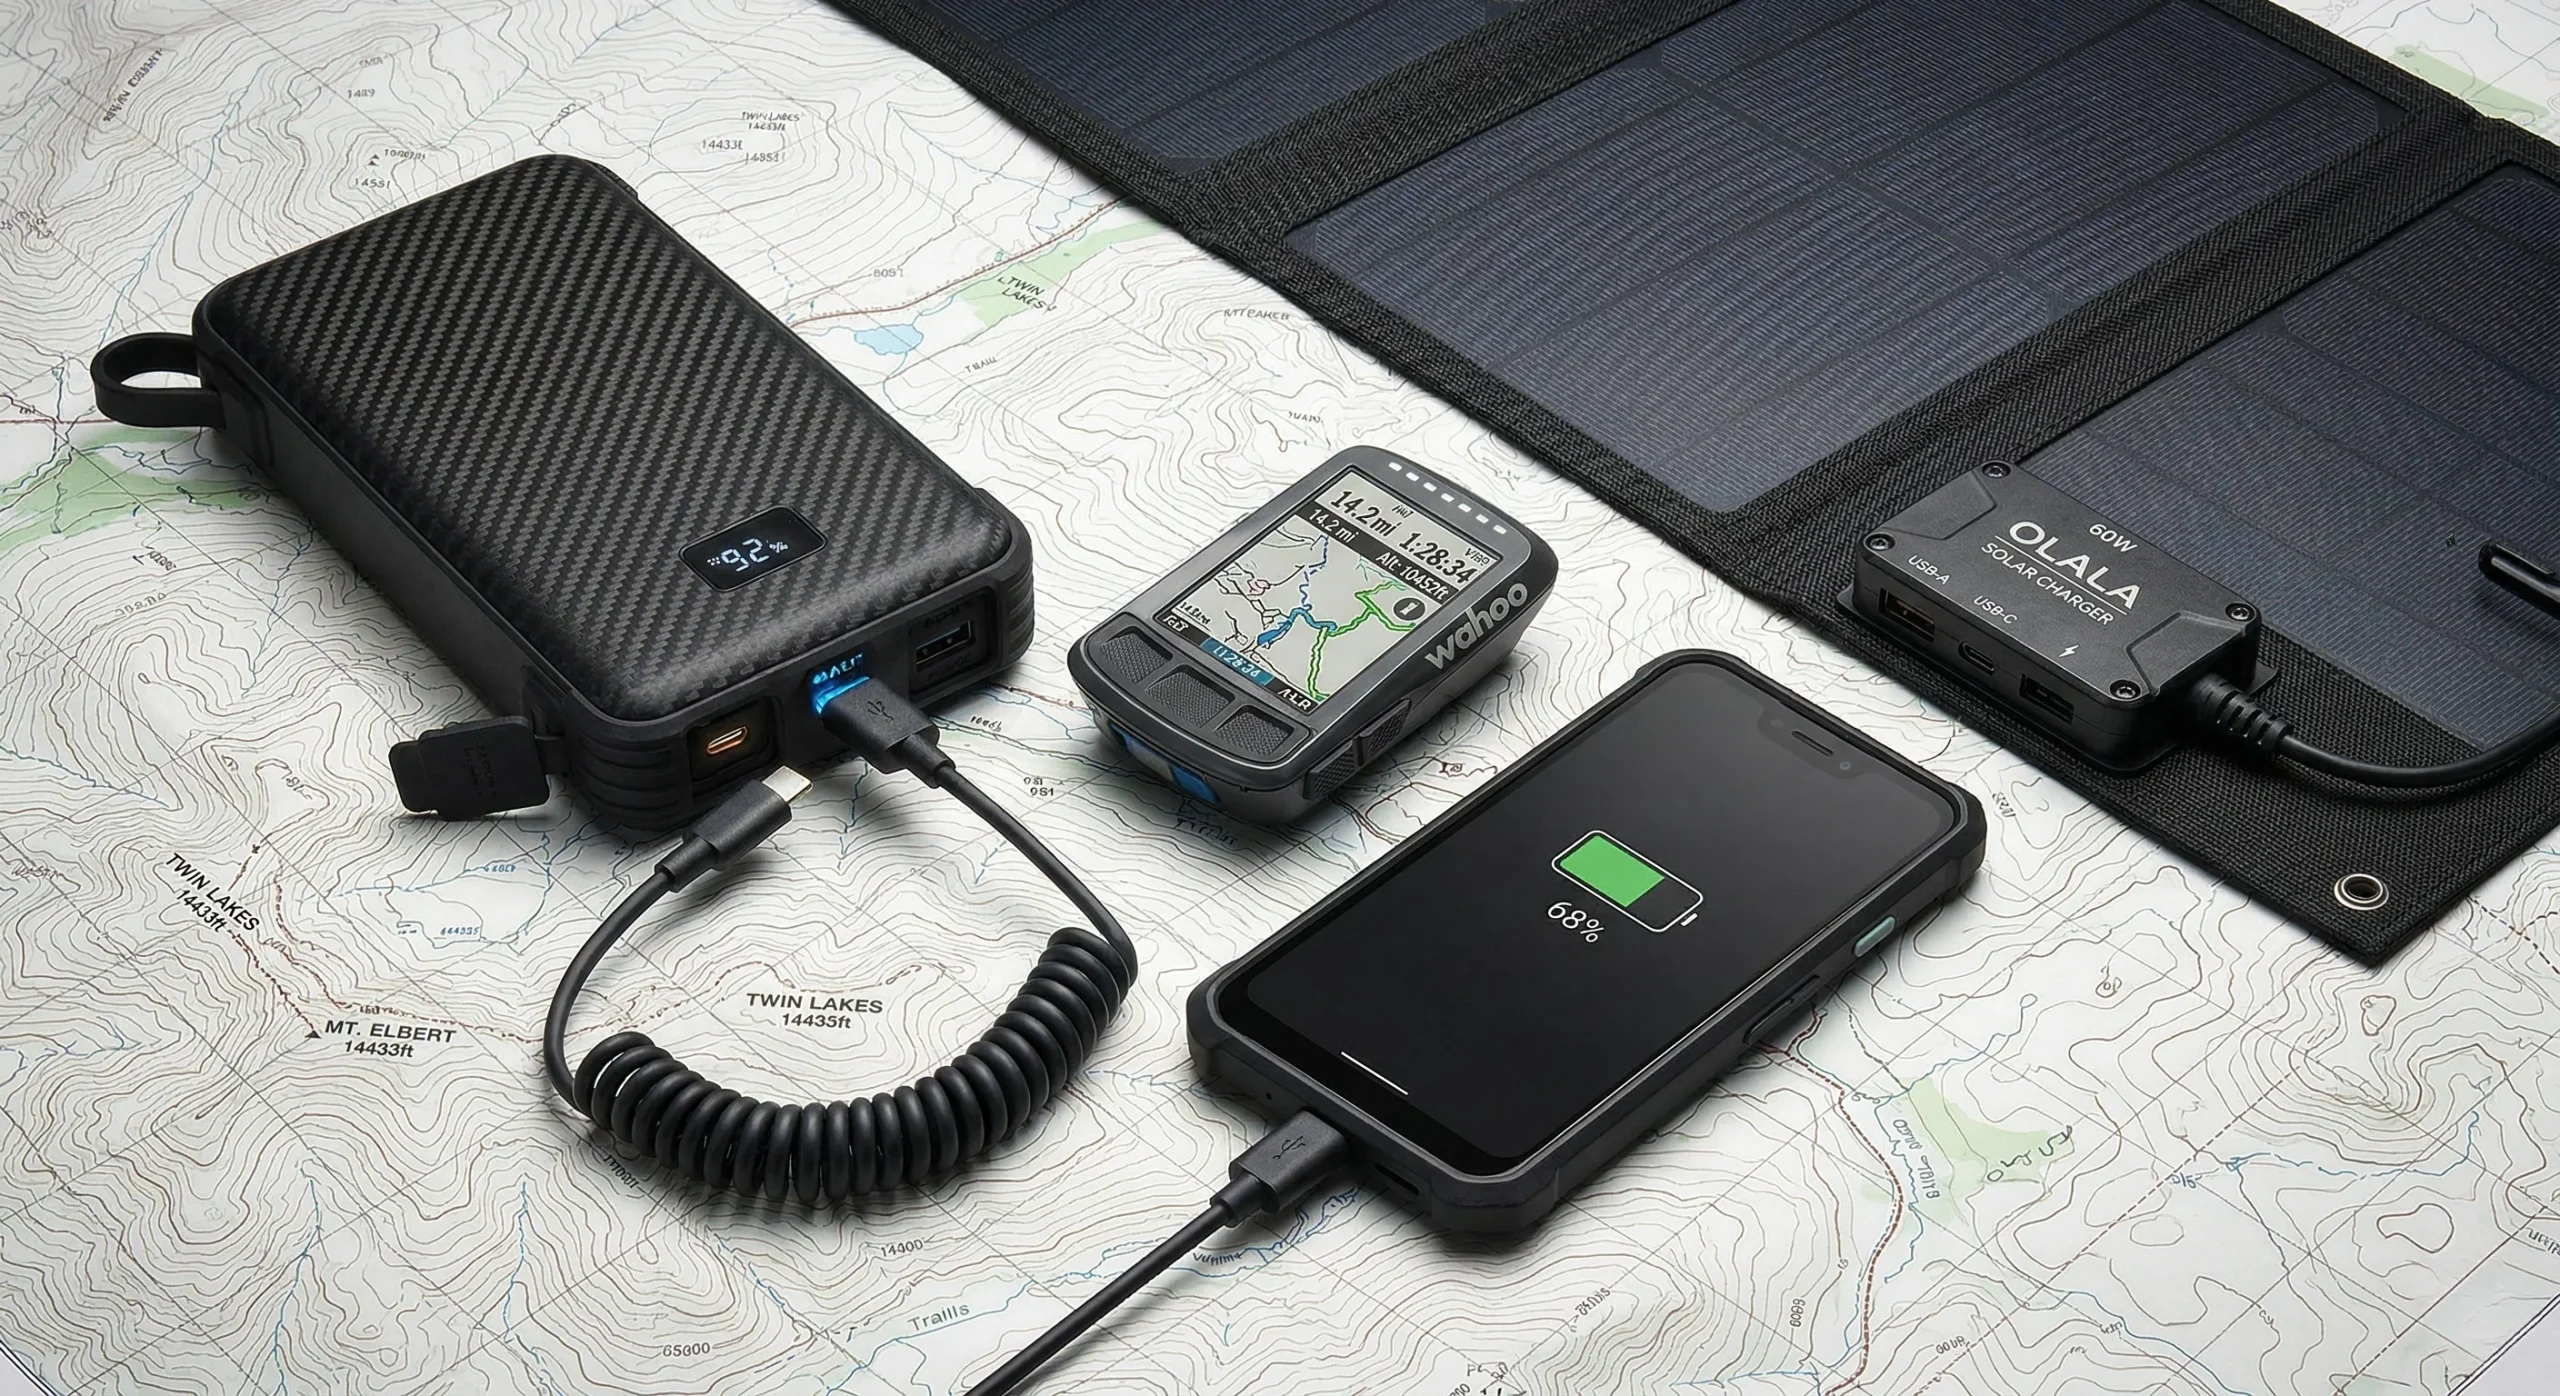
Table of Contents
Introduction: The Technical Requirement for Energy Autonomy
Establishing a reliable system for portable power for bikepacking is a mechanical necessity for any multi-day wilderness expedition. In 2026, the reliance on digital Off-Road Navigation, satellite communication, and high-lumen lighting has transformed electricity into a critical survival resource. A total loss of power in remote terrain compromises the rider’s ability to follow vetted Bikepacking Routes (Internal Link) or signal for assistance during a Solo Safety Emergency. This guide analyzes the mechanical trade-offs between energy storage (power banks) and energy generation (solar chargers).
The objective of an energy strategy is to maintain a positive “power balance” throughout the journey. For those following the 7 Proven Steps for Bikepacking for Beginners, understanding your daily milliamp-hour (mAh) consumption is the first step toward self-sufficiency. Proper energy management ensures that weight is minimized while redundancy is maximized, adhering to the principles found in our Bikepacking Packing Guide. This guide provide a disciplined technical analysis of eleven portable power options defining the 2026 season.
Technical Fundamentals of Energy Storage and Generation
Before selecting hardware, the rider must understand the physics of energy transfer. Efficiency is dictated by the chemical composition of batteries and the surface area of solar cells.
Power Bank Chemistry and Efficiency
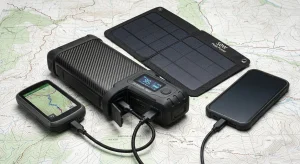
Most modern portable power for bikepacking solutions utilize Lithium-Polymer (LiPo) or Lithium-Ion (Li-Ion) cells. For 2026, carbon-fiber reinforced shells have become the industry standard for reducing weight while protecting the cells from high-impact vibrations common on Rugged Terrain. Total capacity is measured in mAh, but “Usable Capacity” is typically 20-30% lower due to voltage conversion heat loss.
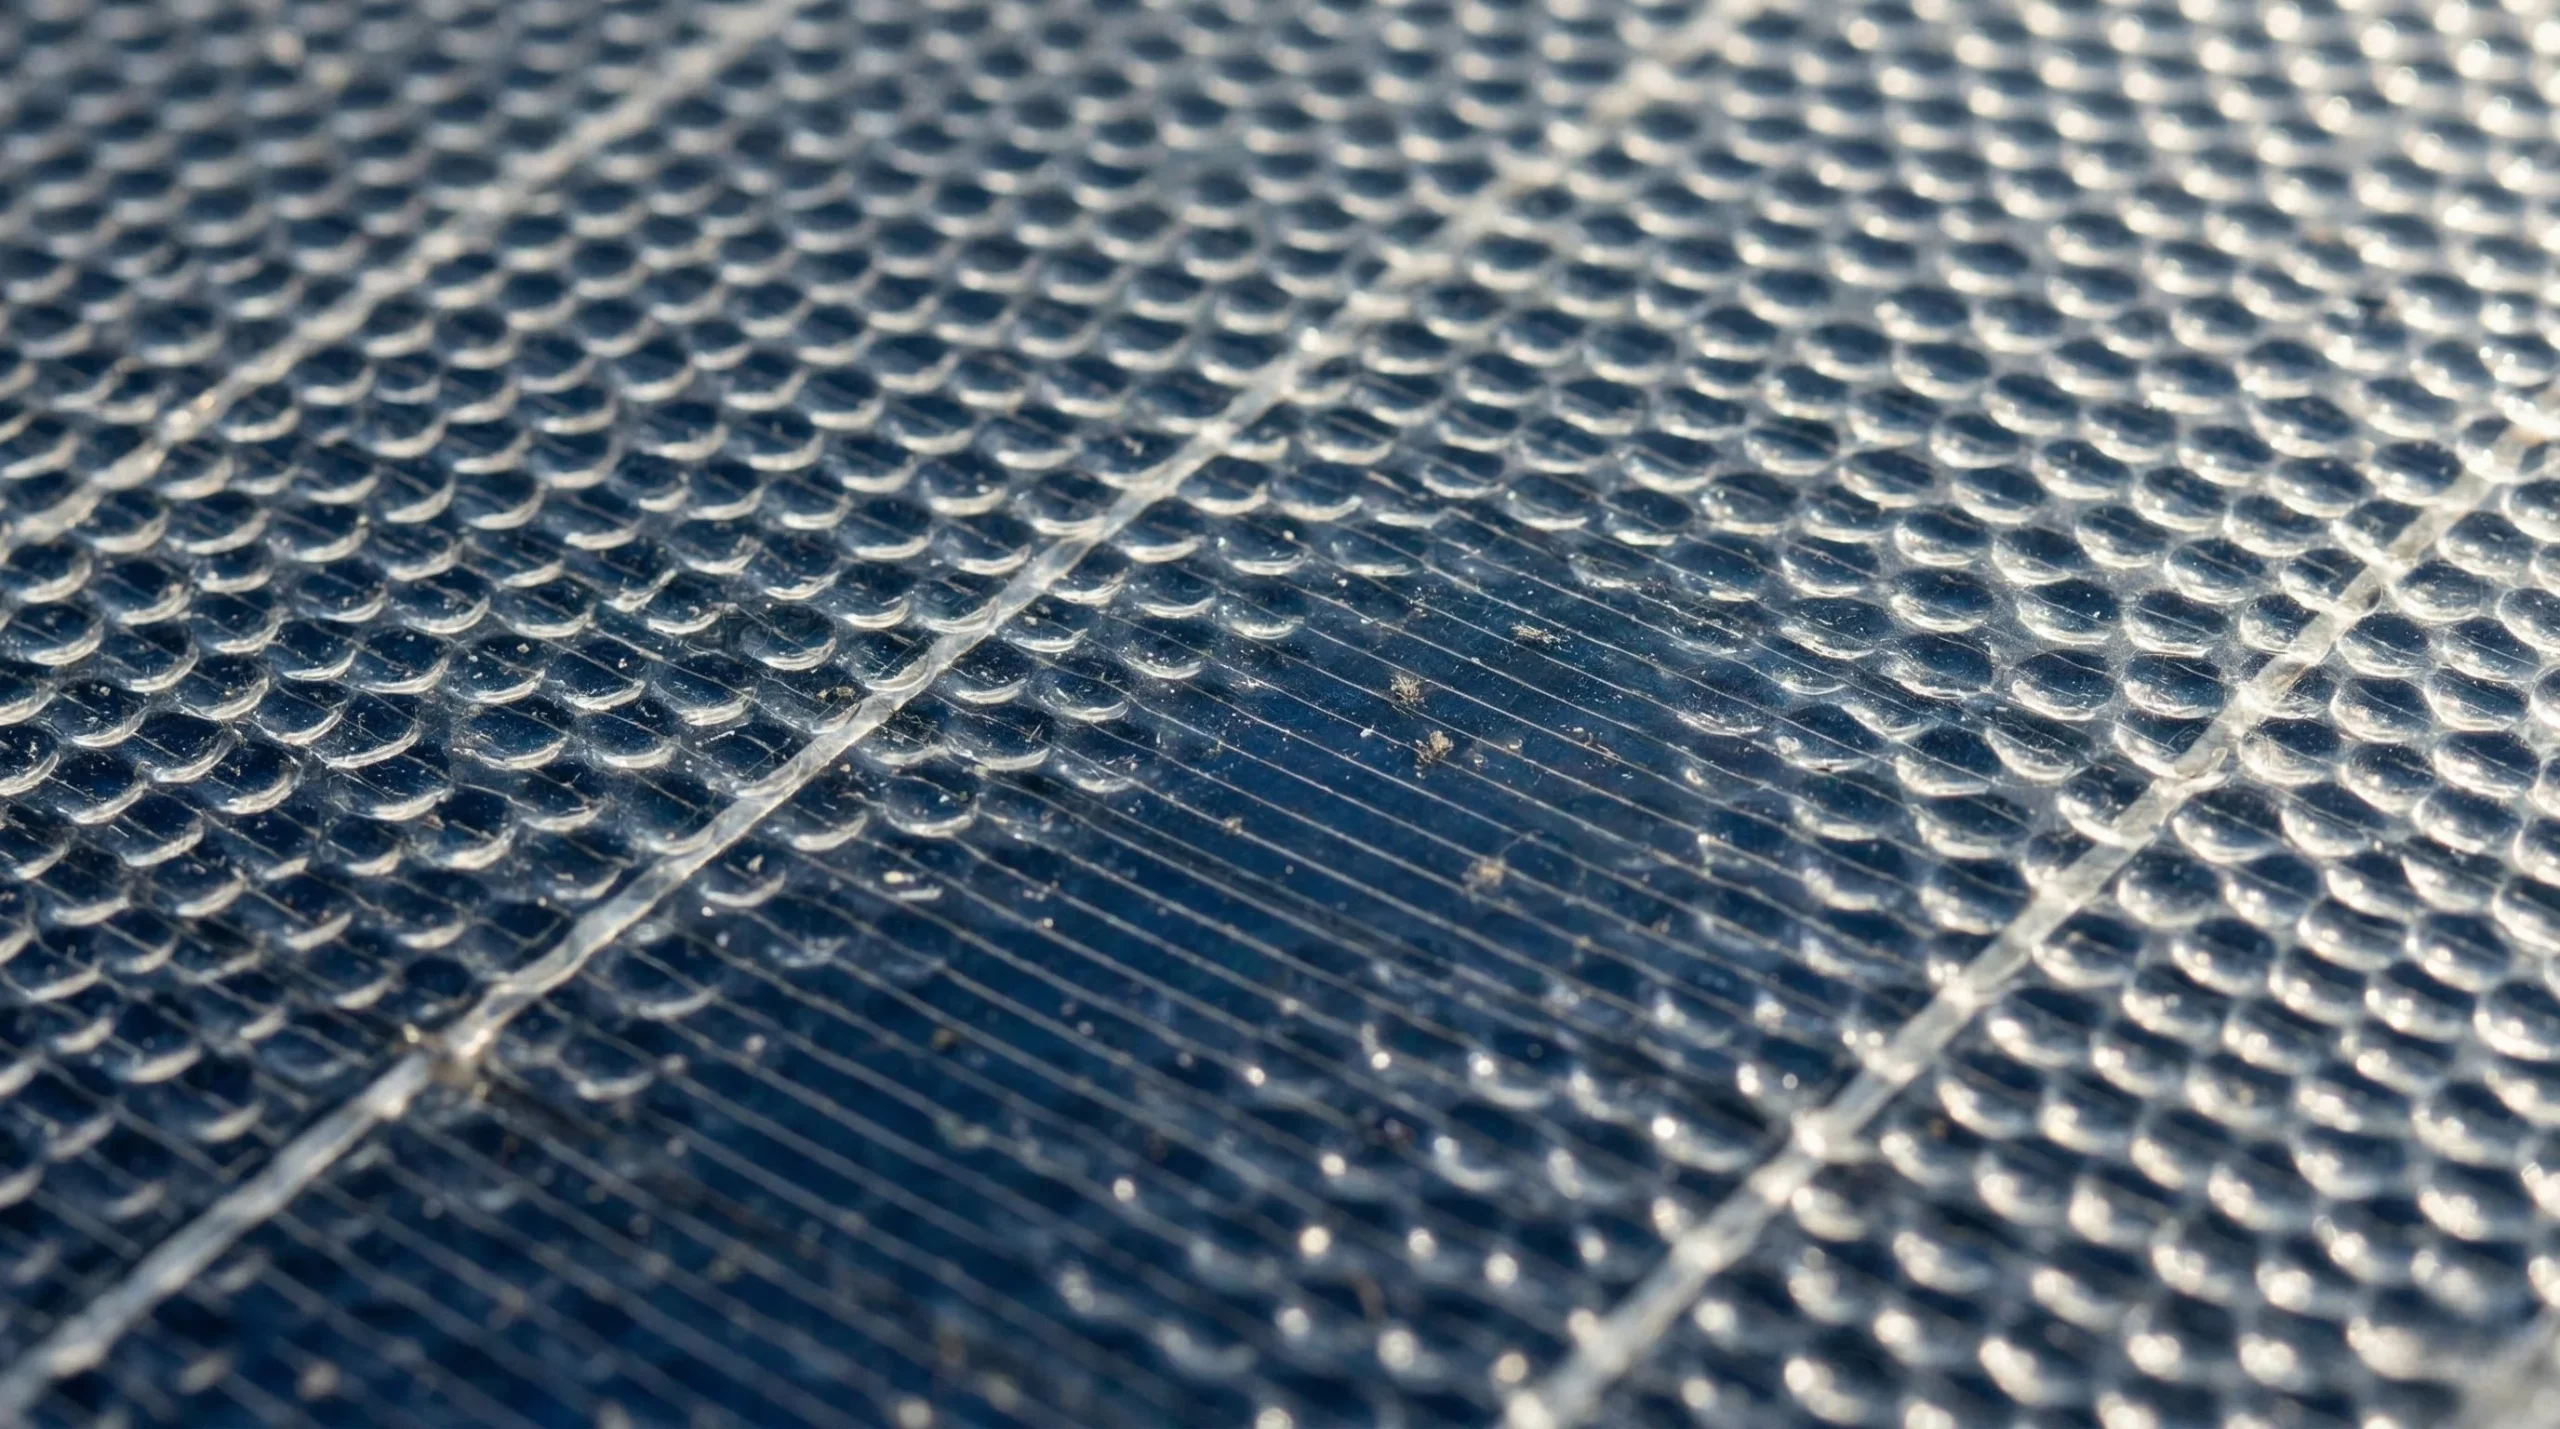
Solar Photovoltaic Physics
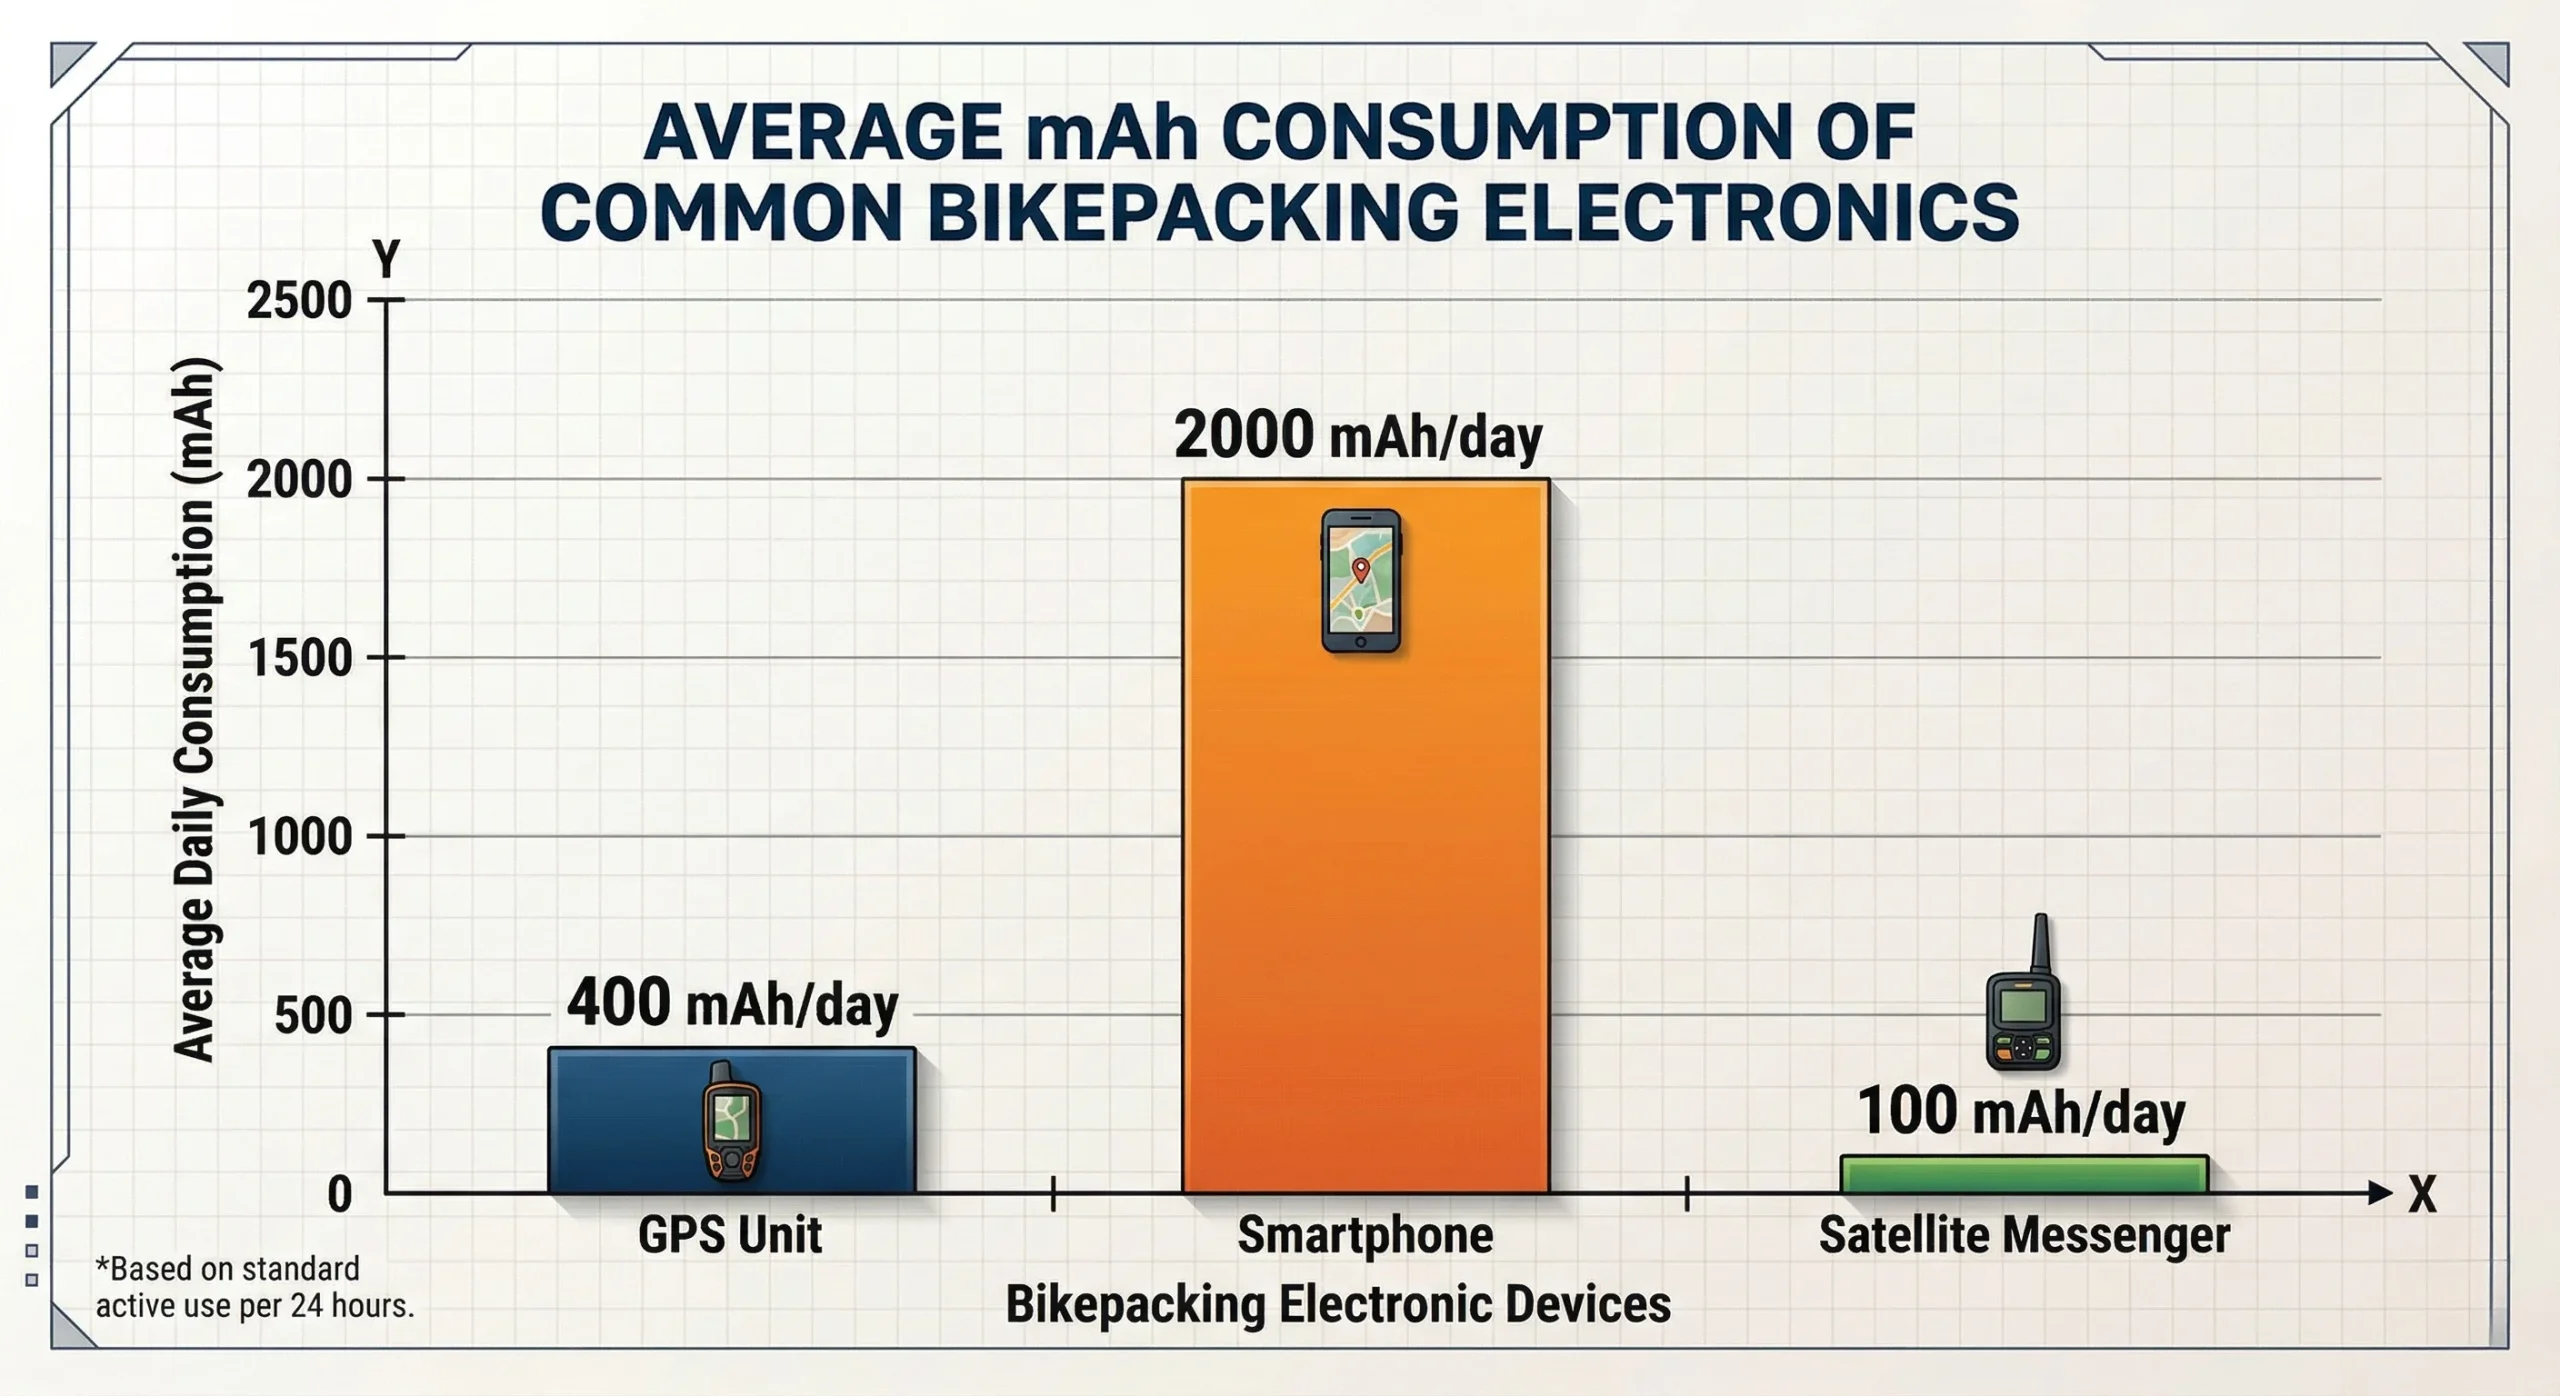
Solar generation for cyclists depends on “insolation”—the amount of solar radiation reaching the panel. Efficiency is highest when panels are perpendicular to the sun. For bikepackers, panels are often strapped to a Seat Pack or Handlebar Roll, meaning they operate at sub-optimal angles. High-efficiency monocrystalline cells are required to generate meaningful wattage in these variable conditions.
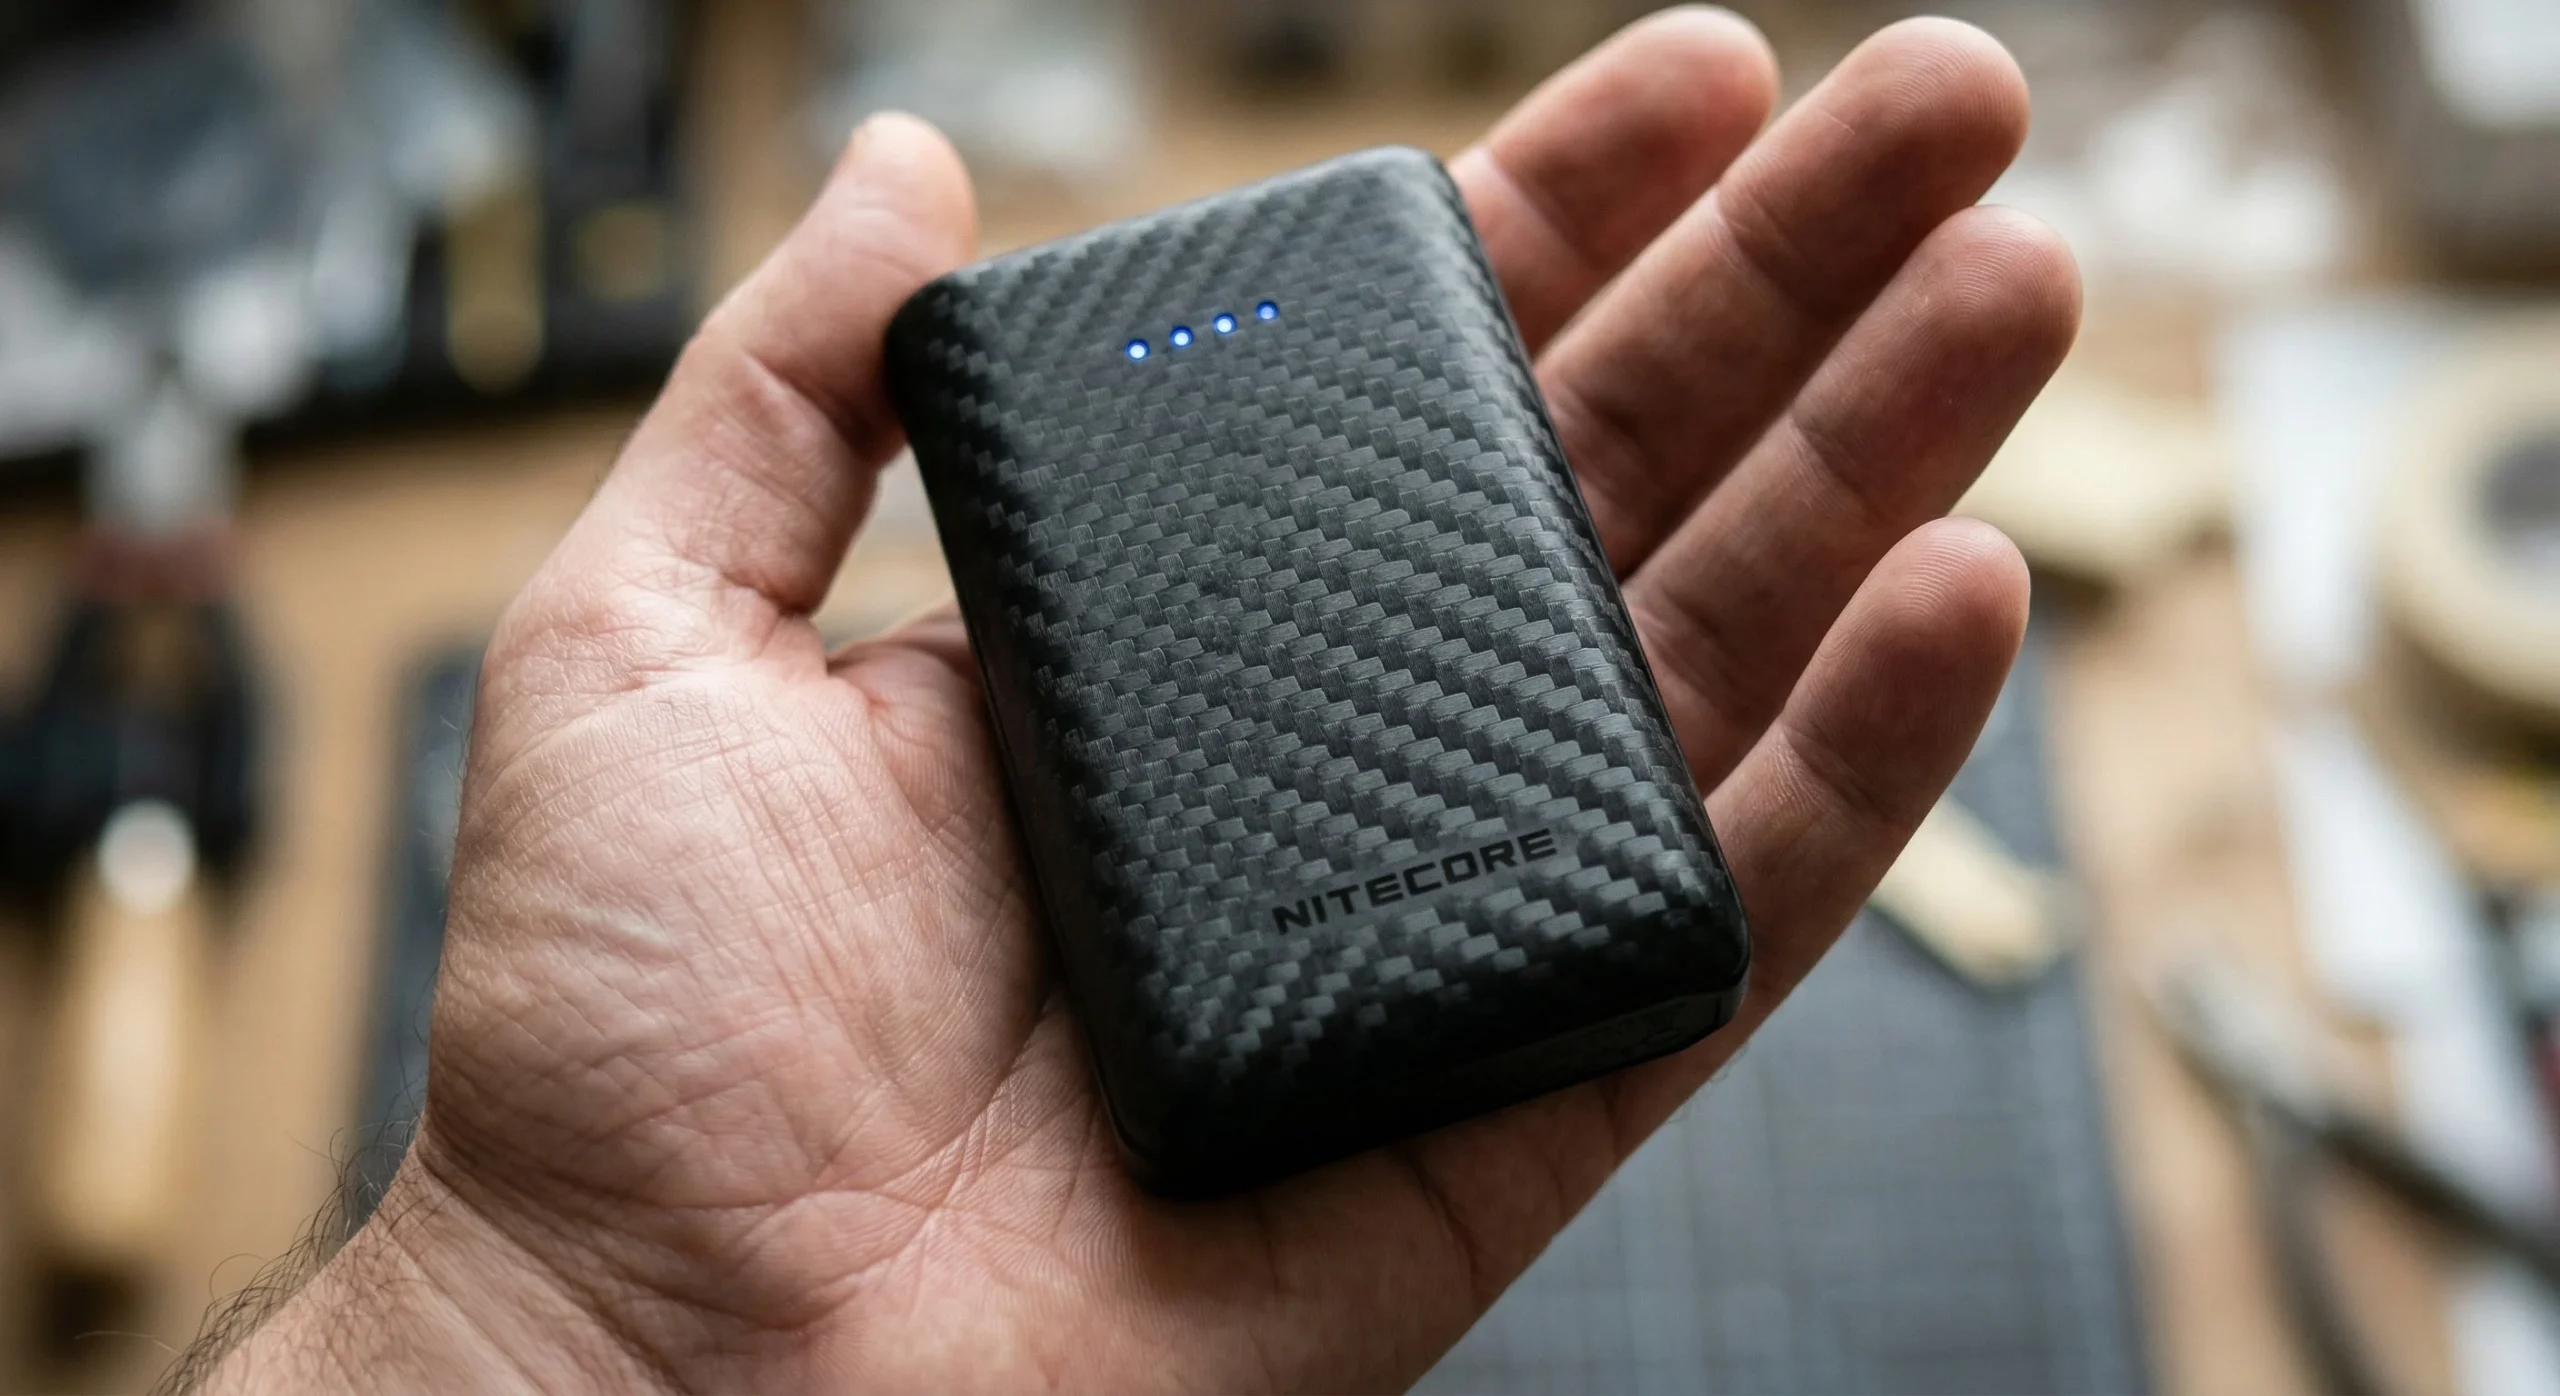
1. Nitecore NB10000 Gen 3 (Best Overall Power Bank)
The Nitecore NB series is the benchmark for weight-conscious riders. It utilizes a carbon-fiber frame to achieve the highest energy-to-weight ratio in the portable power for bikepacking category.
- Key Features: 10,000mAh capacity, carbon fiber shell, IPX5 water resistance, dual USB-C ports.
- Pros: World’s lightest 10k bank (approx. 150g); incredibly slim profile fits in any Bikepacking Bag.
- Cons: Premium price; limited to 22.5W output (insufficient for some laptops).
- Check Price on Amazon: Nitecore NB10000 Gen 3
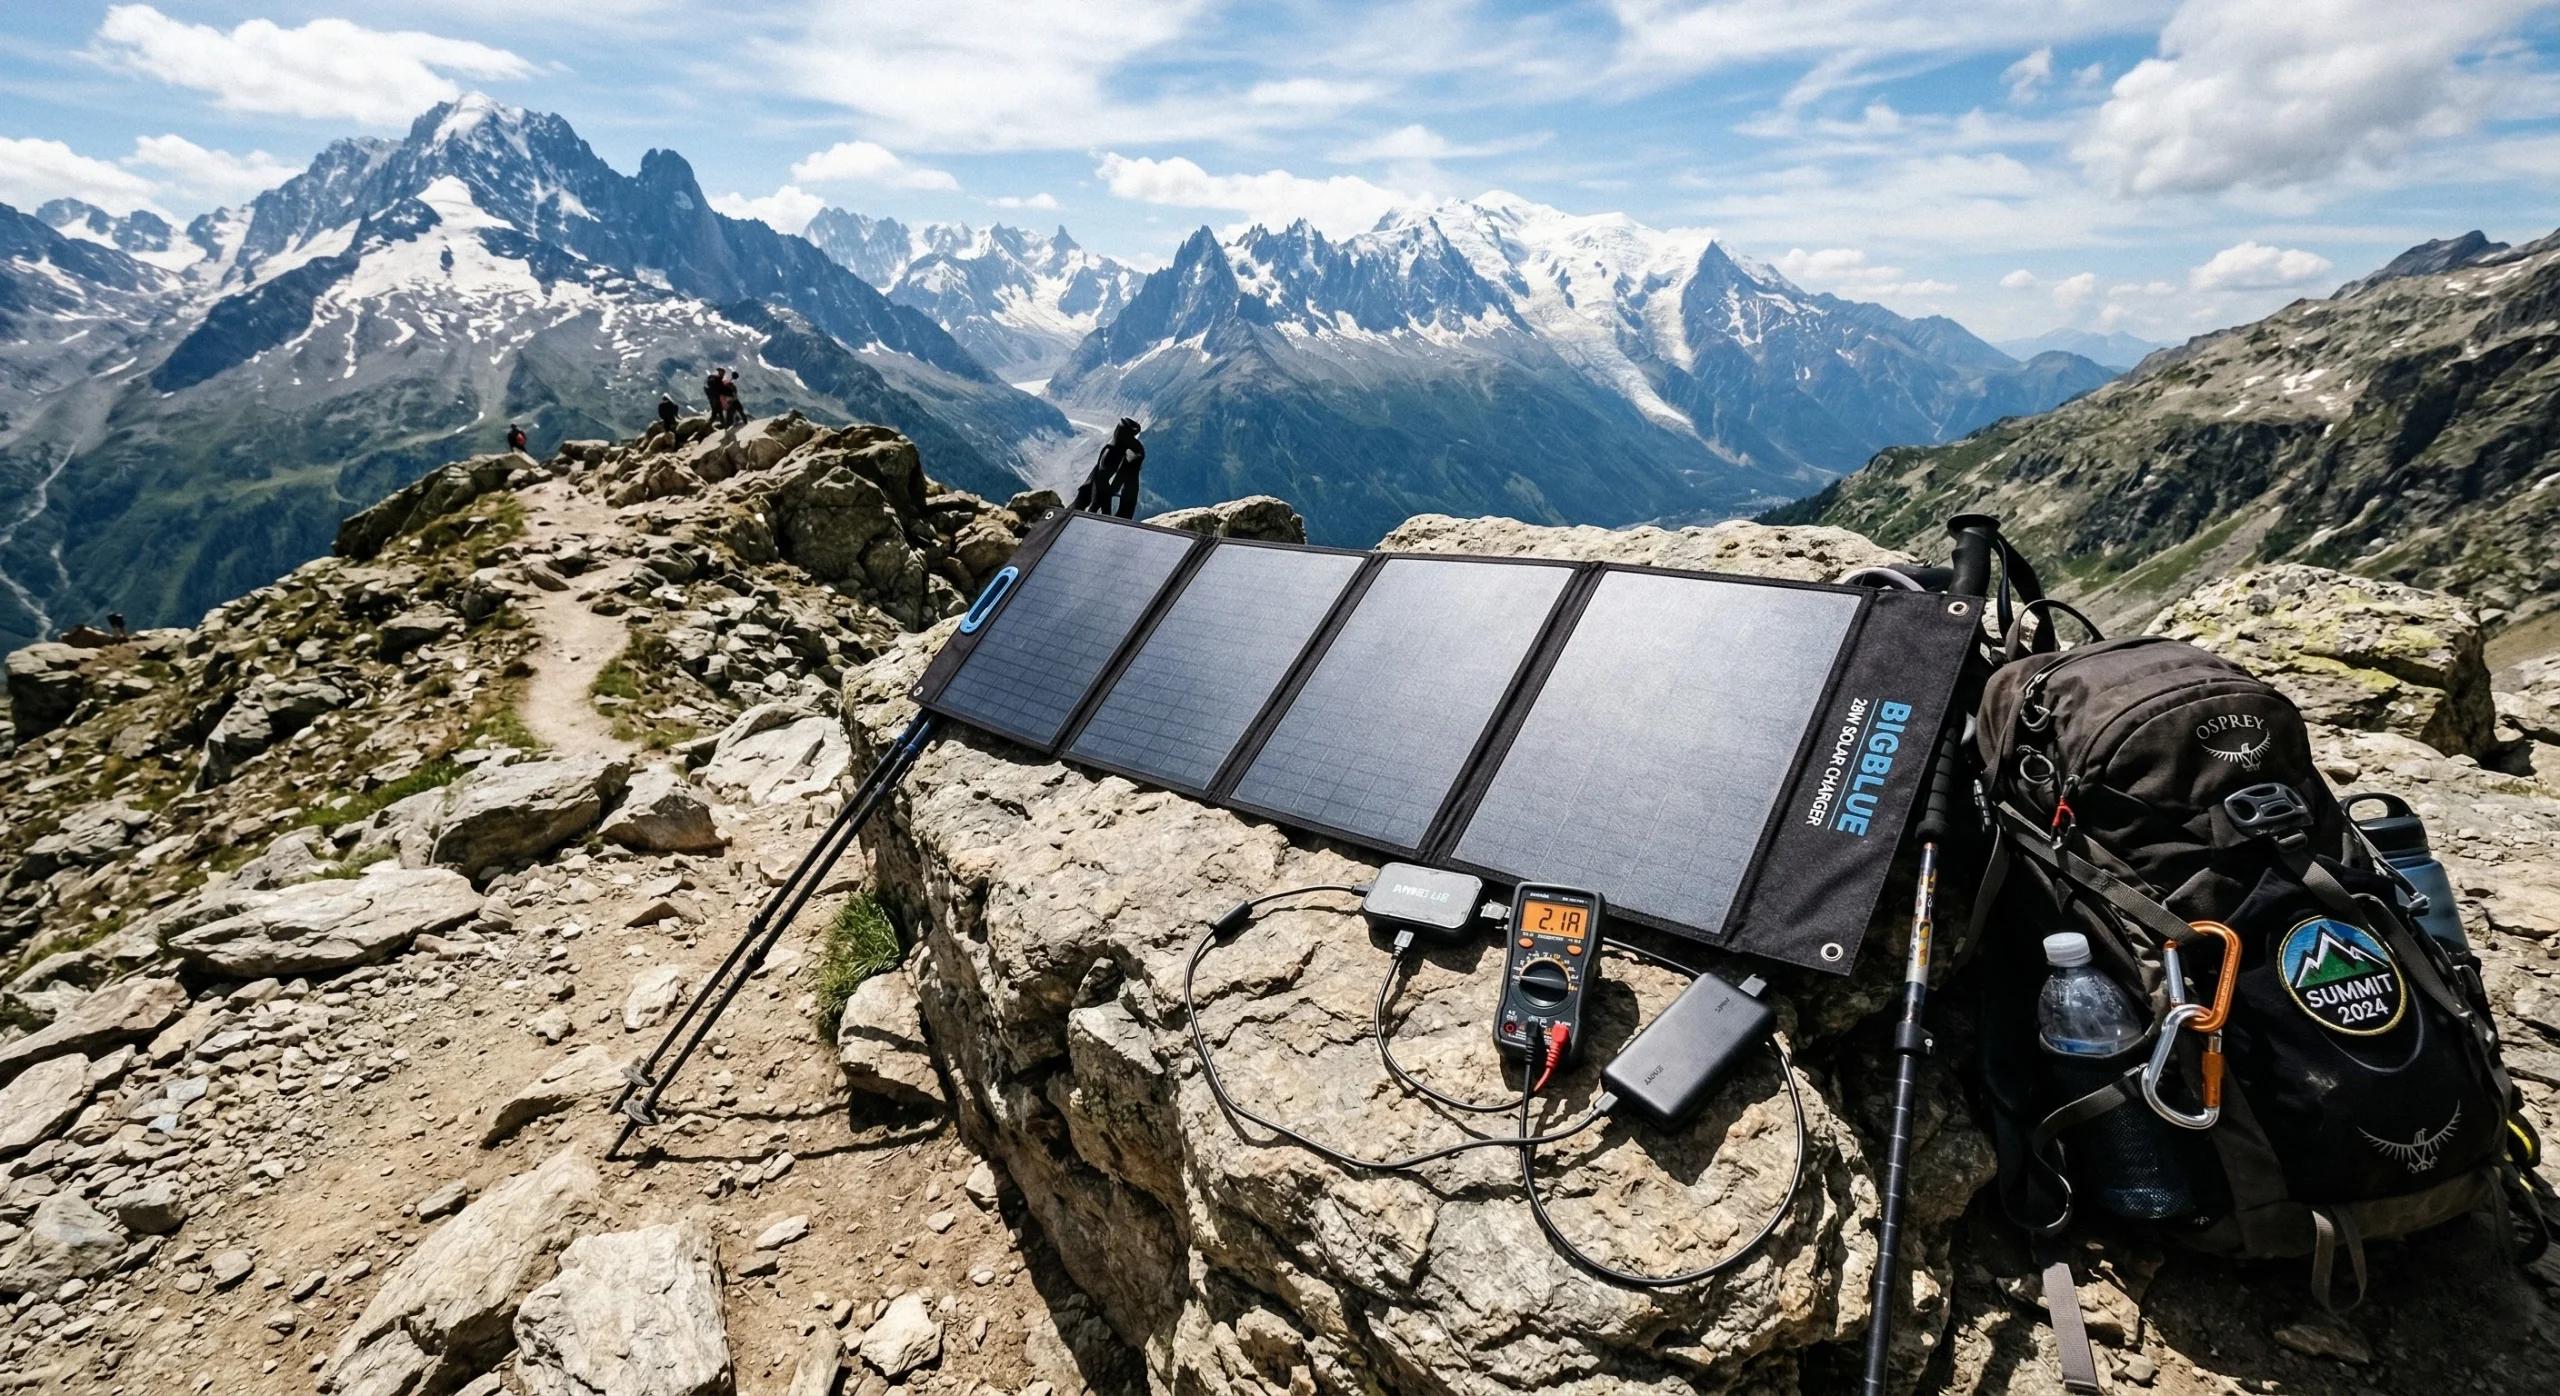
2. BigBlue 28W SunPower (Best Value Solar Charger)
For riders exploring arid Bikepacking Routes with high solar exposure, the BigBlue 28W offers the best wattage-to-dollar ratio. It is a foldable array designed for stationary or low-speed use.
- Key Features: Four monocrystalline panels, three USB-A ports, integrated ammeter.
- Pros: Reliable auto-restart technology for intermittent clouds; high conversion efficiency (24%).
- Cons: Bulky when folded; too heavy for ultra-minimalist setups.
- Check Price on Amazon: BigBlue 28W Solar Charger
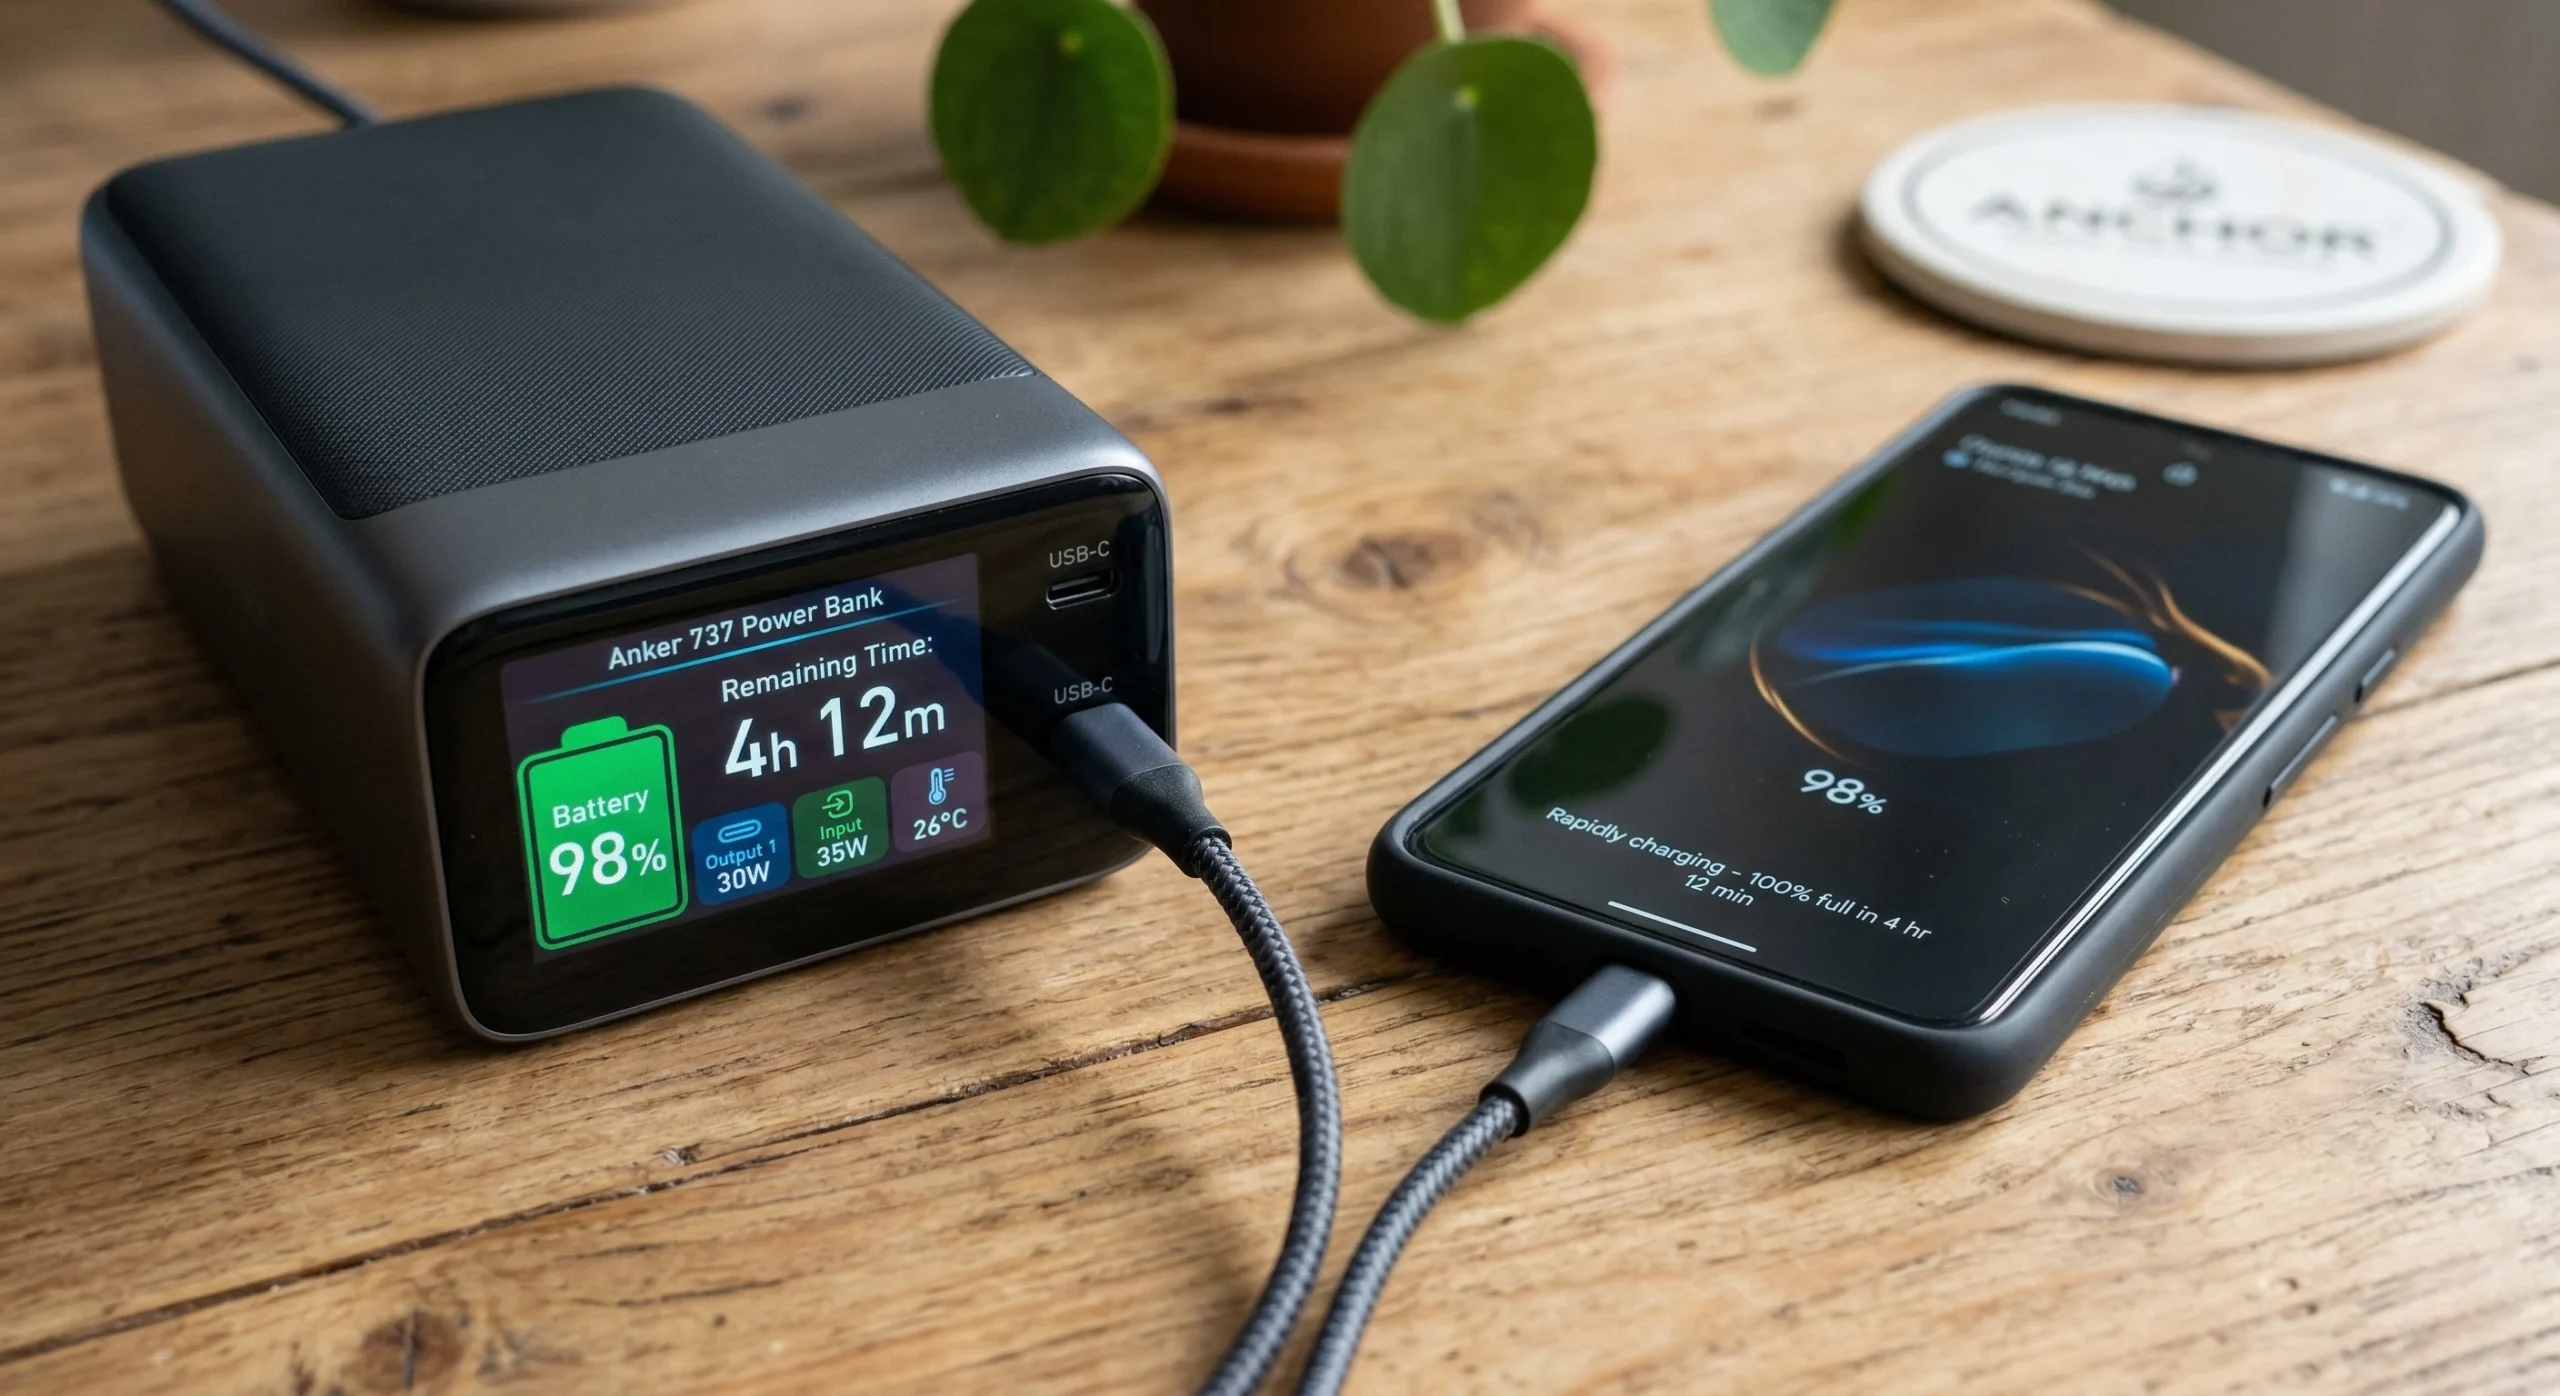
3. Anker 737 Power Bank (PowerCore 24K)
When following a Bikepacking Training Plan that involves drone usage or high-drain cameras, the Anker 737 provides the necessary high-wattage output.
- Key Features: 24,000mAh capacity, 140W fast charging, smart digital display.
- Pros: Massive capacity for 3-Day Adventures; display shows real-time input/output data.
- Cons: Heavy (630g); takes up significant space in a frame bag.
- Check Price on Amazon: Anker 737 Power Bank
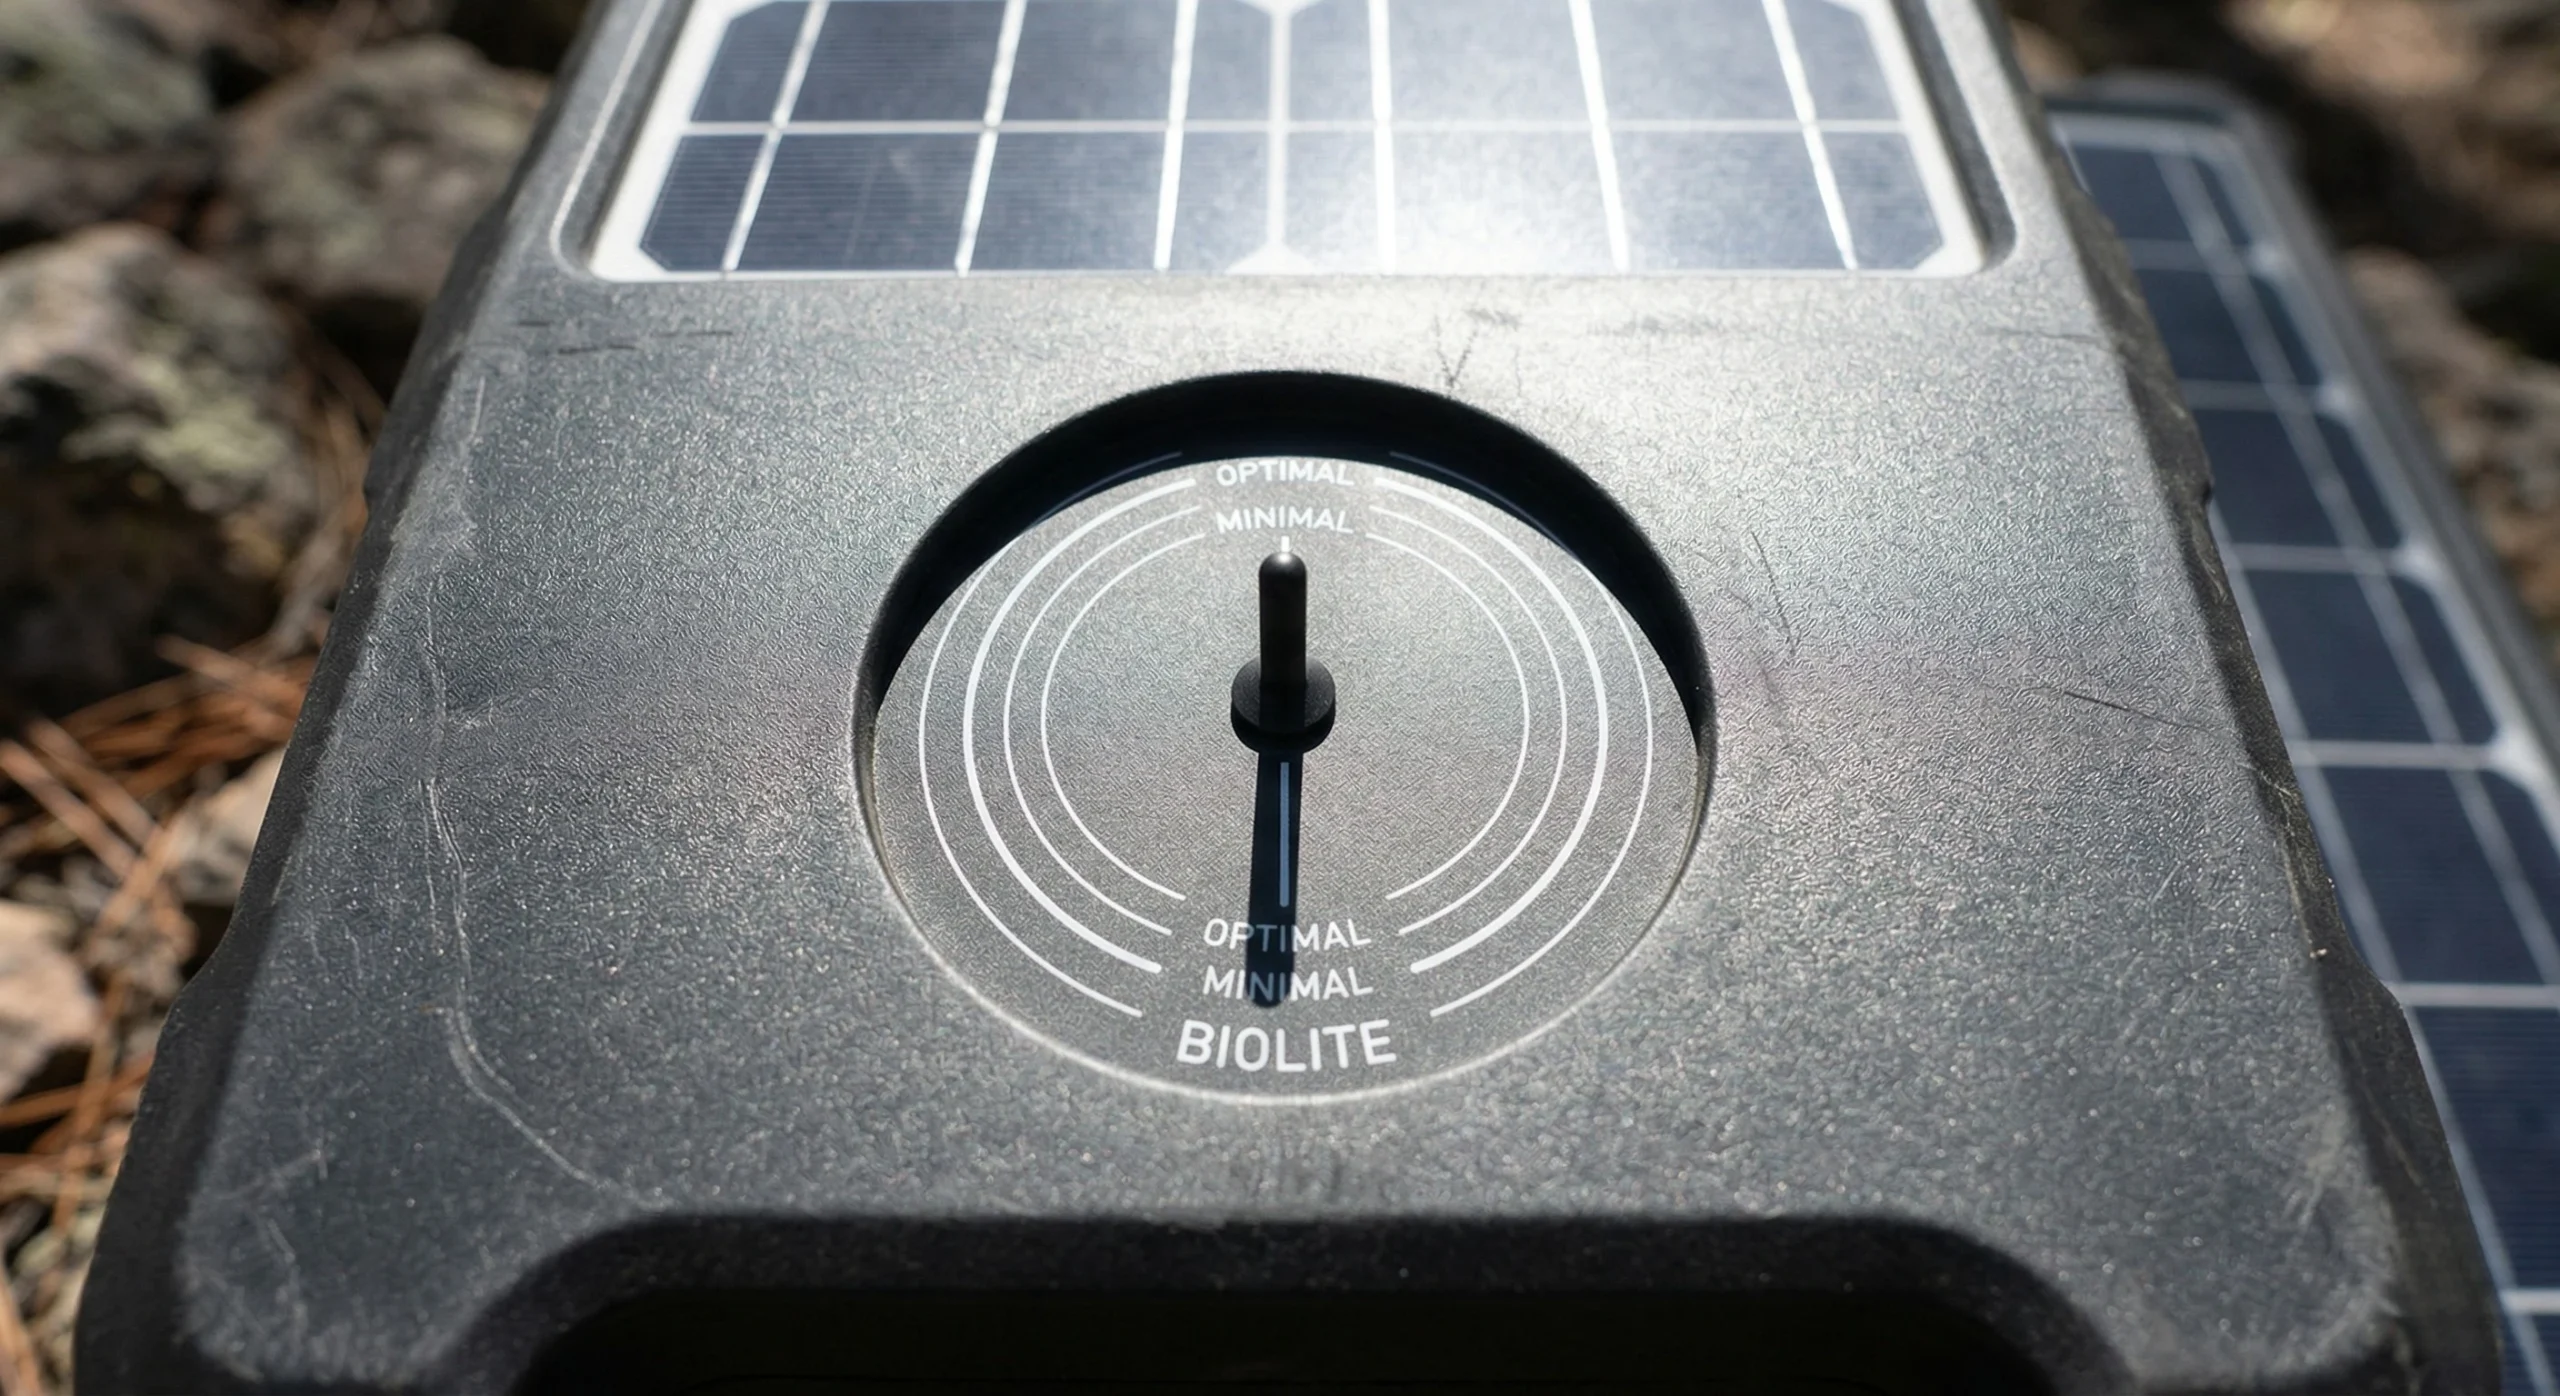
4. BioLite SolarPanel 10+ (Best Integrated System)
BioLite offers a hybrid solution for portable power for bikepacking by integrating a small 3,200mAh battery directly into the solar panel frame. This buffers the energy flow to your devices.
- Key Features: 10W panel, 3200mAh internal battery, sundial for alignment.
- Pros: Integrated sundial ensures perfect alignment; thin profile allows for easy strapping to a handlebar roll.
- Cons: Low generation capacity compared to large arrays.
- Check Price on Amazon: BioLite SolarPanel 10+
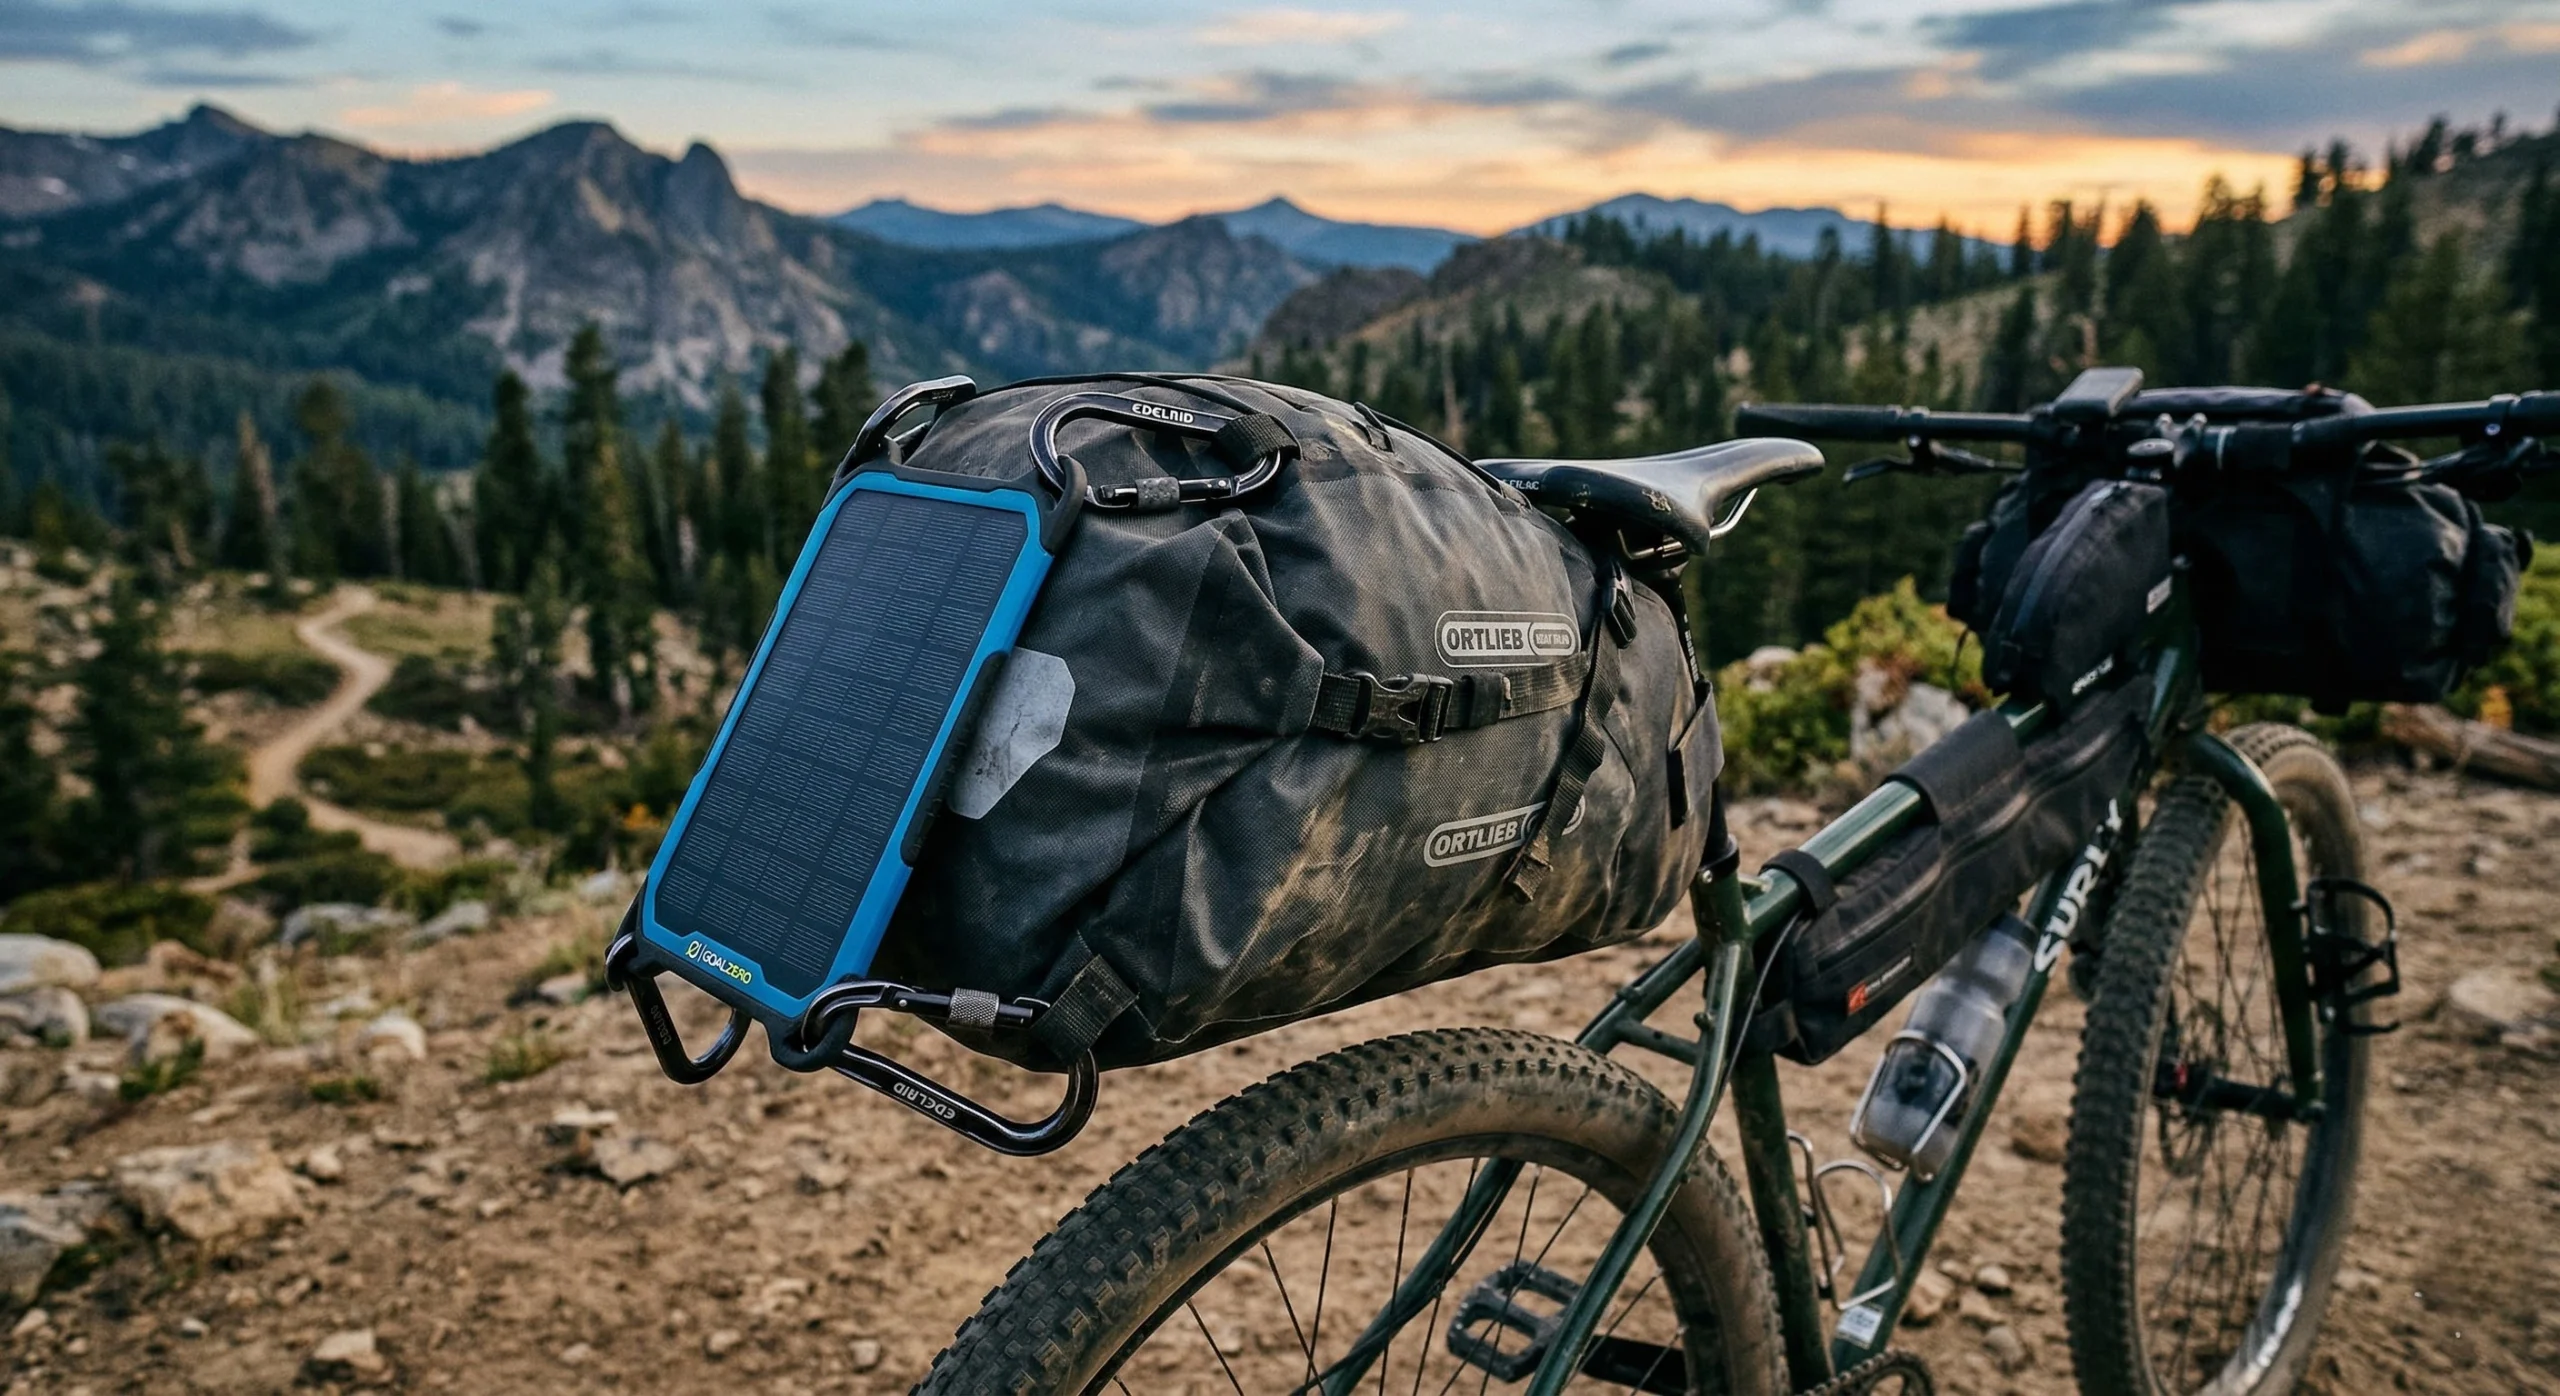
5. Goal Zero Nomad 10 (Best for Remote Attachment)
The Nomad 10 is designed for riders who require power during Gravel Riding. Its rigid frame and high-quality carabiner points are optimized for vibration resistance.
- Key Features: 10W monocrystalline panel, adjustable kickstand, ruggedized USB port.
- Pros: Most durable solar panel in the category; chainable with other Goal Zero units.
- Cons: Low output per square inch.
- Check Price on Amazon: Goal Zero Nomad 10
6. Zendure SuperTank Pro (Professional Endurance)
For transcontinental missions, the Zendure SuperTank Pro utilizes OLED technology and firmware updates to ensure compatibility with future electronics standards.
- Key Features: 26,800mAh capacity, 4 USB-C ports, OLED display, 100W output.
- Pros: Industry-leading capacity for Solo Bikepacking; exceptionally fast recharge times.
- Cons: High weight and cost.
- Check Price on Amazon: Zendure SuperTank Pro
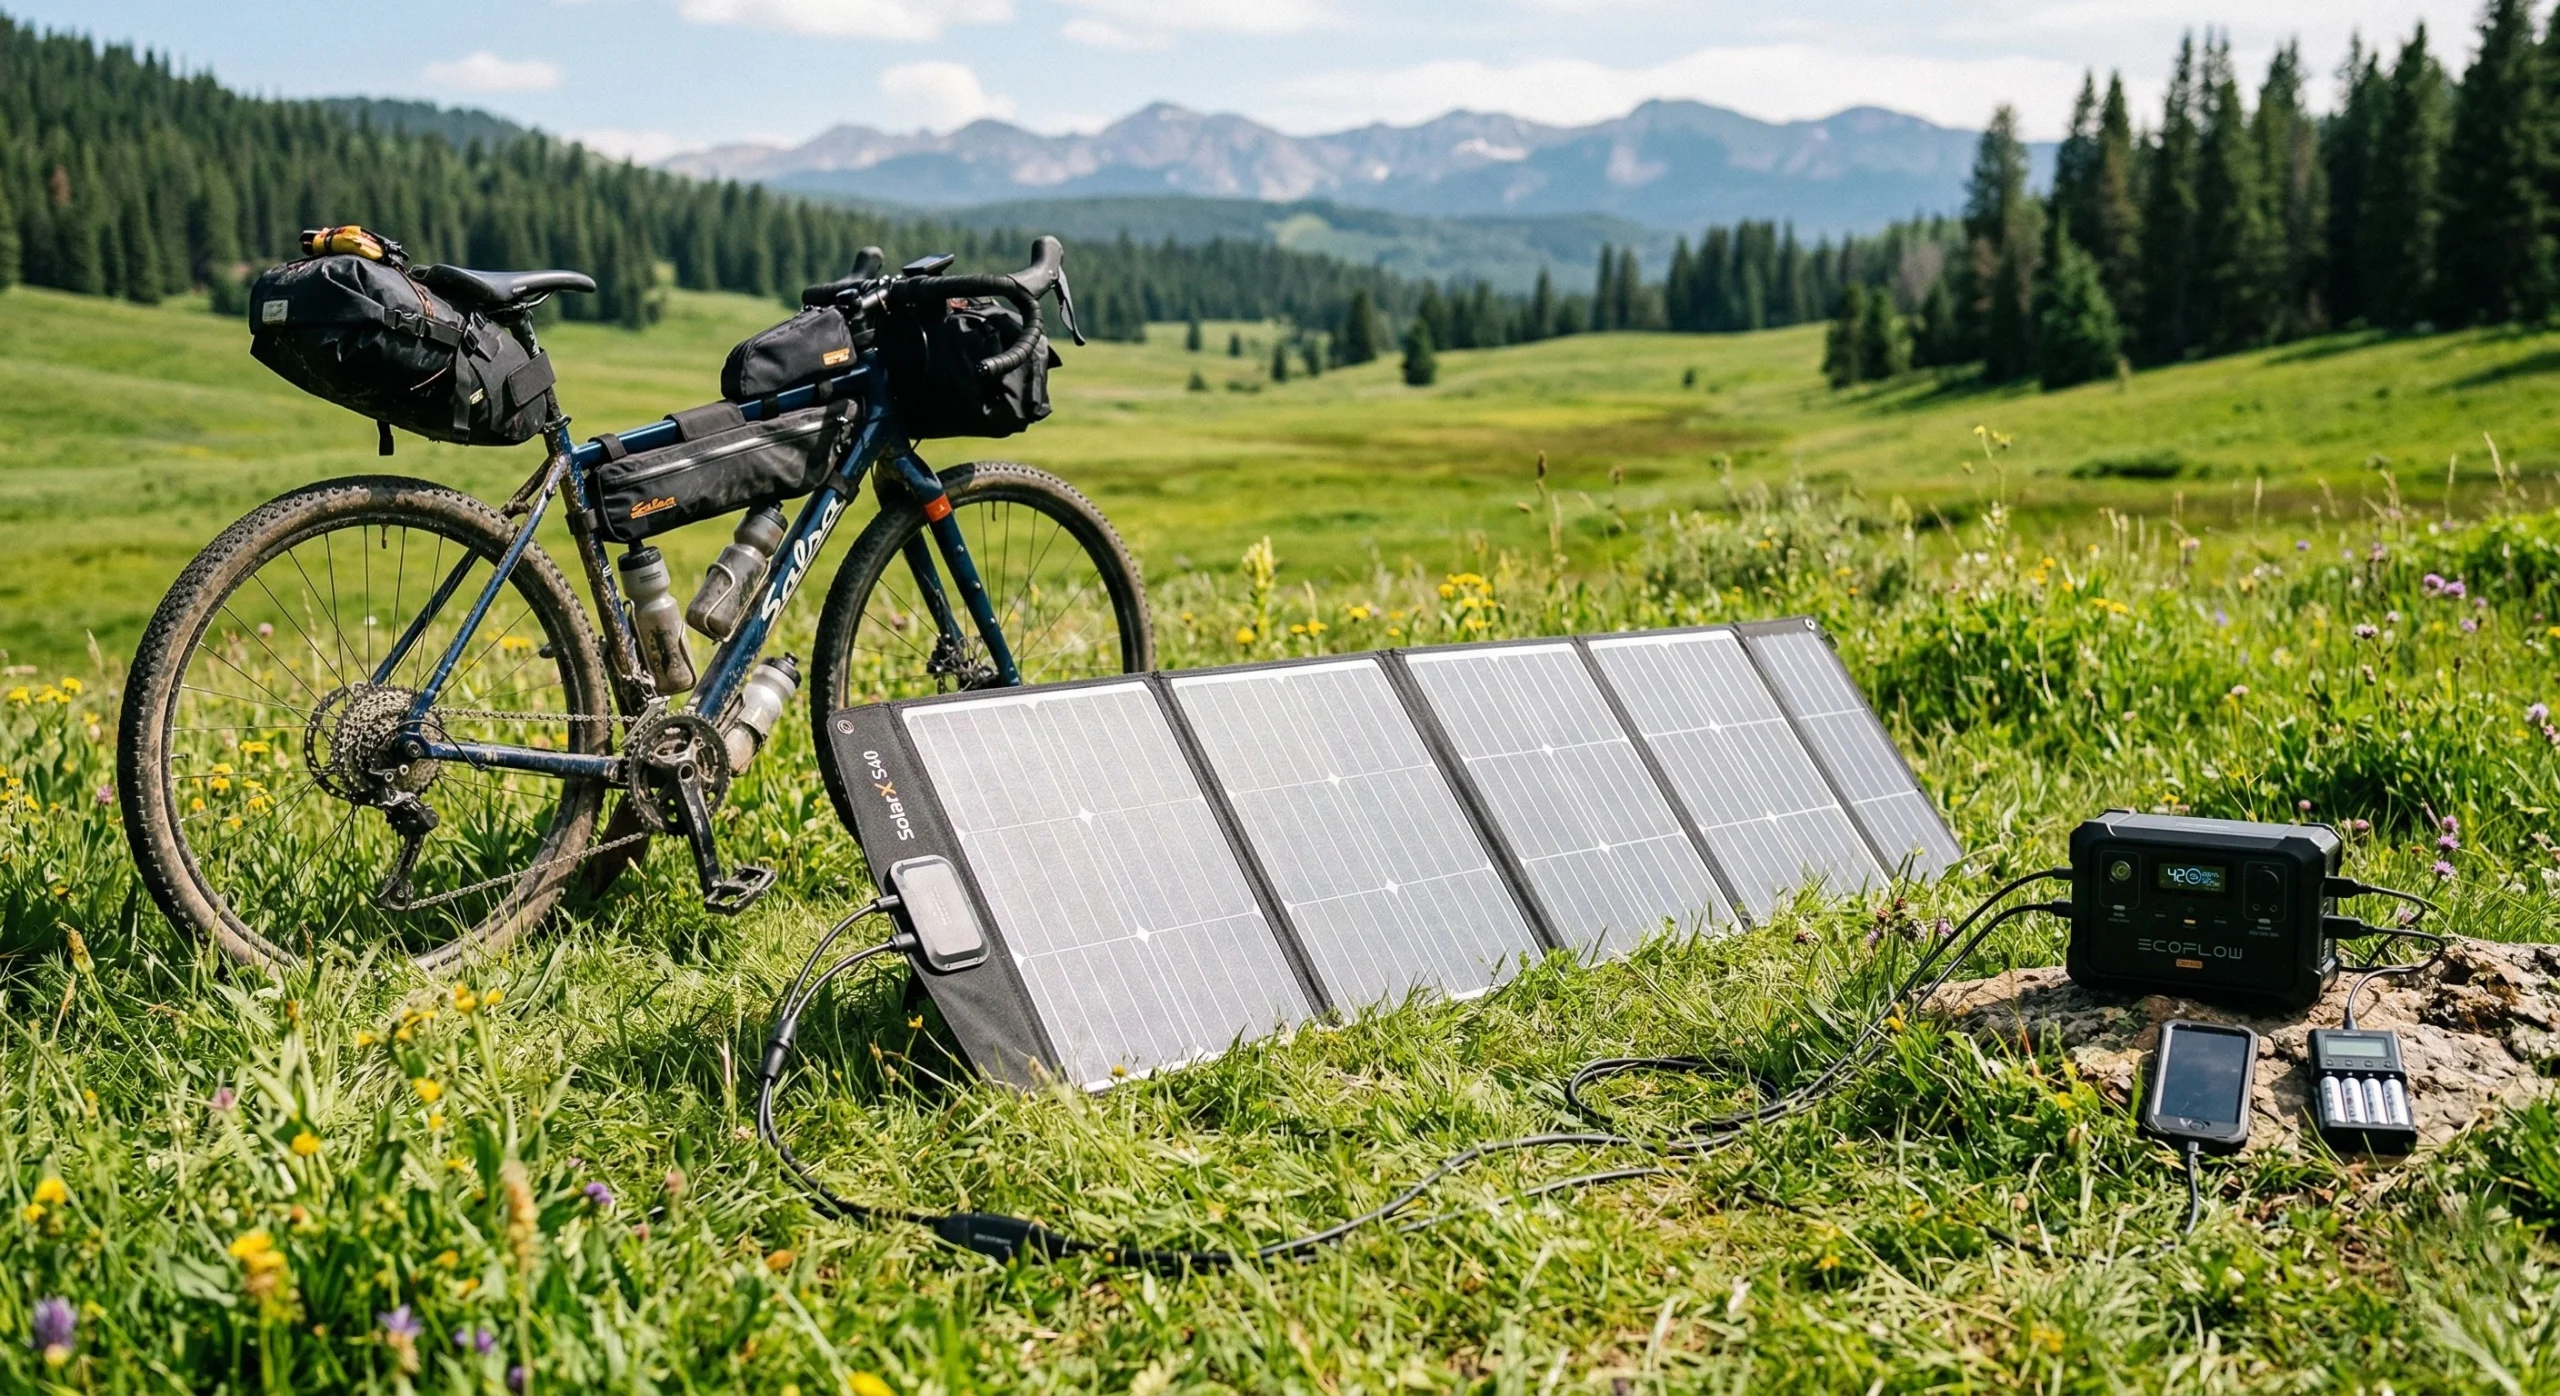
7. Powerness SolarX S40 (Best for High-Elevation Sun)
The SolarX S40 is a high-wattage foldable panel suitable for basecamp operations during Wilderness Adventures.
- Key Features: 40W output, integrated LCD, multiple adapter cables included.
- Pros: Can recharge a 20k bank in a single afternoon of high-elevation sun.
- Cons: Too large for active use while riding.
- Check Price on Amazon: Powerness SolarX S40
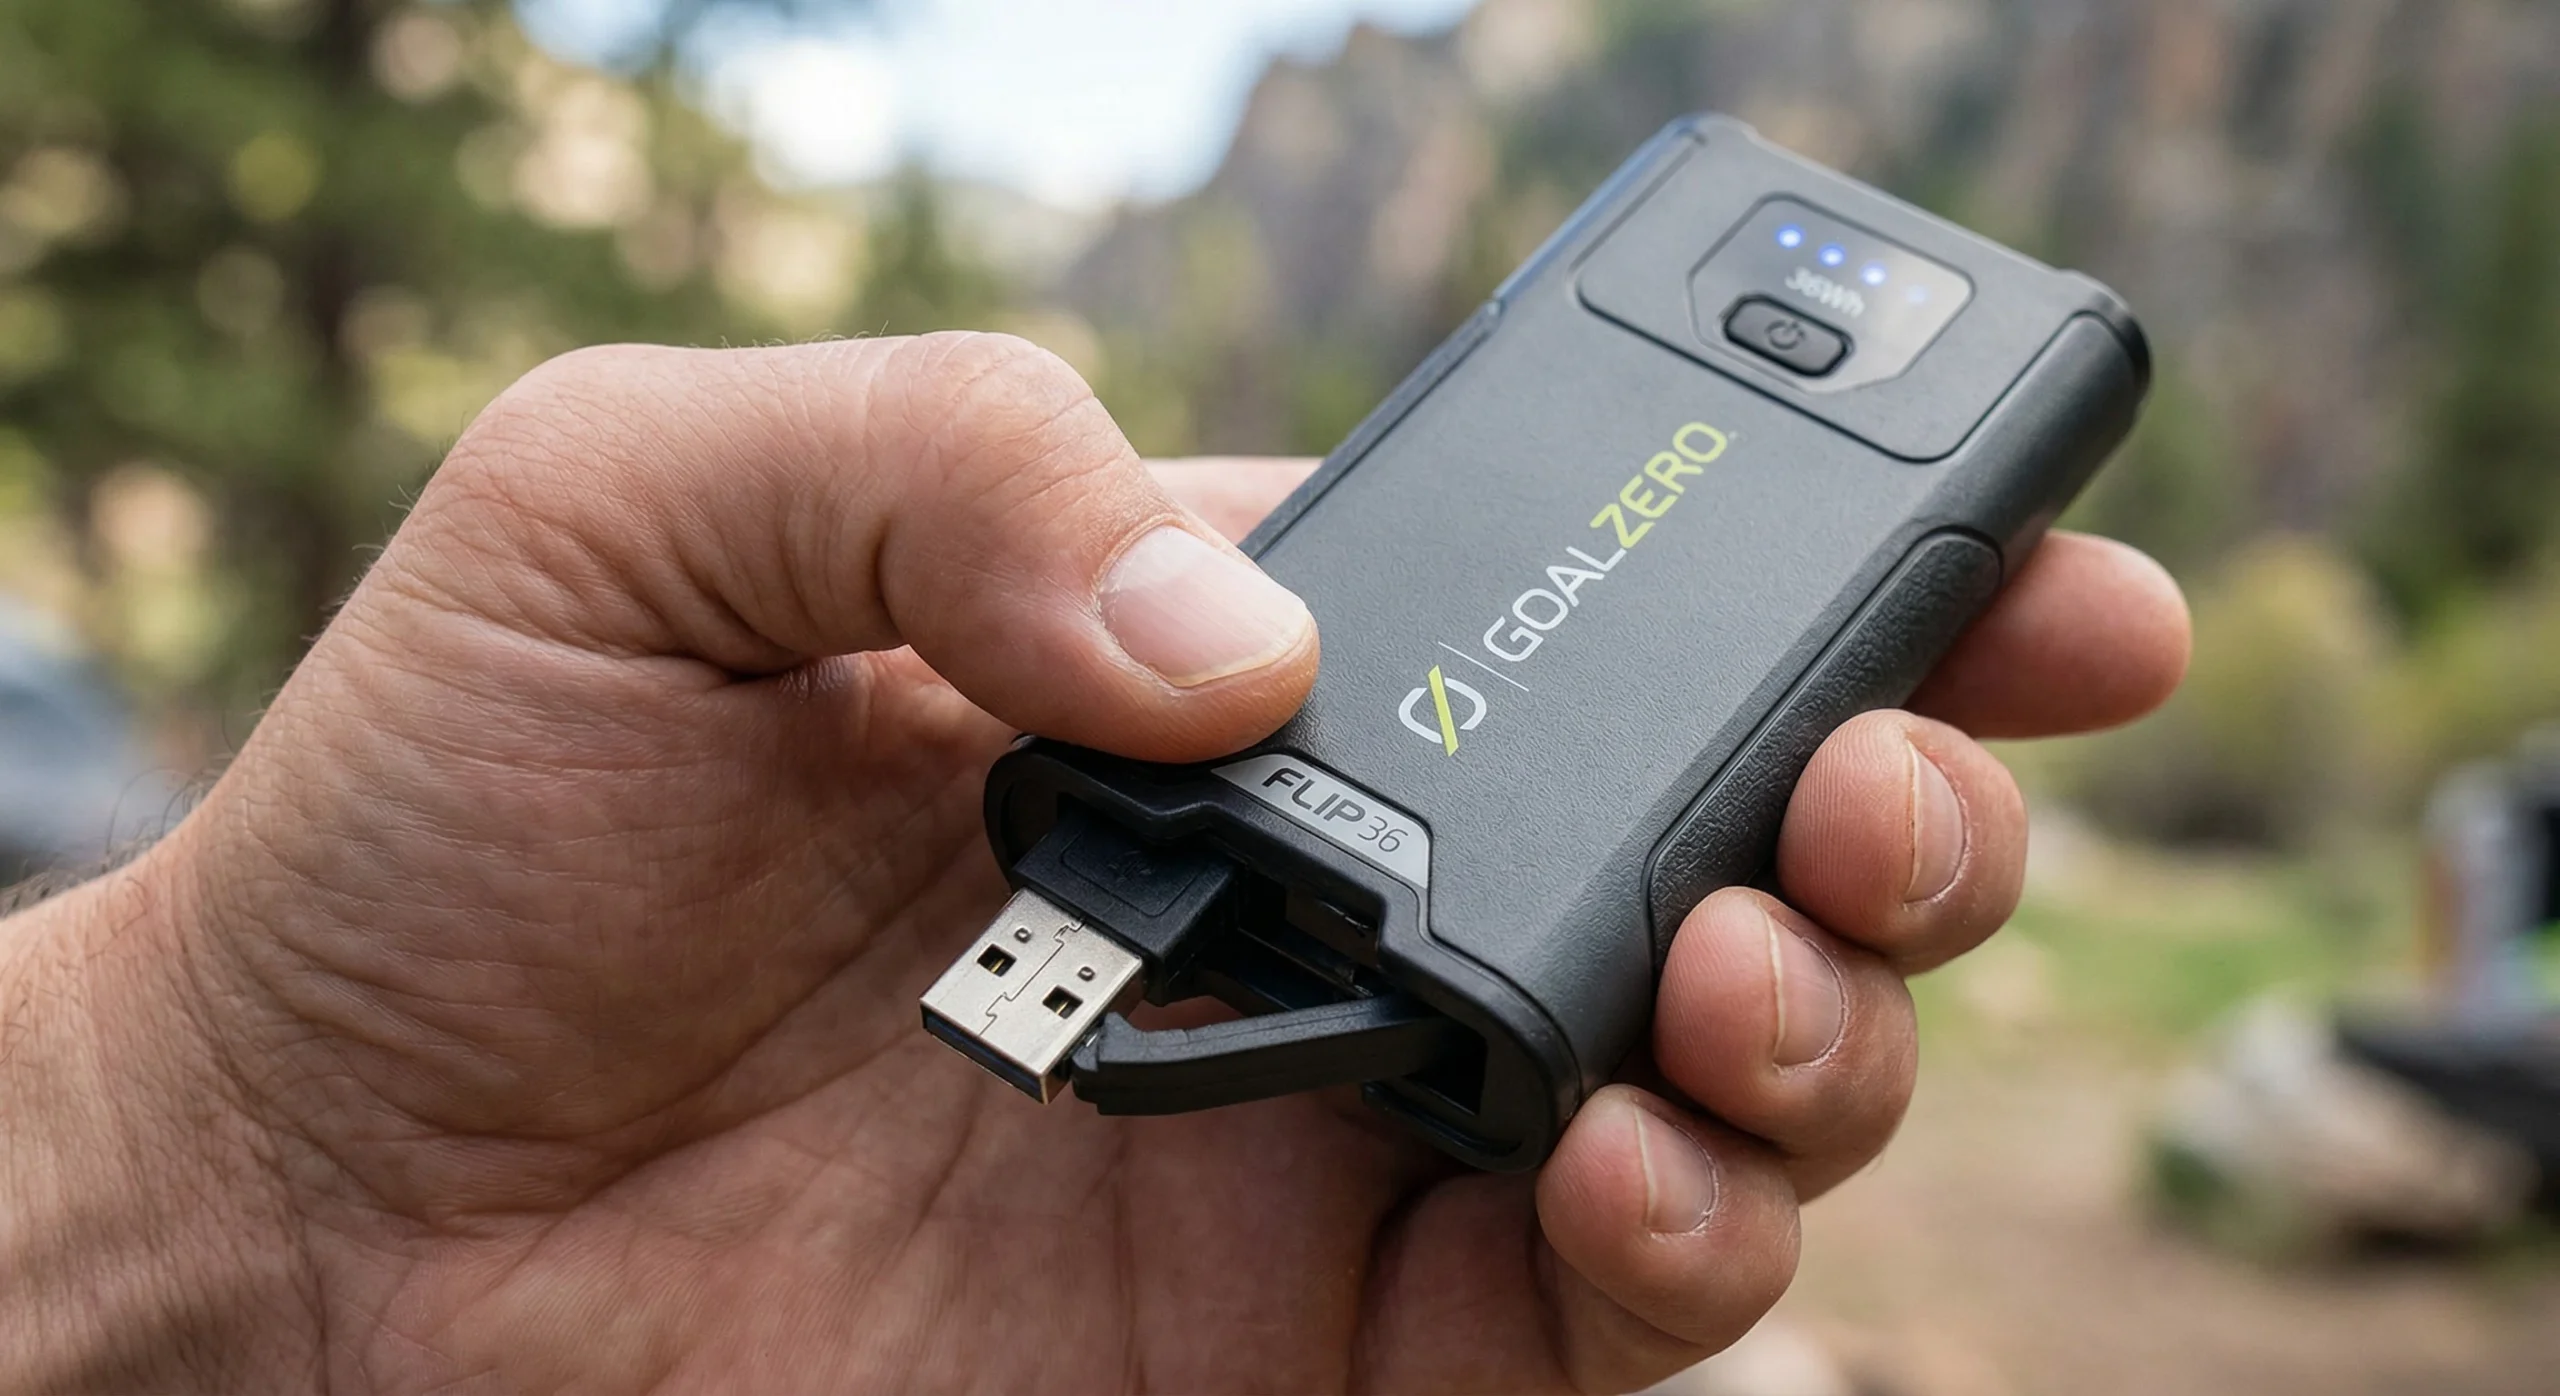
8. Goal Zero Flip 36 (Best Minimalist Redundancy)
The Flip 36 is the ideal entry point for portable power for bikepacking for those on a Budget Setup. It provides three full smartphone charges in a rugged, small package.
- Key Features: 10,050mAh capacity, flip-out USB charging tip, LED indicator.
- Pros: No cables required to charge the bank; fits perfectly in a Top Tube Bag.
- Cons: Slower charging speeds than USB-C standard banks.
- Check Price on Amazon: Goal Zero Flip 36
9. Nitecore NW5000 (Magnetic Wireless Standard)
The NW5000 introduces MagSafe compatibility to the portable power for bikepacking market, reducing the mechanical stress on charging ports in dusty environments.
- Key Features: 5,000mAh capacity, 15W wireless charging, carbon fiber construction.
- Pros: Wireless charging prevents “port rot” in Difficult Terrain; incredibly thin.
- Cons: Wireless charging is less efficient (higher heat loss).
- Check Price on Amazon: Nitecore NW5000 Magnetic Bank

10. Voltaic Systems Arc 20W (Ruggedized Solar)
Voltaic specializes in “IoT” style durability. Their panels are designed to withstand the impacts and Wet Weather inherent in professional bikepacking.
- Key Features: ETFE-coated monocrystalline cells, UV-resistant fabric, 20W output.
- Pros: Cells are waterproof and scratch-resistant; flexible enough to wrap over a handlebar roll.
- Cons: Lower efficiency than rigid panels.
- Check Details: Voltaic Systems Tech
11. Anker 511 Charger (Nano 3) & Cable Kit
While not a battery, the wall charger is the final essential of portable power for bikepacking. It is required for rapid “town stop” charging to minimize downtime.
- Key Features: GaN technology, 30W output, ultra-compact size.
- Pros: Smallest charger in the world for this wattage; allows for a 50% charge in 30 minutes.
- Cons: Useless without access to a wall outlet.
- Check Price on Amazon: Anker 511 Nano 3
Technical Comparison: Solar vs. Power Banks
To assist with your Ultimate Gear List (Internal Link) preparations, the following table summarizes the mechanical performance of both systems.
| Metric | Power Banks | Solar Chargers |
|---|---|---|
| Energy Reliability | 100% (Until empty) | Variable (Sun dependent) |
| Weight | Moderate (150g – 600g) | High (250g – 800g) |
| Climate Performance | Poor in Extreme Cold | Excellent in Arid/High Alt |
| Mechanical Risk | Internal cell failure | Panel abrasion/Cable shear |
| Setup Time | Instant | Requires alignment |
[Image Prompt 13: A technical infographic summarizing the table data with battery and sun icons.]
Logistical Energy Management and Safety Protocols
Implementing an energy budget is a foundational skill for maintaining safety in remote areas. A rider must calculate their daily consumption to avoid a “blackout” scenario.
- The 50% Rule: Never let your primary navigation battery drop below 50% without a redundant power source ready.
- Port Hygiene: Use rubber plugs to protect USB ports from dust and mud, as emphasized in our Gravel Bike Maintenance.
- Thermal Protection: In Cold Weather, keep power banks in an internal pocket or inside your Bikepacking Sleeping System to maintain cell temperature. Cold temperatures drastically reduce effective capacity.
- Redundant Cables: Carry at least two charging cables. High-frequency vibrations frequently cause cable fatigue and internal wiring breaks.
Conclusion: The Foundation of Modern Self-Sufficiency
Mastering the selection of portable power for bikepacking is the final step in achieving professional-level independence. By utilizing high-capacity power banks for short missions (Section 1) and integrating high-efficiency solar arrays for transcontinental travel (Section 5), any rider can maintain their Bikepacking Mindset without the anxiety of energy failure. The success of an expedition is measured by the reliability of its systems across diverse Wilderness Terrains.
Remember that electricity is a tool for exploration. Keep your Technical Maintenance high and your power budget conservative. As you progress from local rail-trails to remote mountain loops, your understanding of energy density and solar insolation will become your greatest asset. High-quality portable power allow you to focus on the trail rather than the percentage remaining on your screen.
The wilderness is waiting, and with the right energy system, you are ready to conquer it. Treat the environment with respect, follow Leave No Trace Principles, and enjoy the unique liberation of off-road cycling. The transition from a day-rider to a self-contained expert is a path paved with preparation. Step out with a plan, respect your machine’s limits, and embrace the unparalleled freedom of the bicycle.
[Image Prompt 15: A final inspiring shot of the rider at a high-altitude summit, their GPS unit glowing brightly in the dark as they successfully navigate the final mile of their journey.] [Image Prompt 16: A macro shot of a USB-C cable being plugged into a power bank, with dust covers visible on the other ports.] [Image Prompt 17: A 3D render of a bicycle frame showing the “Energy Center” (Frame bag) where all batteries are stored.]
Discover more from Maive Verse
Subscribe to get the latest posts sent to your email.